Nova Poshta Service Shopify App
Calculate Nova Poshta shipping costs, and allow customers to select the nearest Nova Posta Warehouse
Installation and basic configuration
-
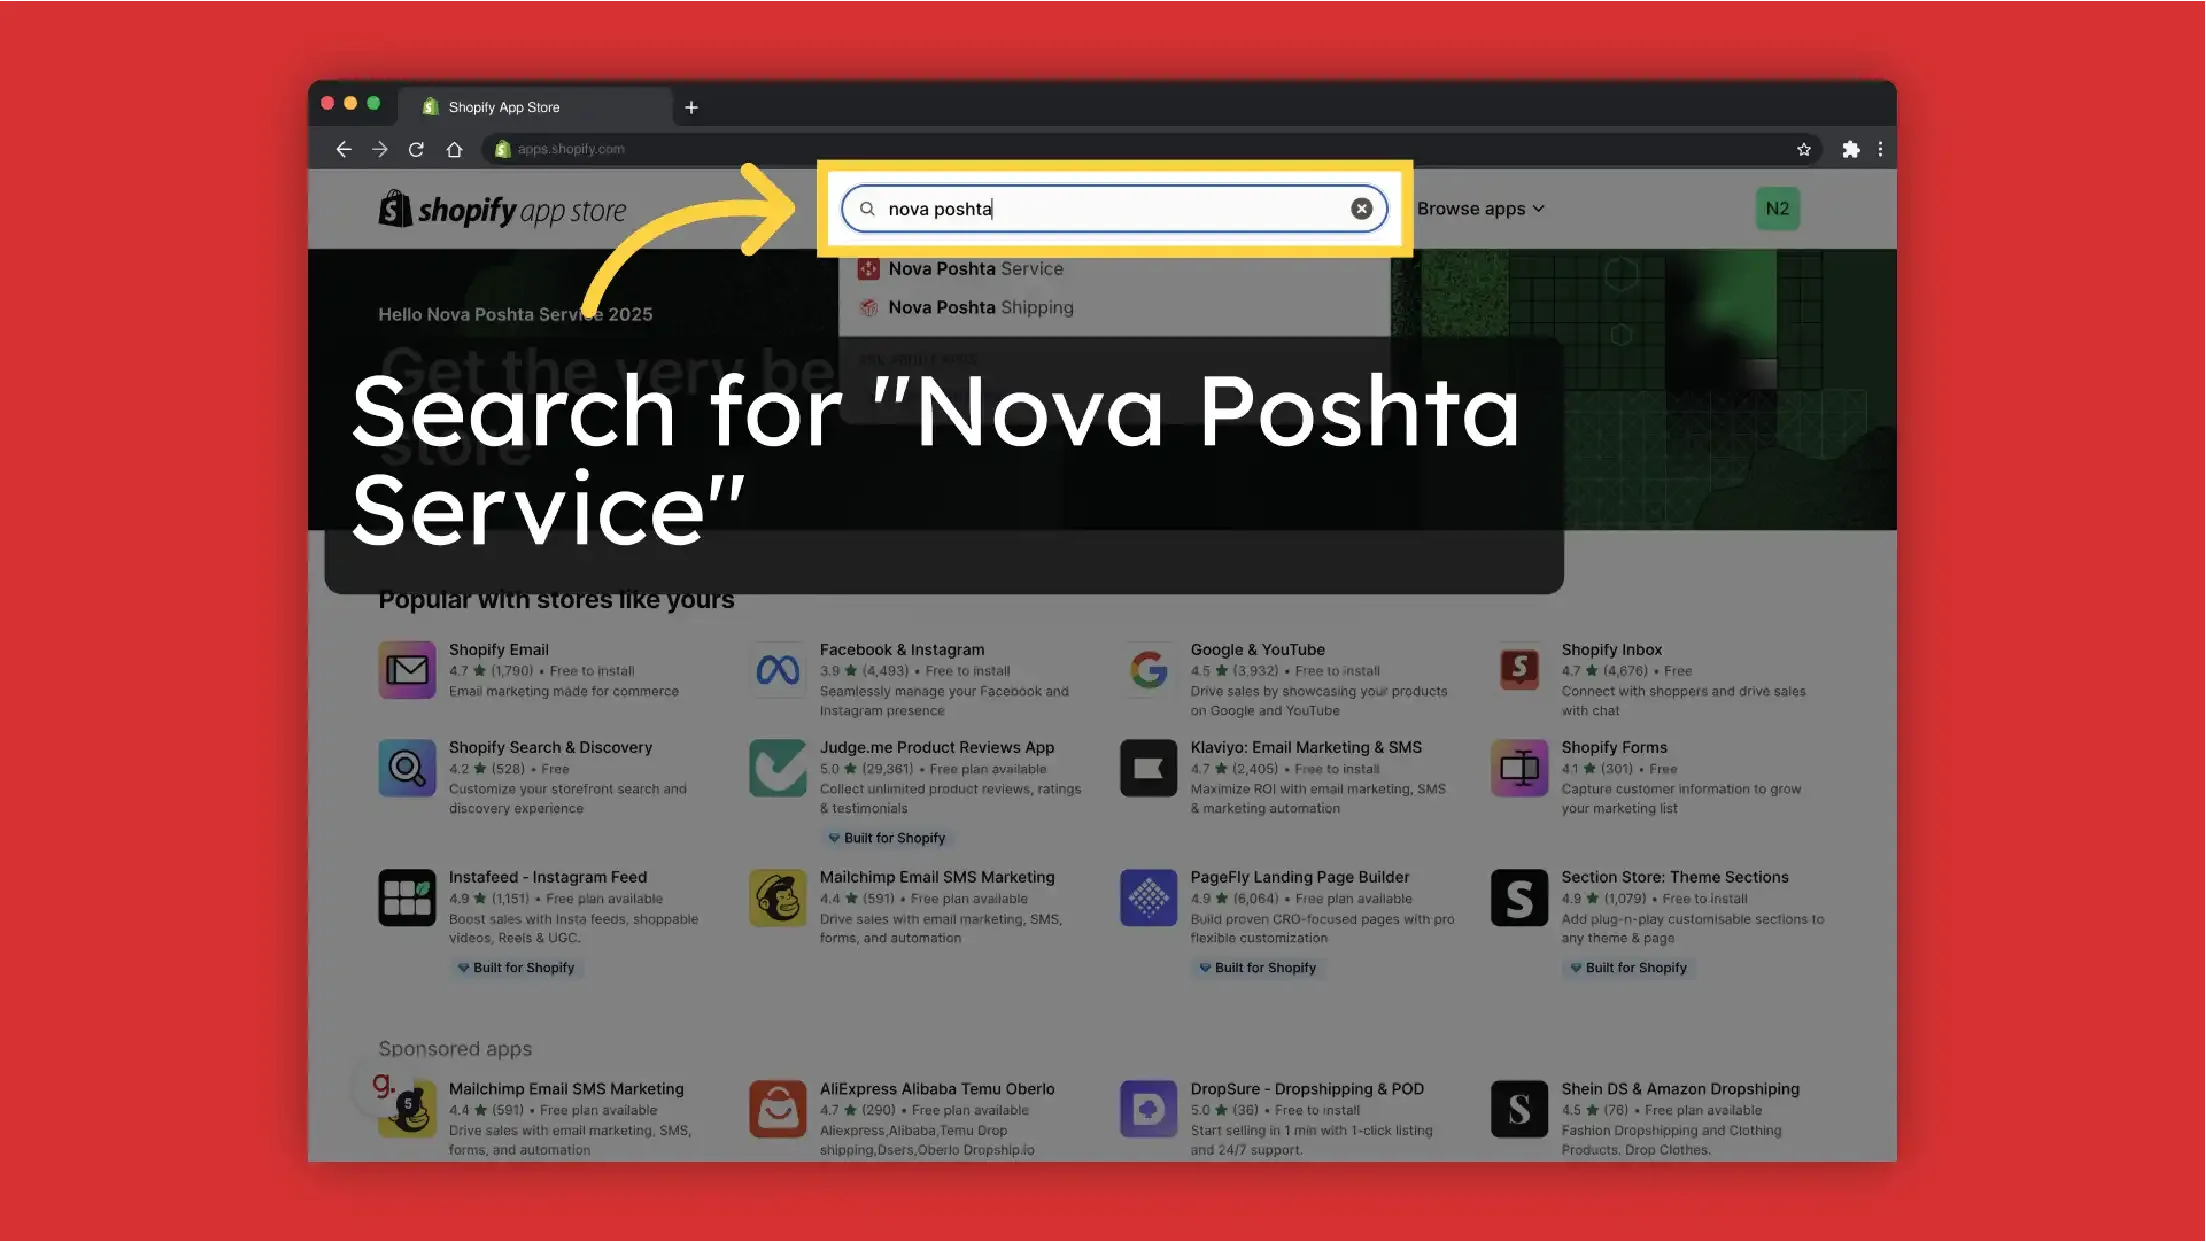
Log in to your Shopify store > Go to Shopify App Store > Search for Nova Poshta Service
-
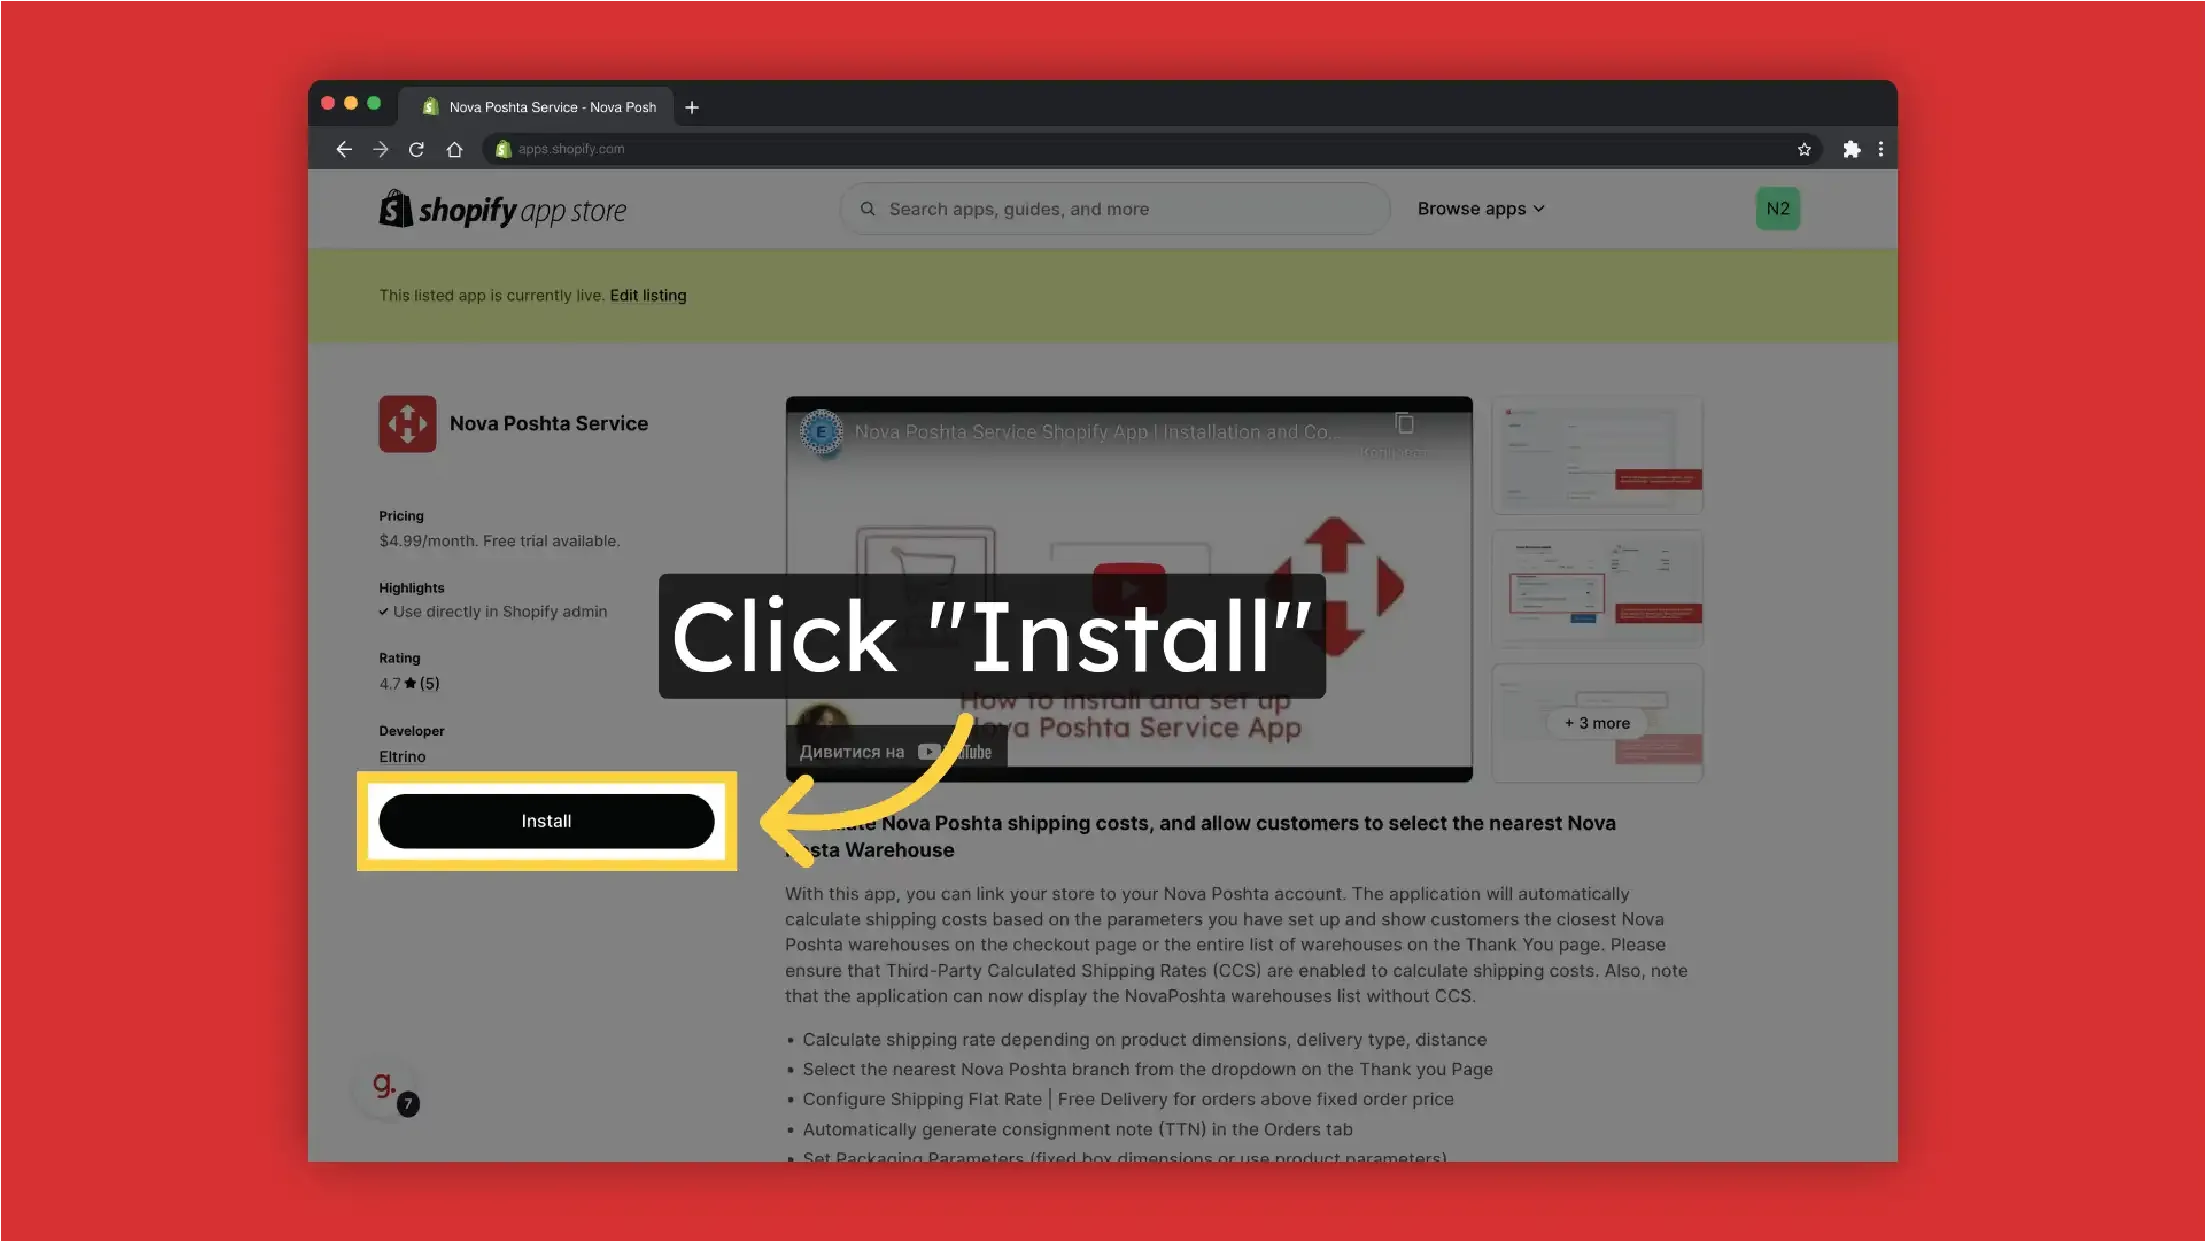
Click "Install"
-
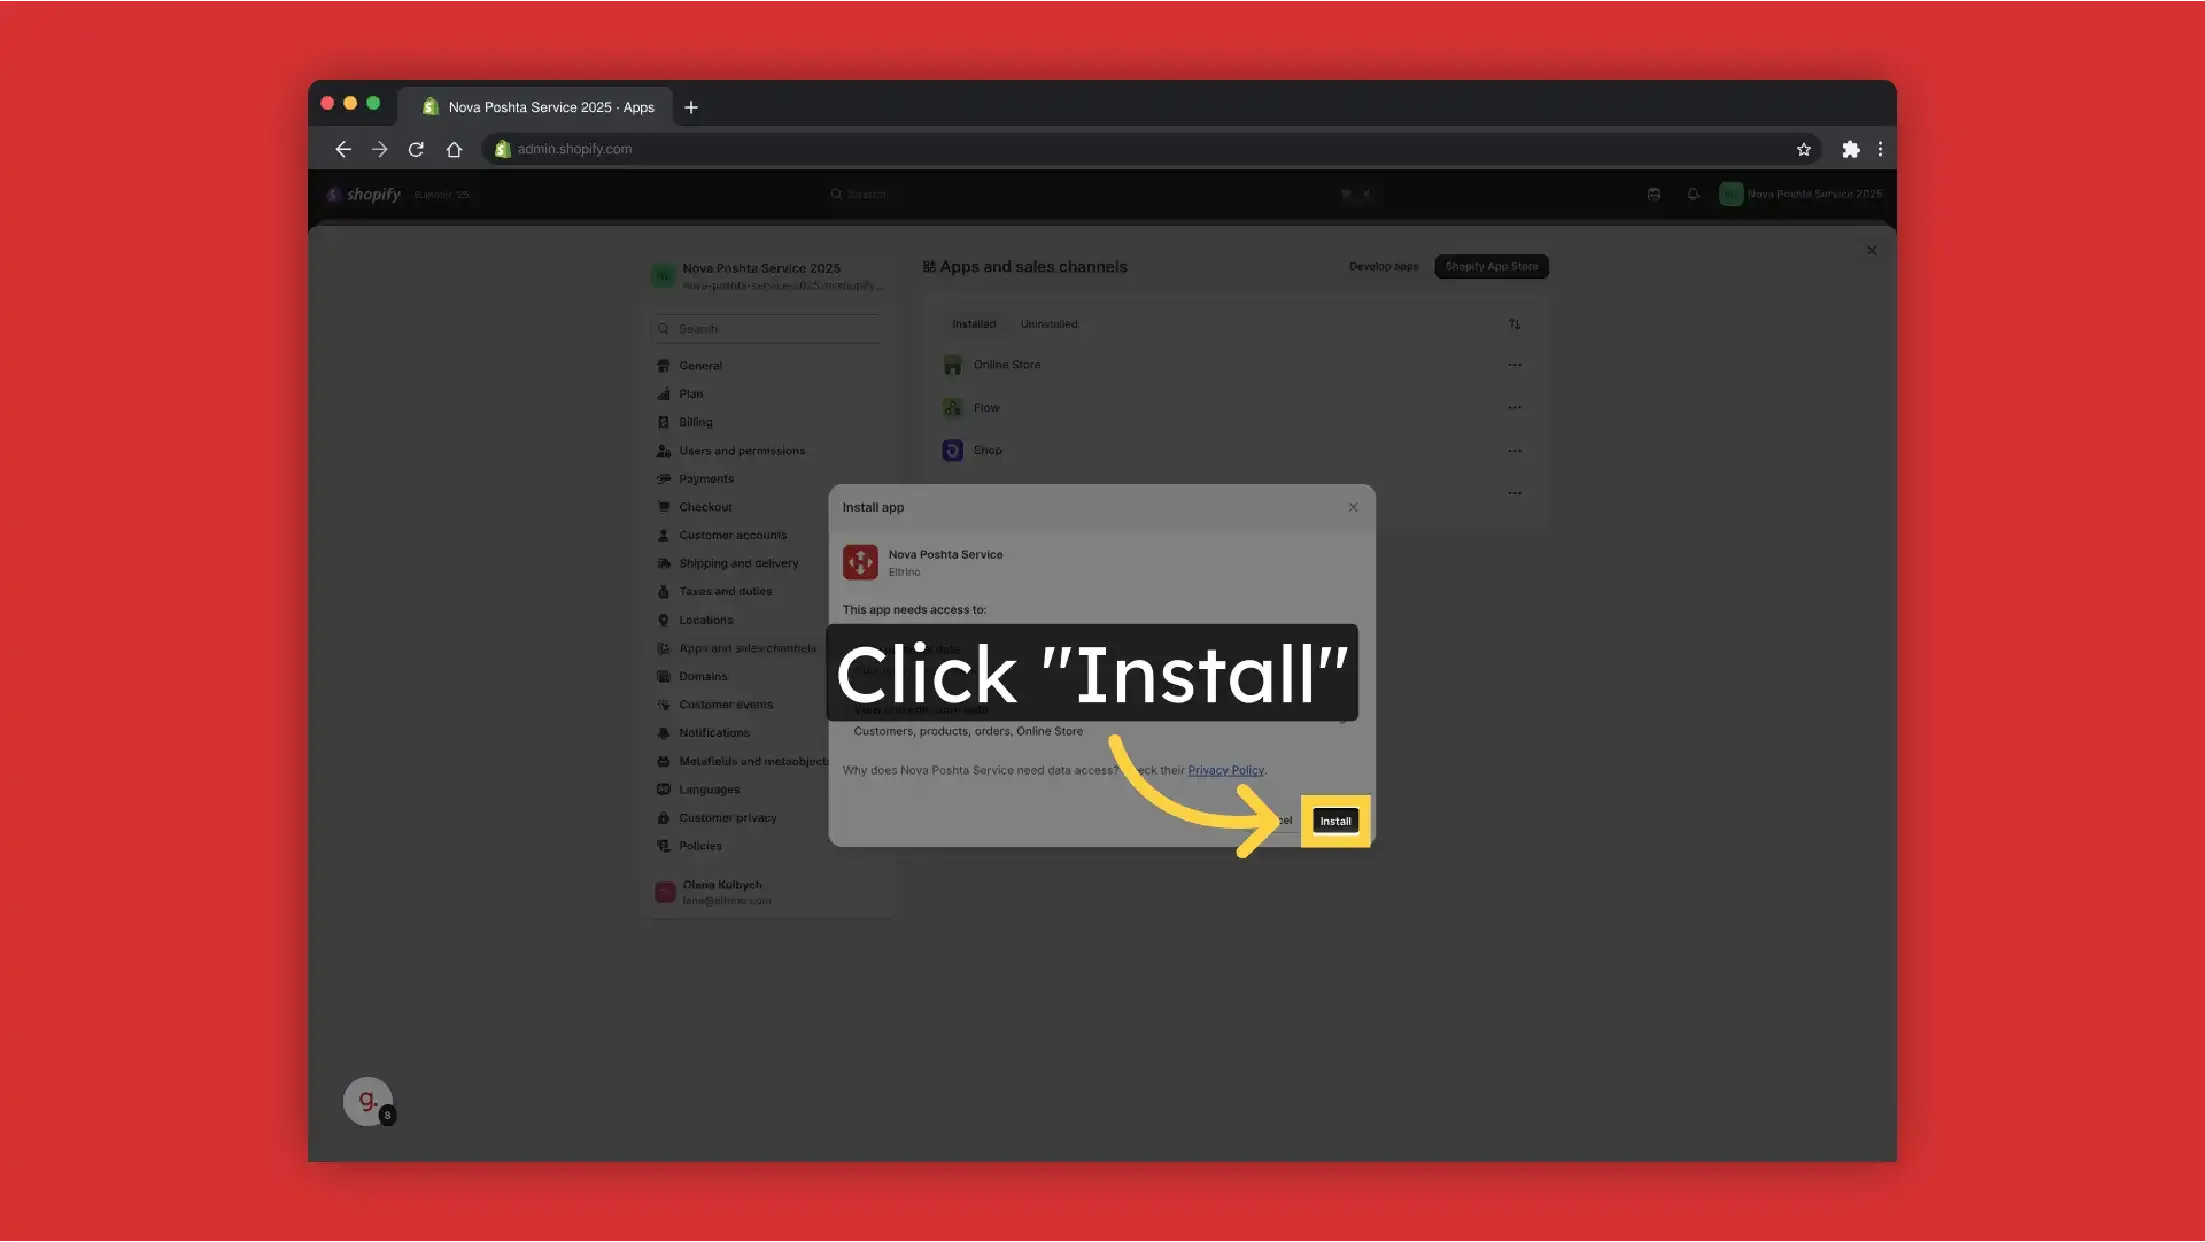
Click "Install"
-
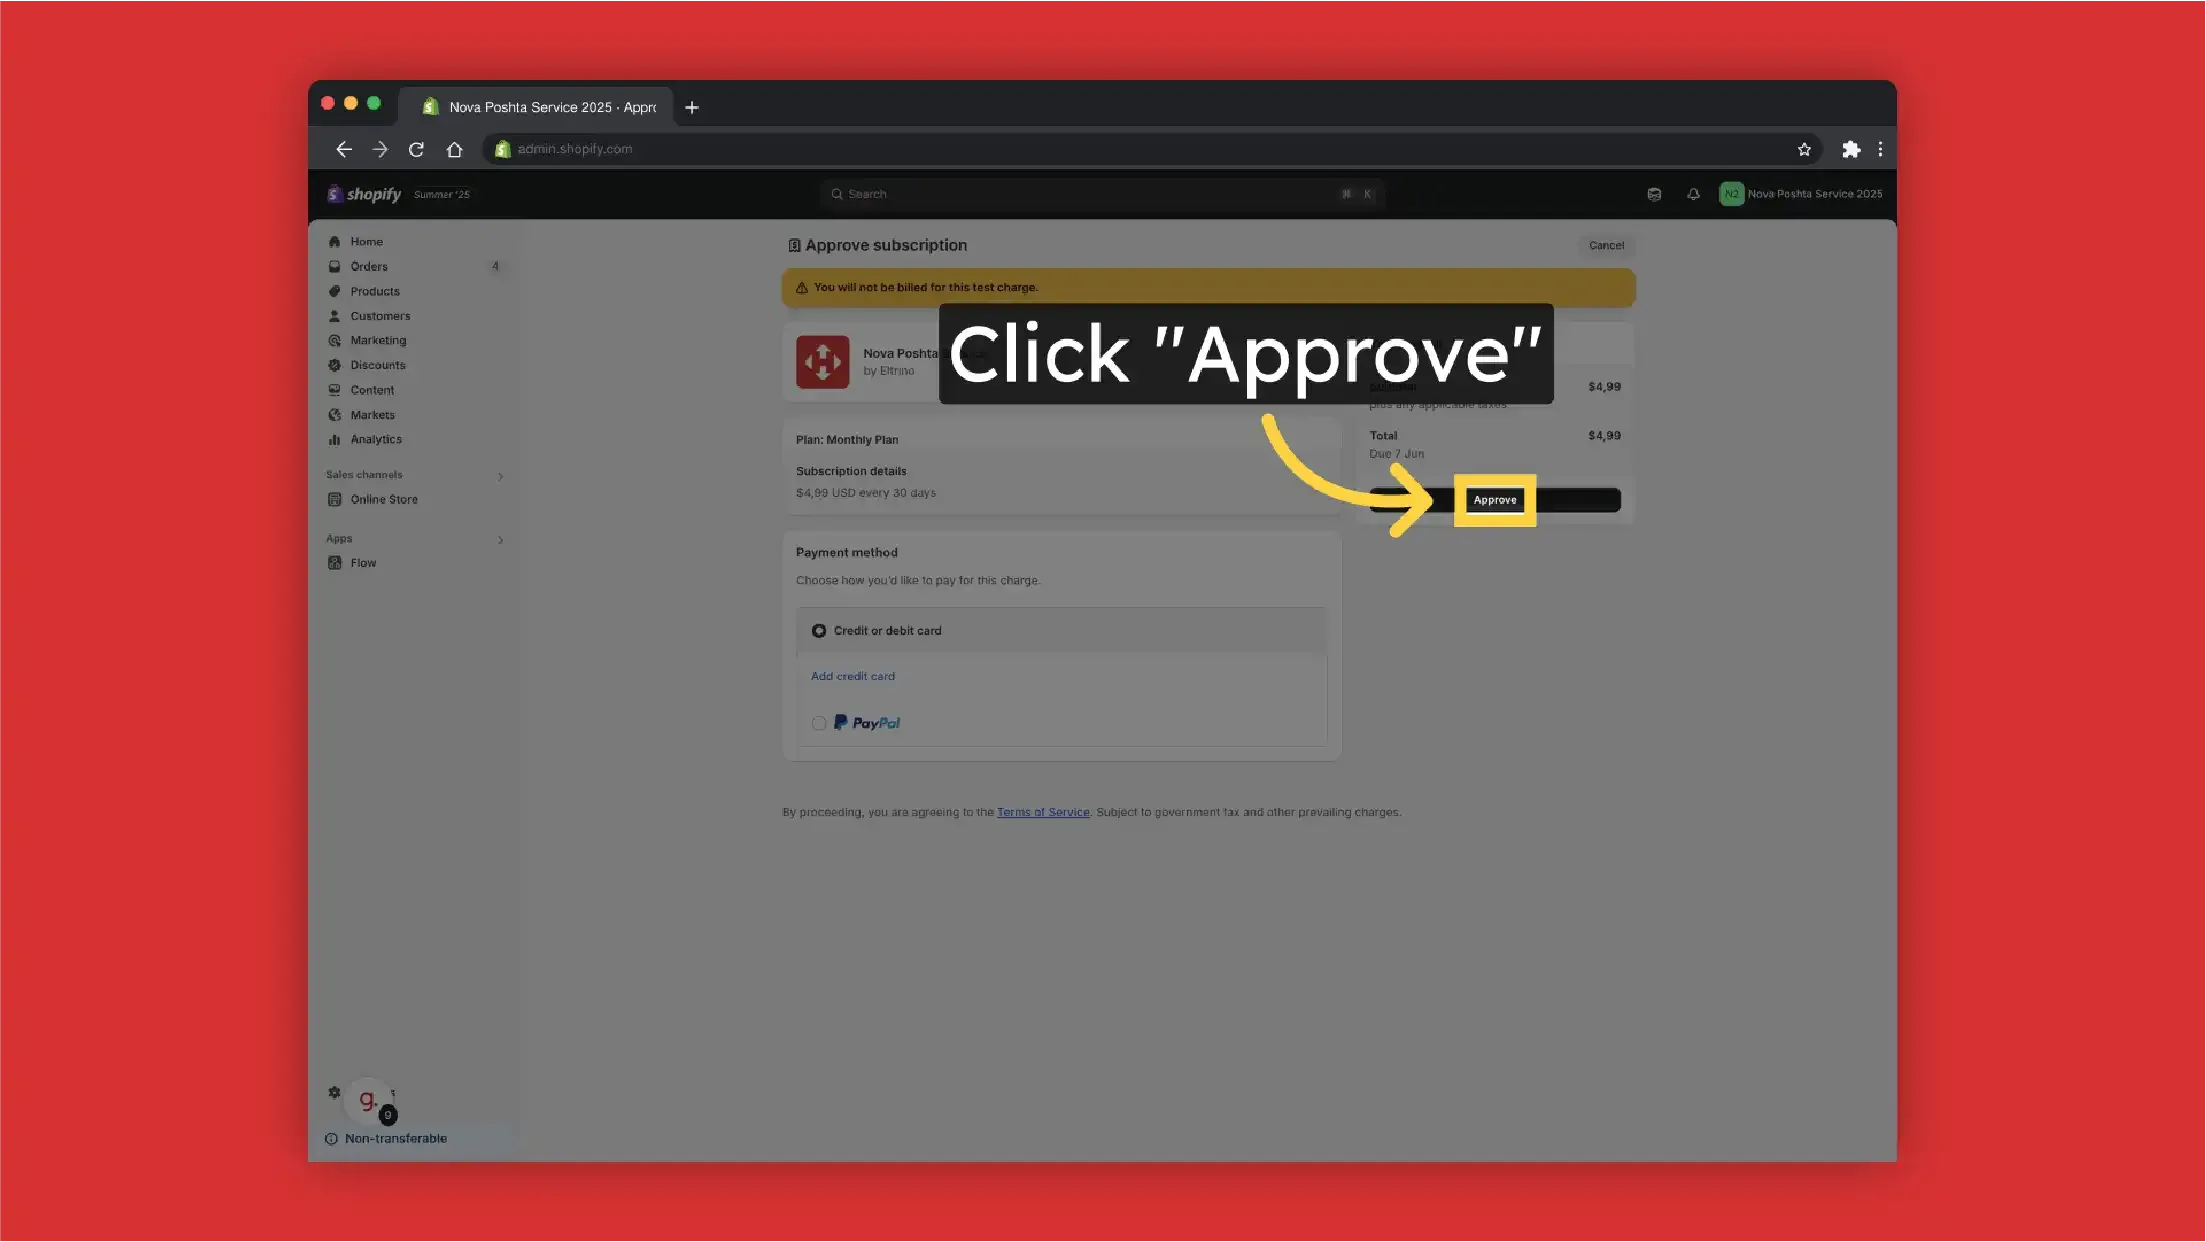
Click "Approve"
-
To proceed with the configuration, click "Configure Application".
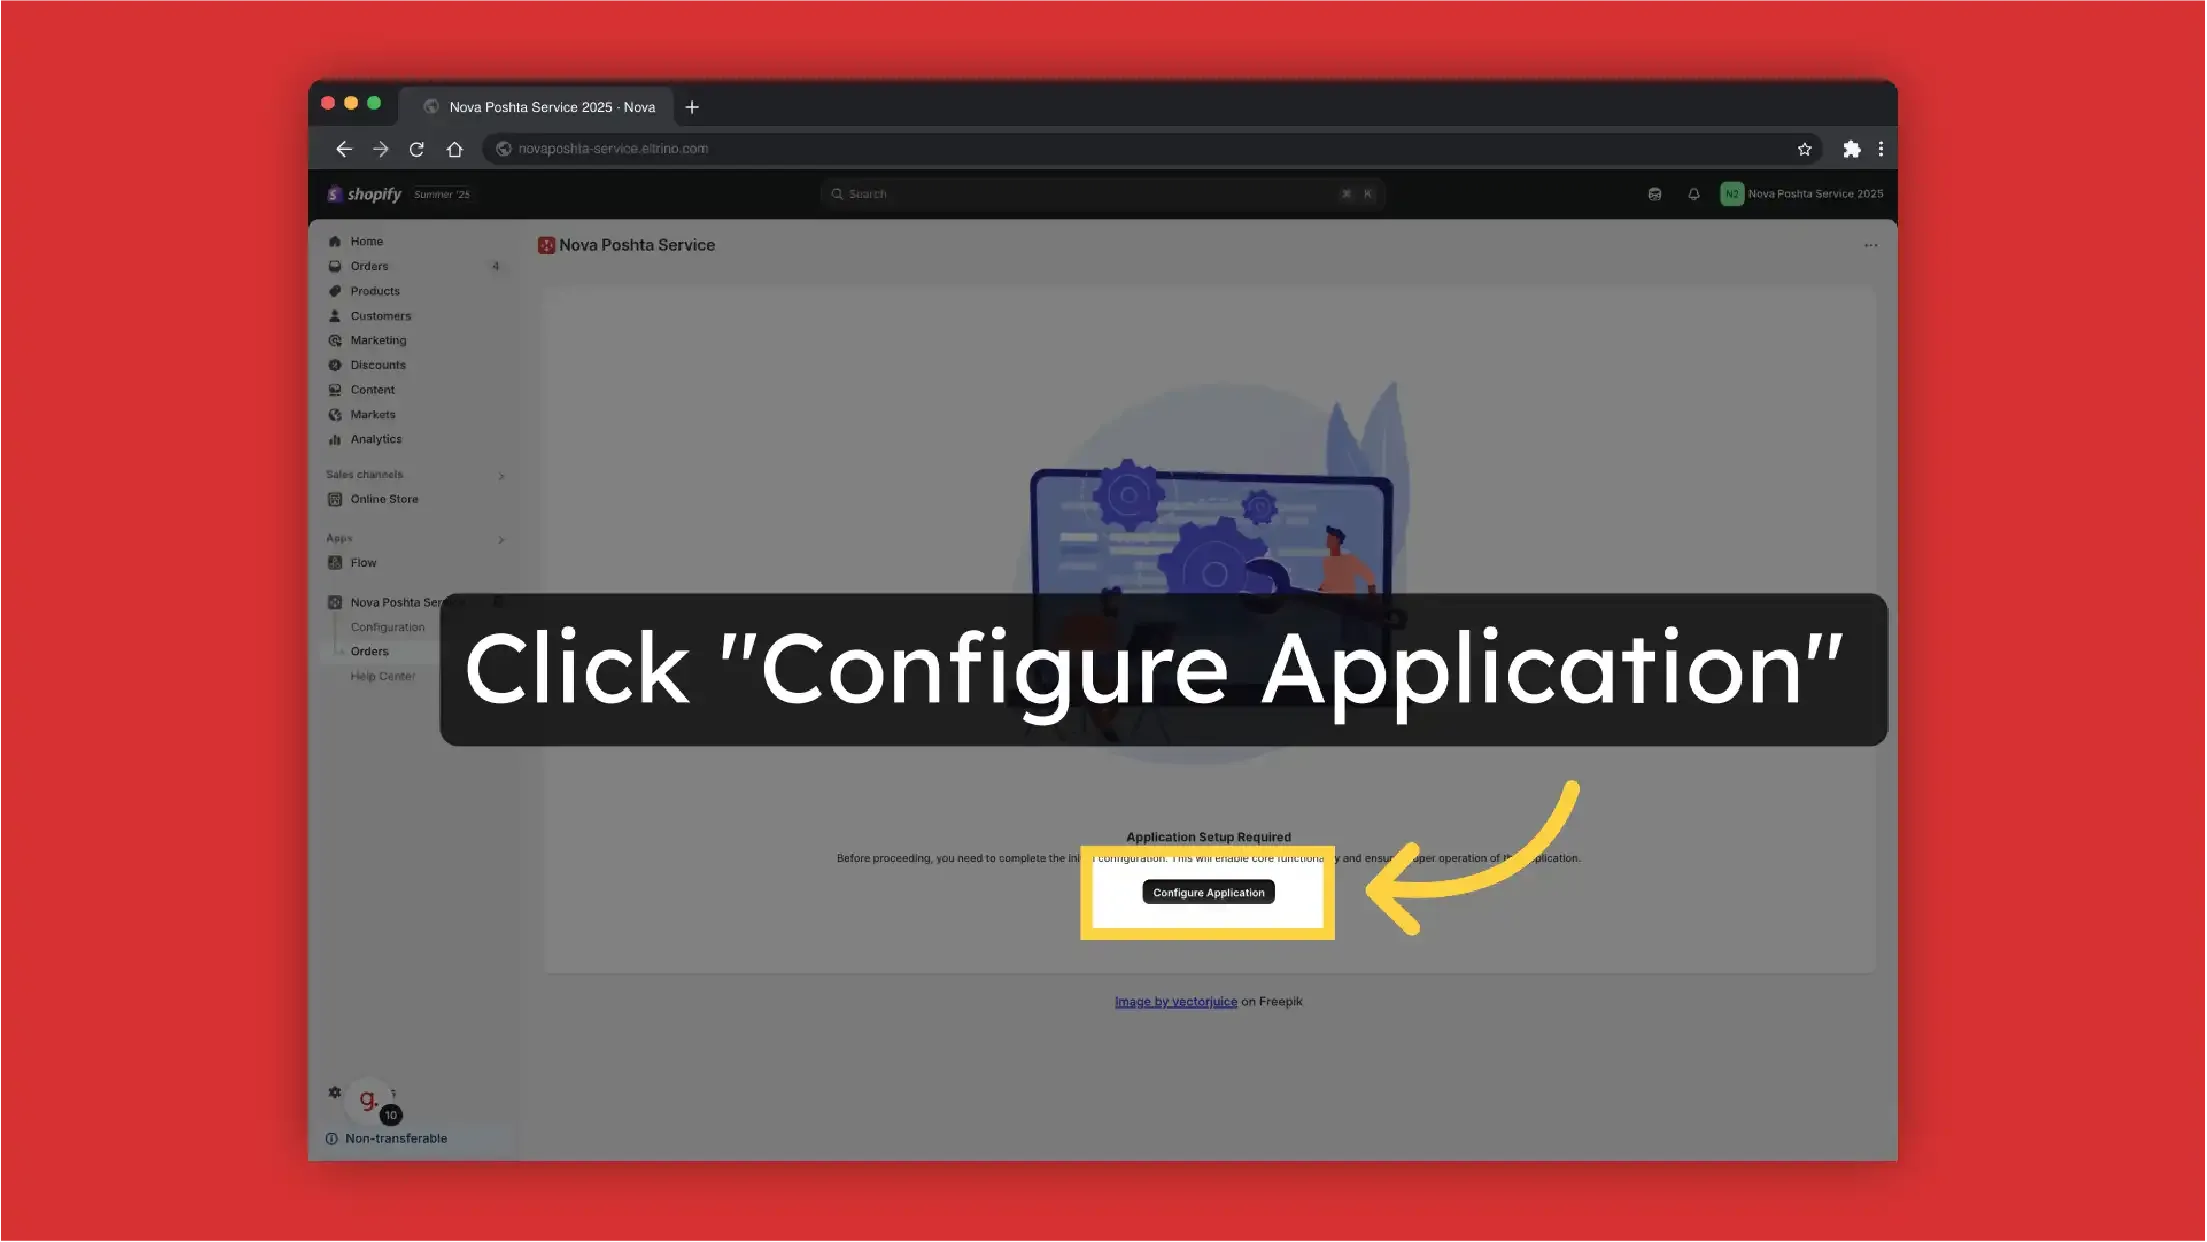
-
To connect the app to your Nova Poshta account you have to enter Nova Poshta API Key. Enter "Nova Poshta" API key.
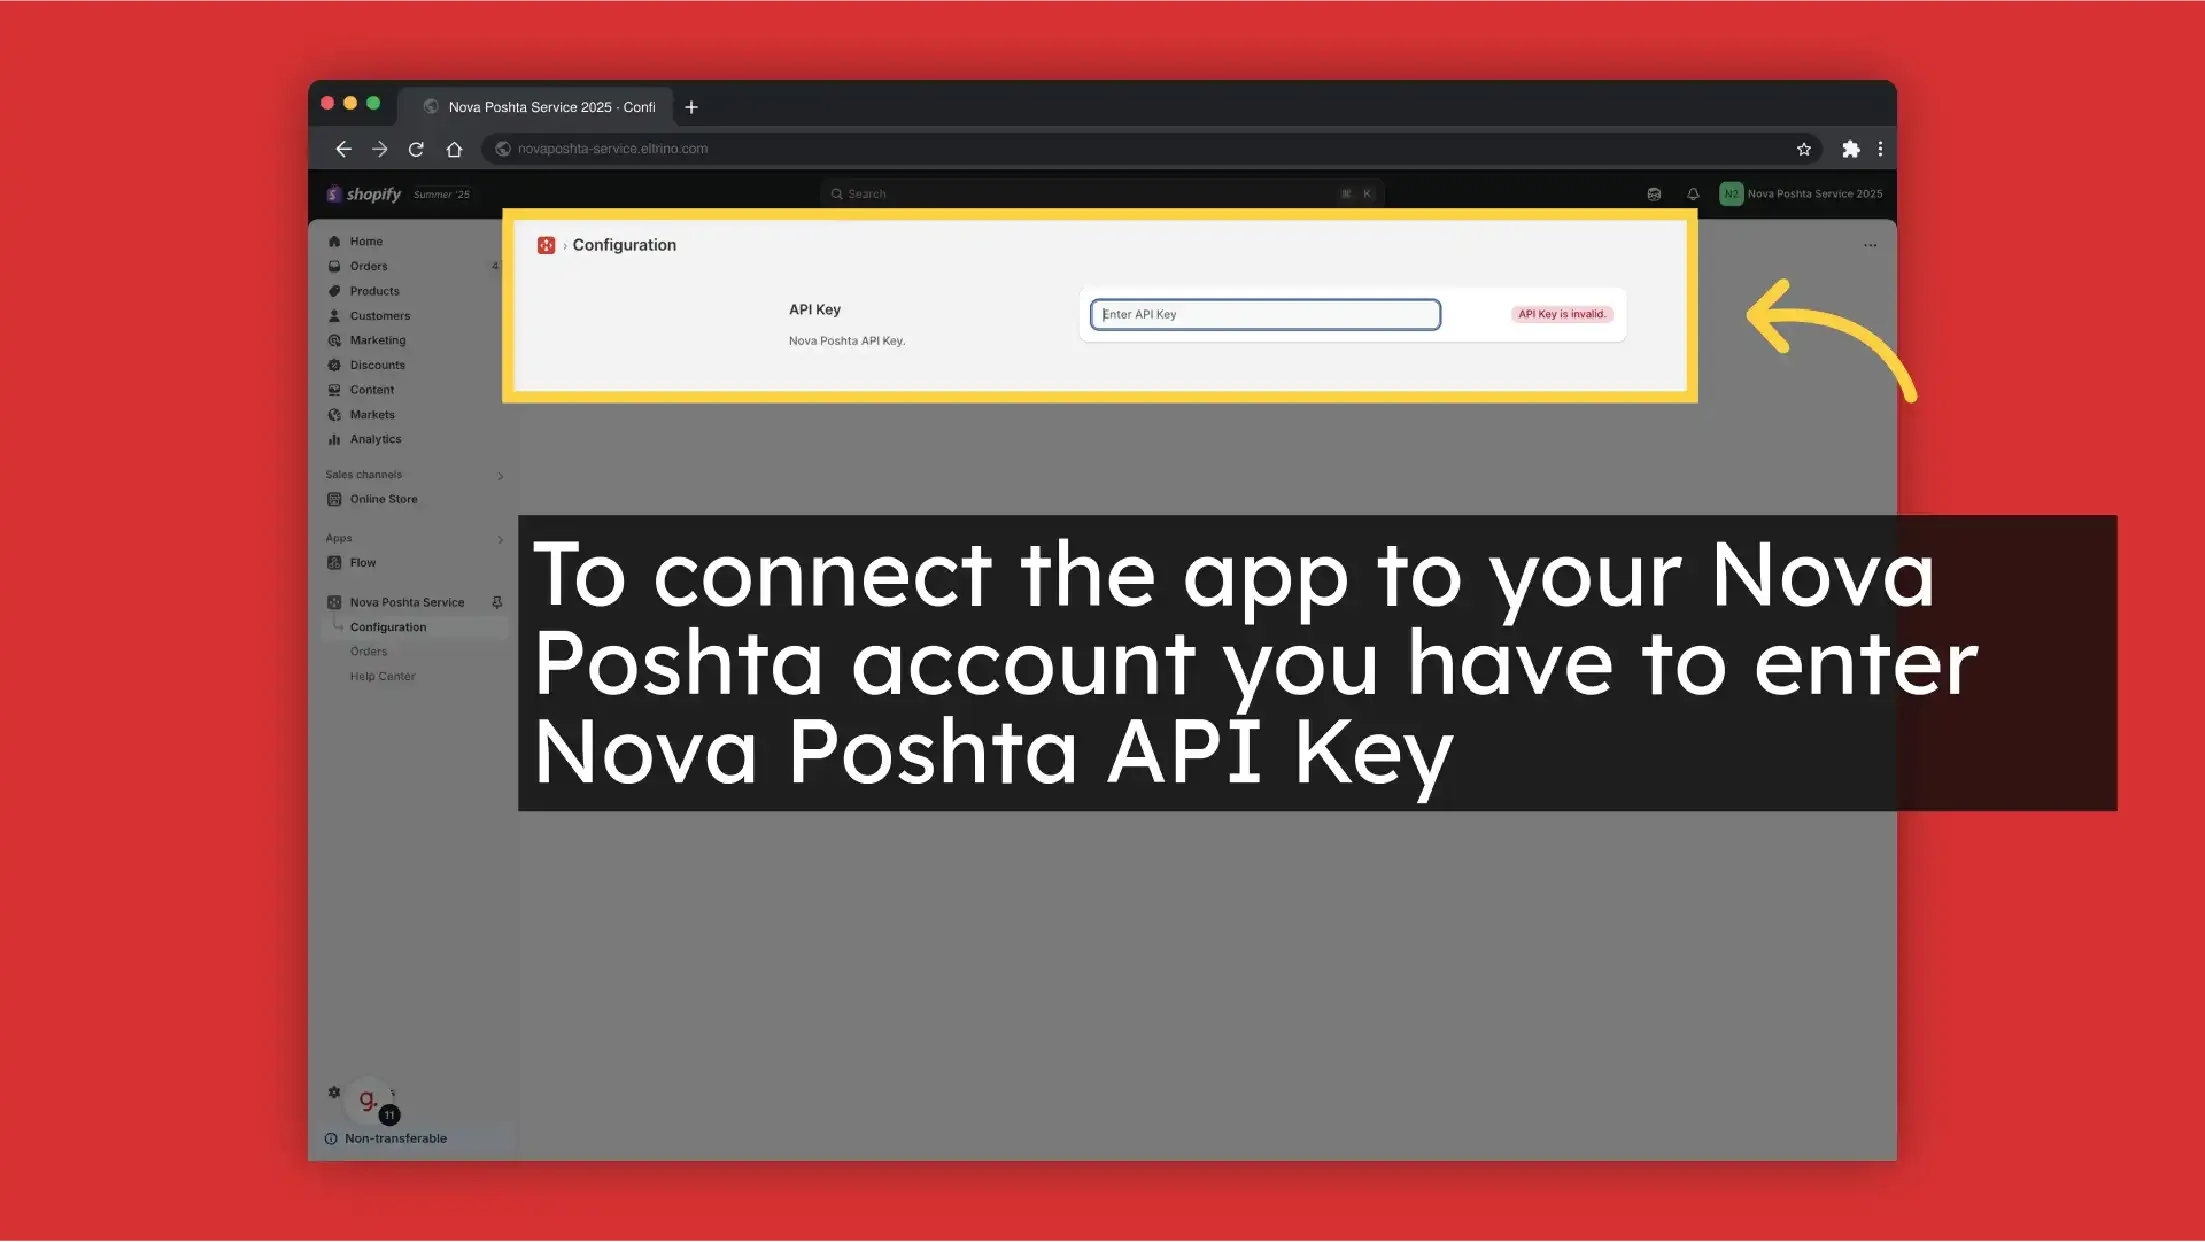
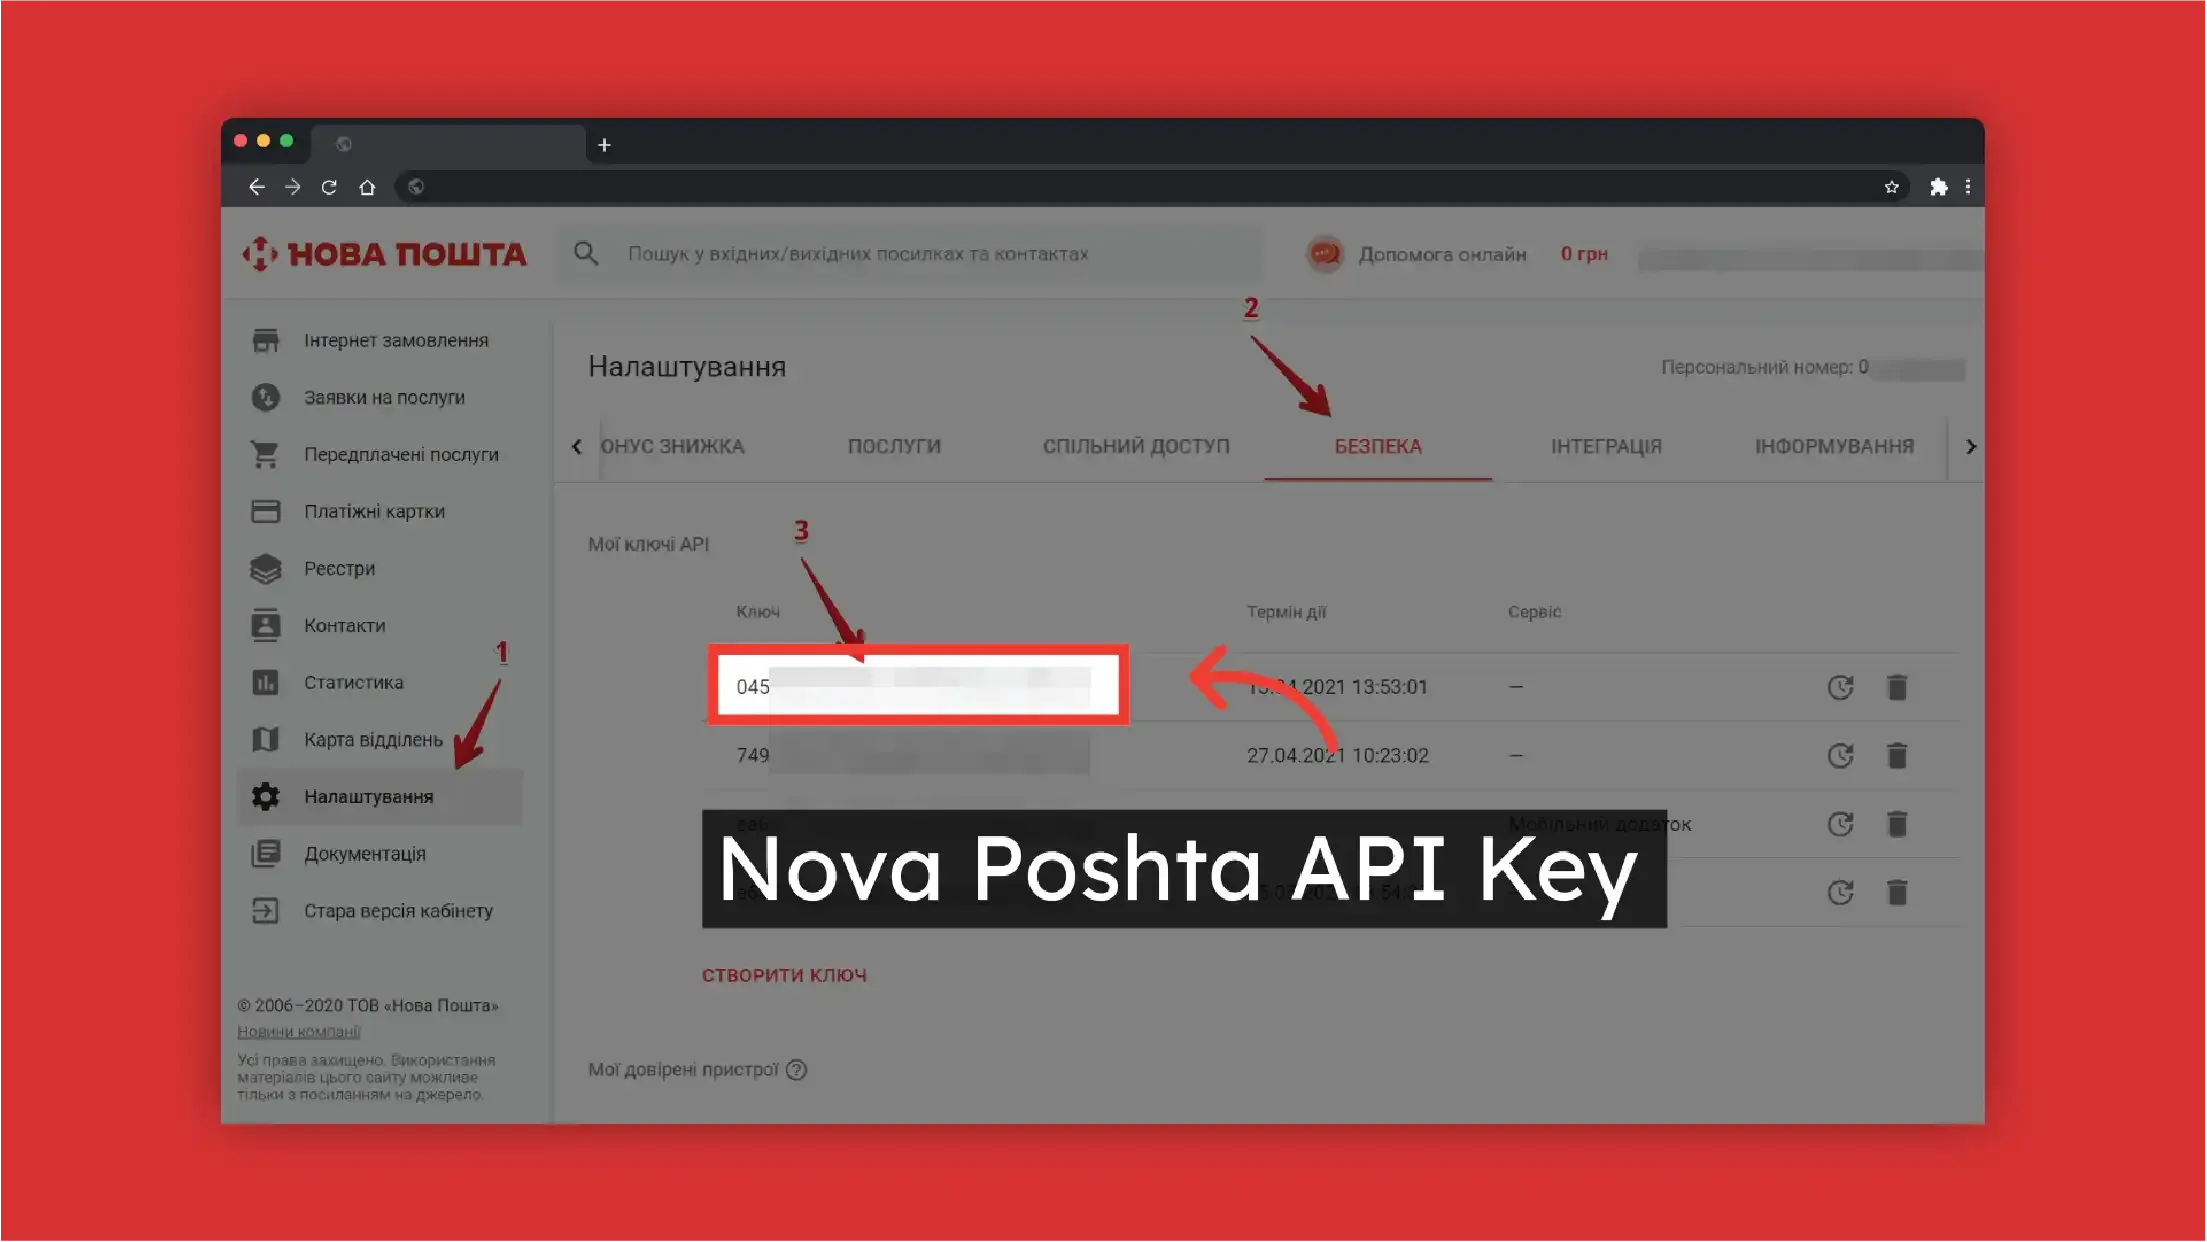
You can find Nova Poshta API key in your Nova Poshta account.
-
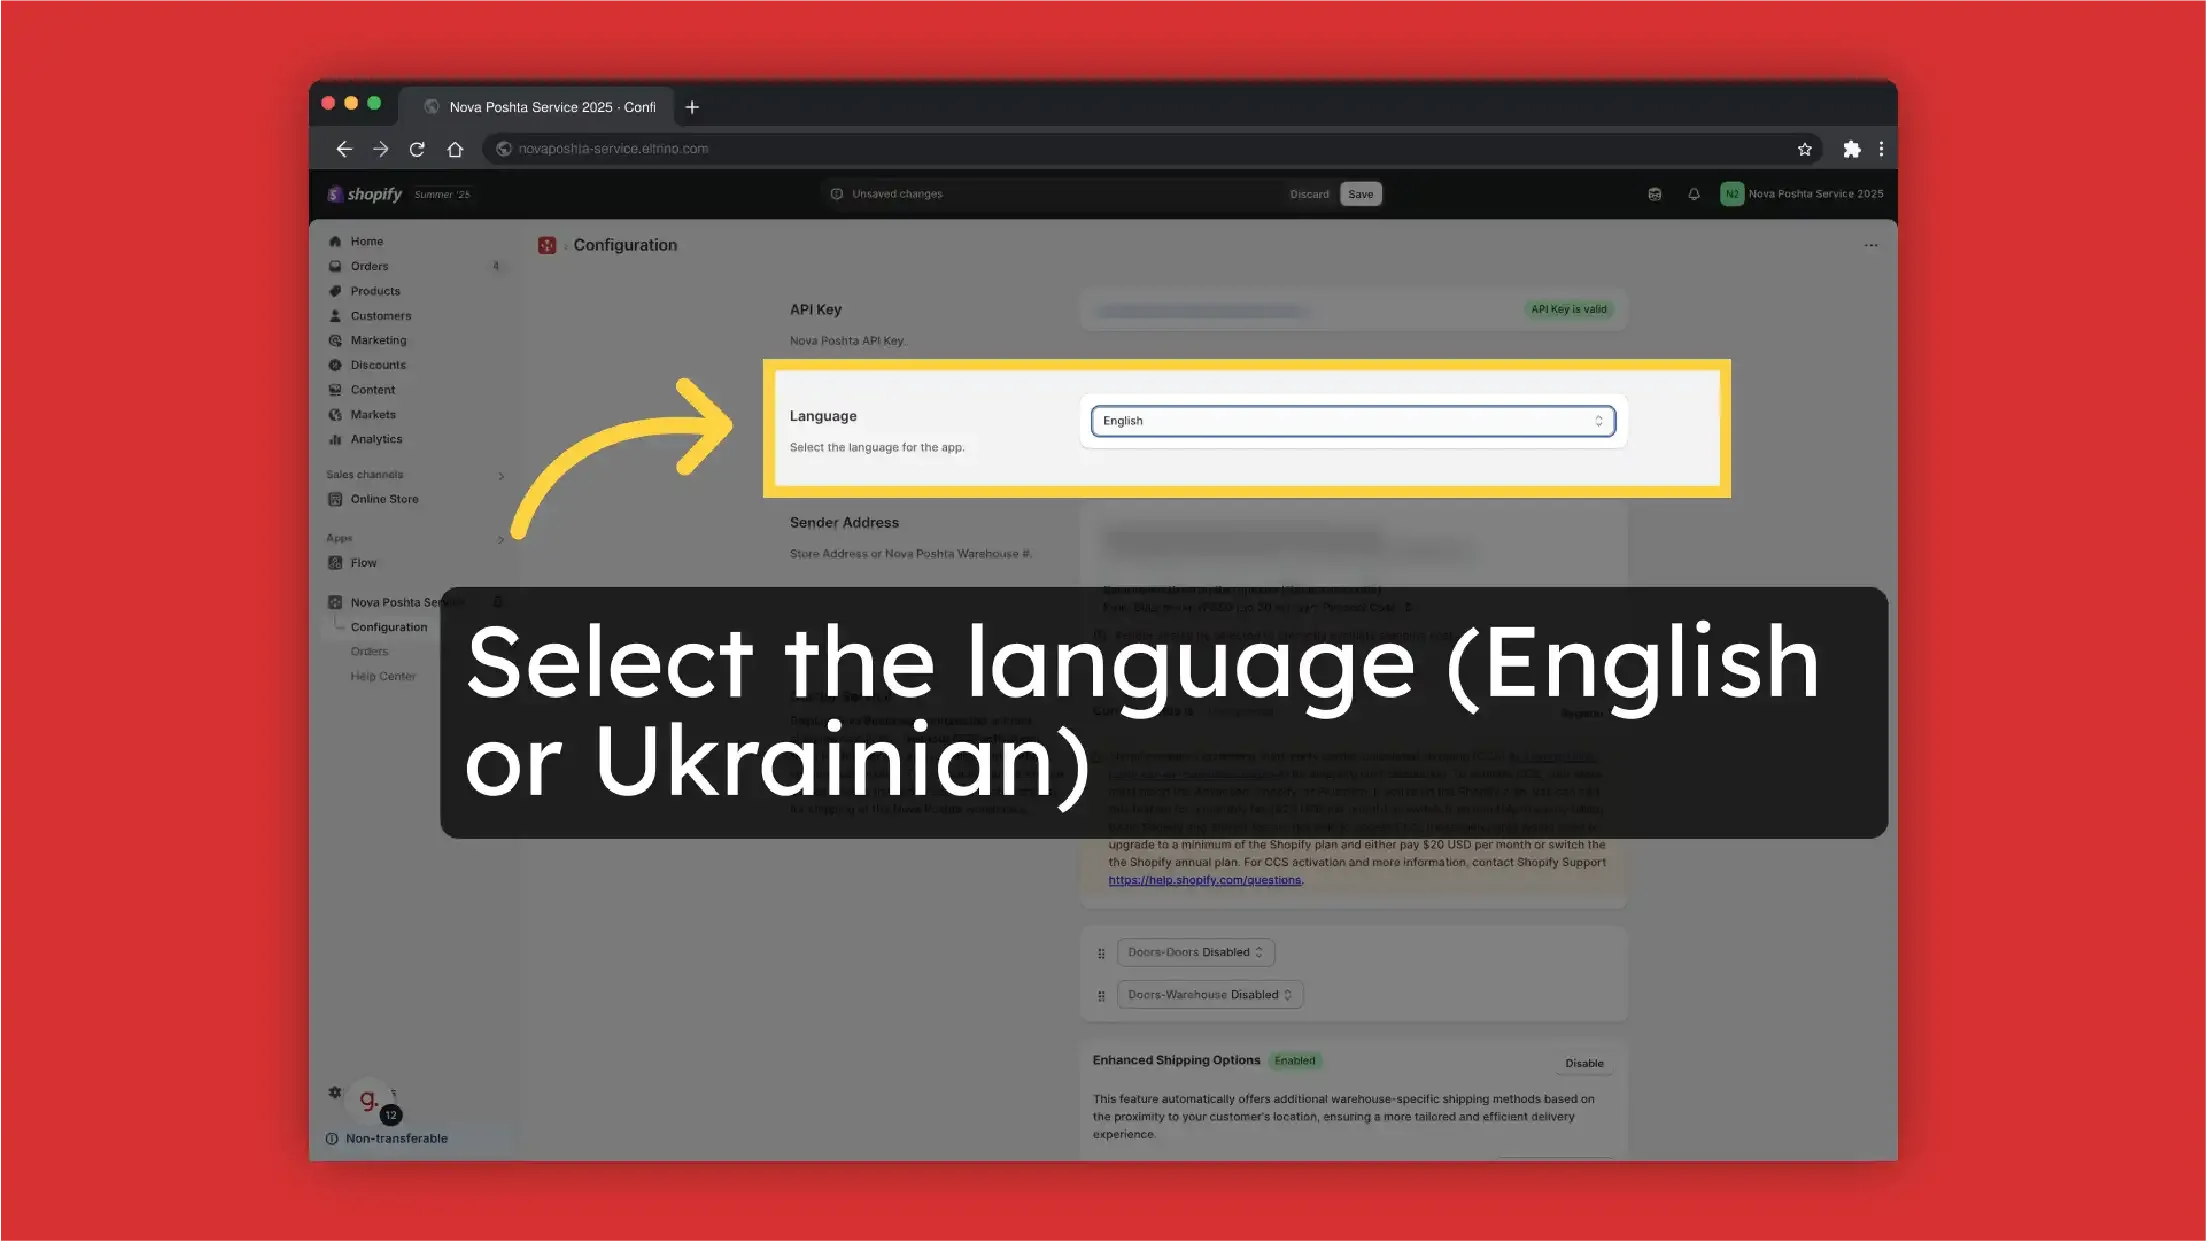
Select the language (English / Ukrainian)
-
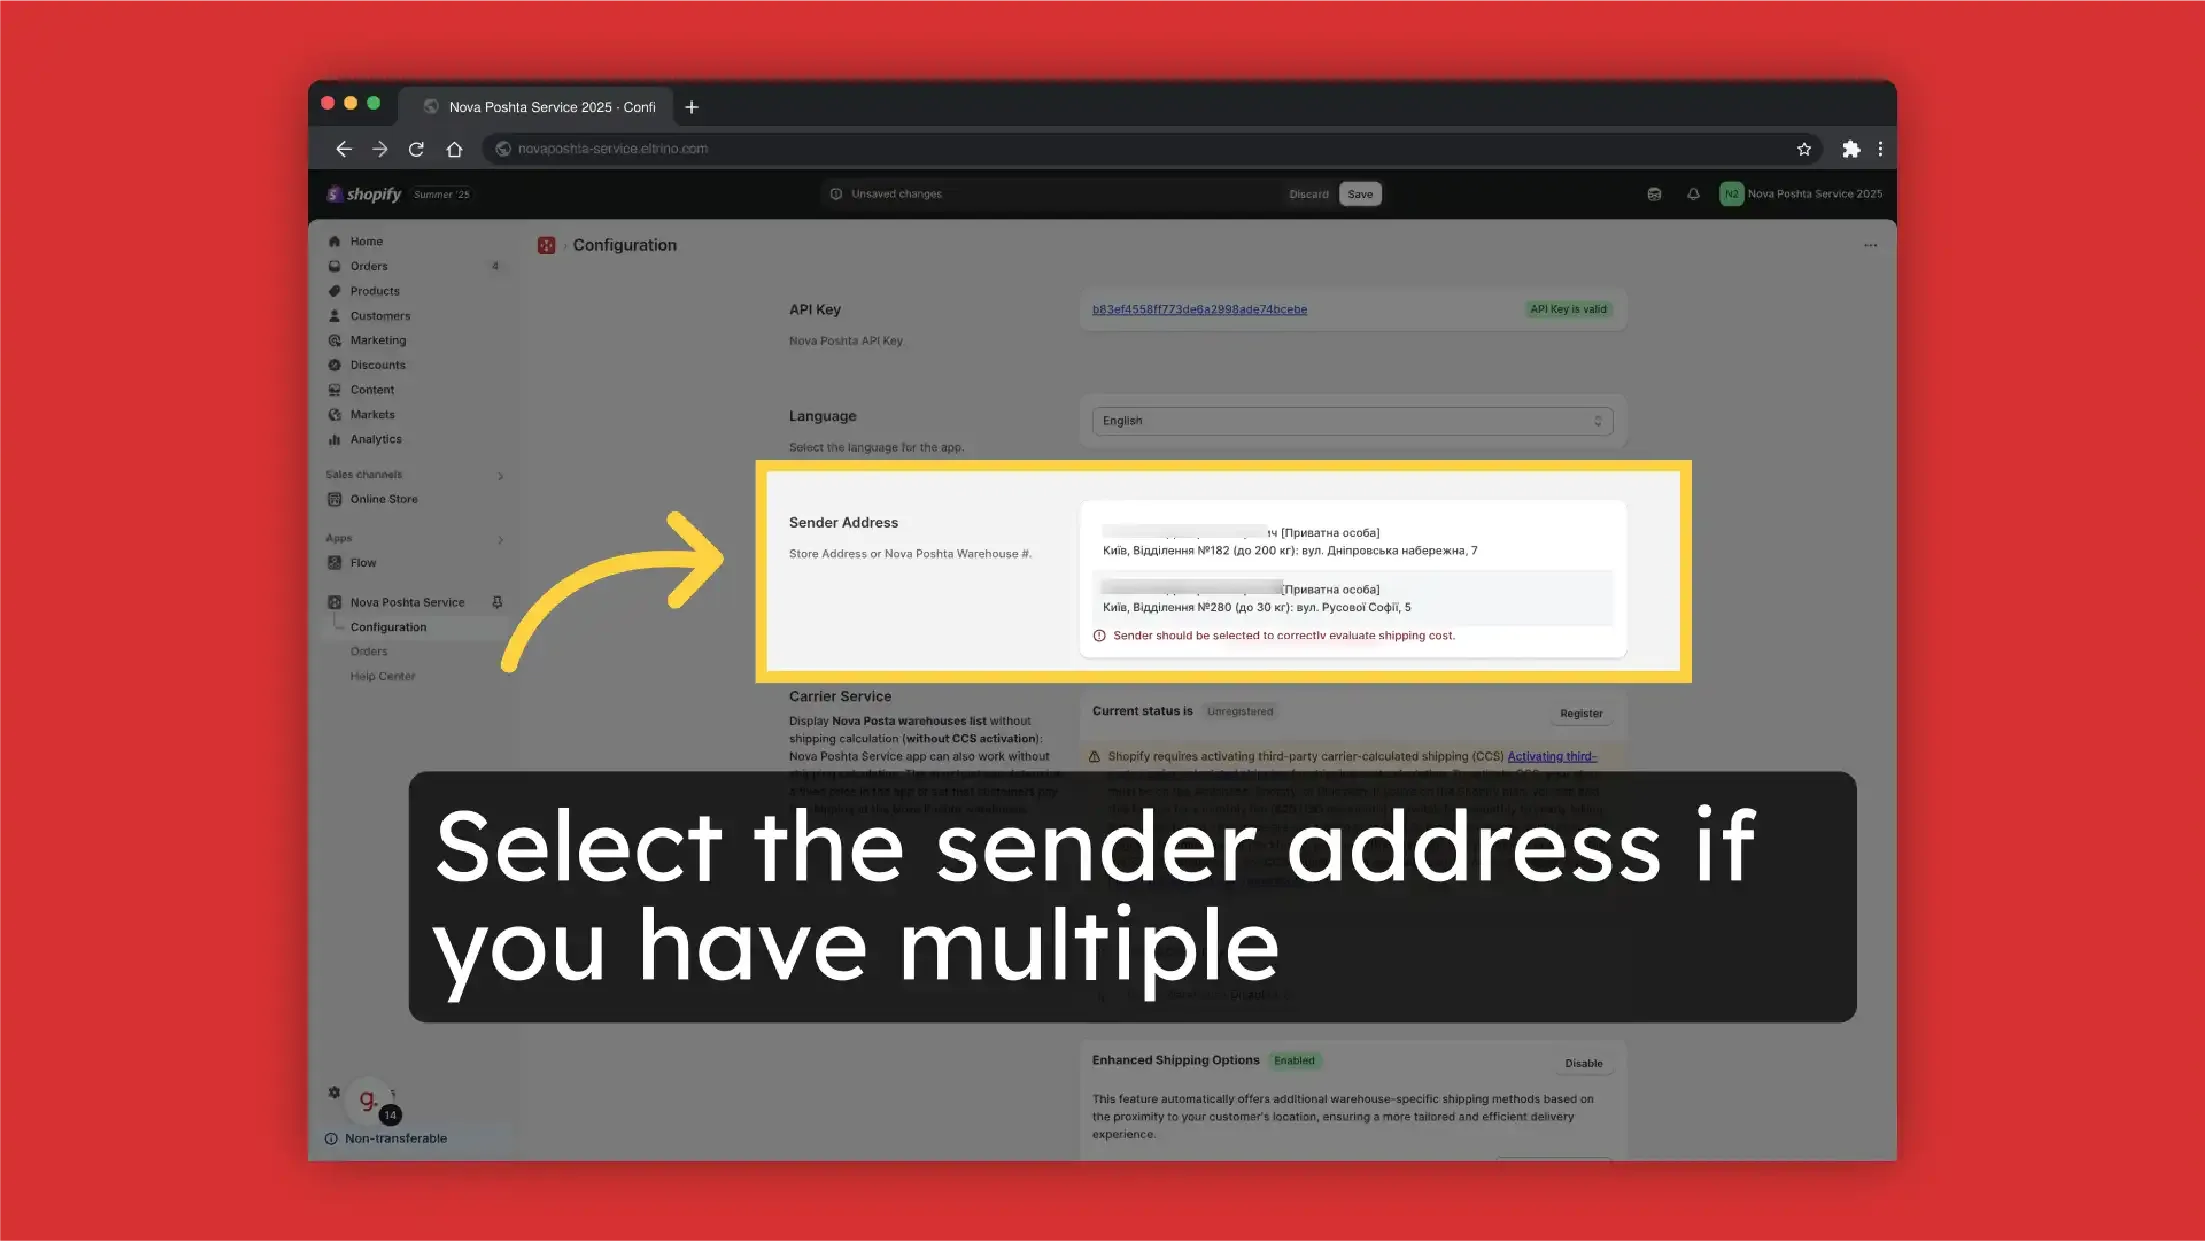
Select sender address, it can be address or Nova Poshta branch. You have to set up address or preferred Nova Poshta warehouse in your Nova Poshta account first.
-
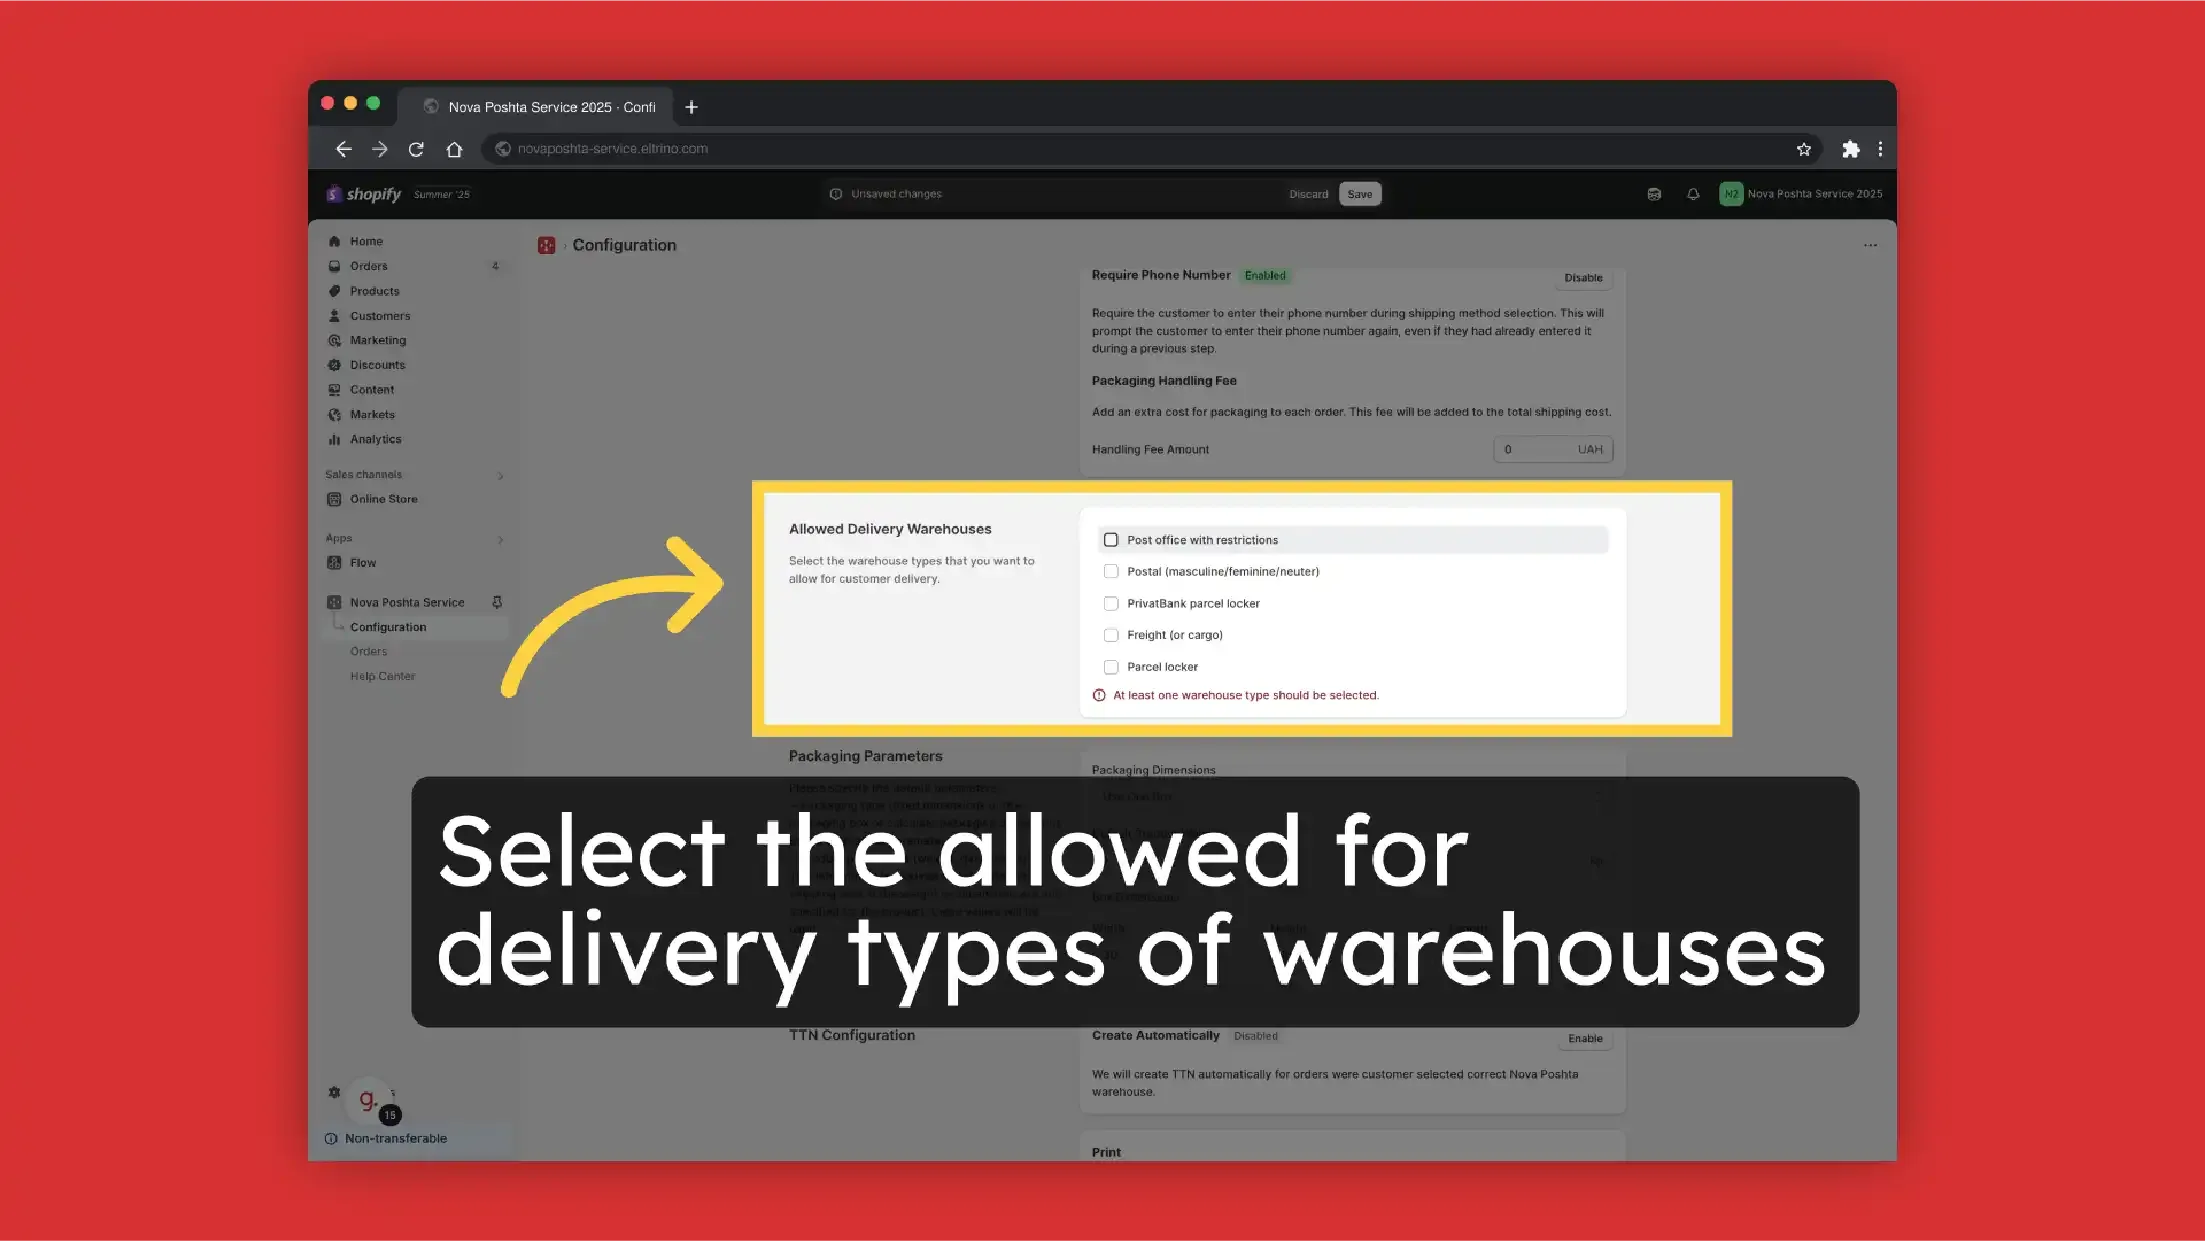
Select the allowed for delivery types of Nova Poshta warehouses.
- Post office with limitations
- Postal (or post)
- PrivatBank parcel locker
- Cargo
- Parcel locker
- Select packaging parameters. Set Packaging Parameters (fixed box dimensions or use product parameters)

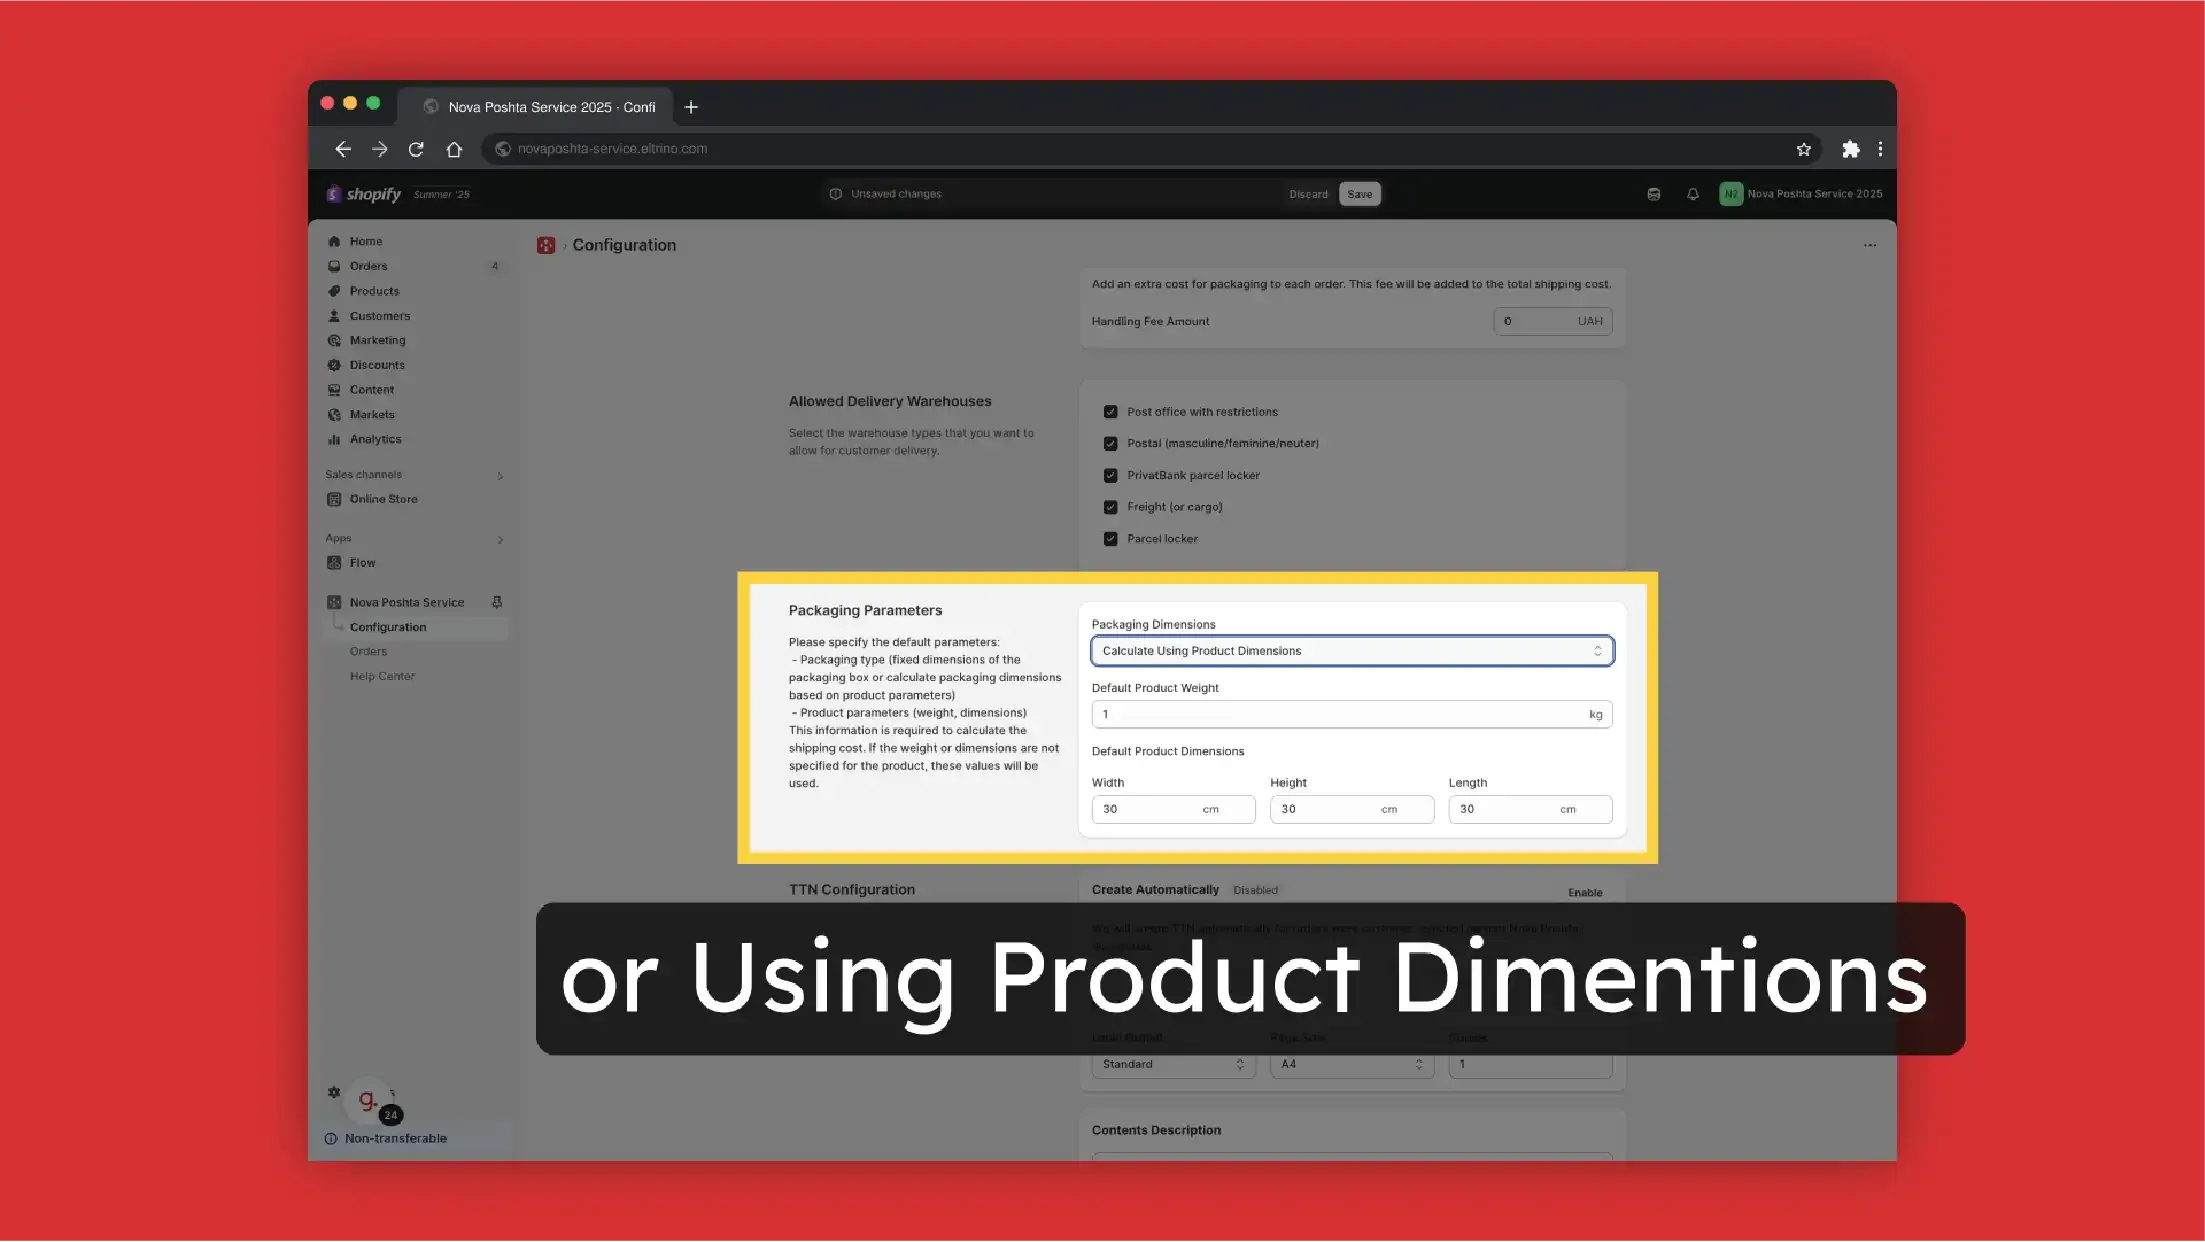 This information is required not only for the shipping cost calculation. If the weight or dimensions are not specified for the product, these values will be used. But also to display for customers (and in the admin panel) just Nova Poshta branches that can accept the order based on its parameters.
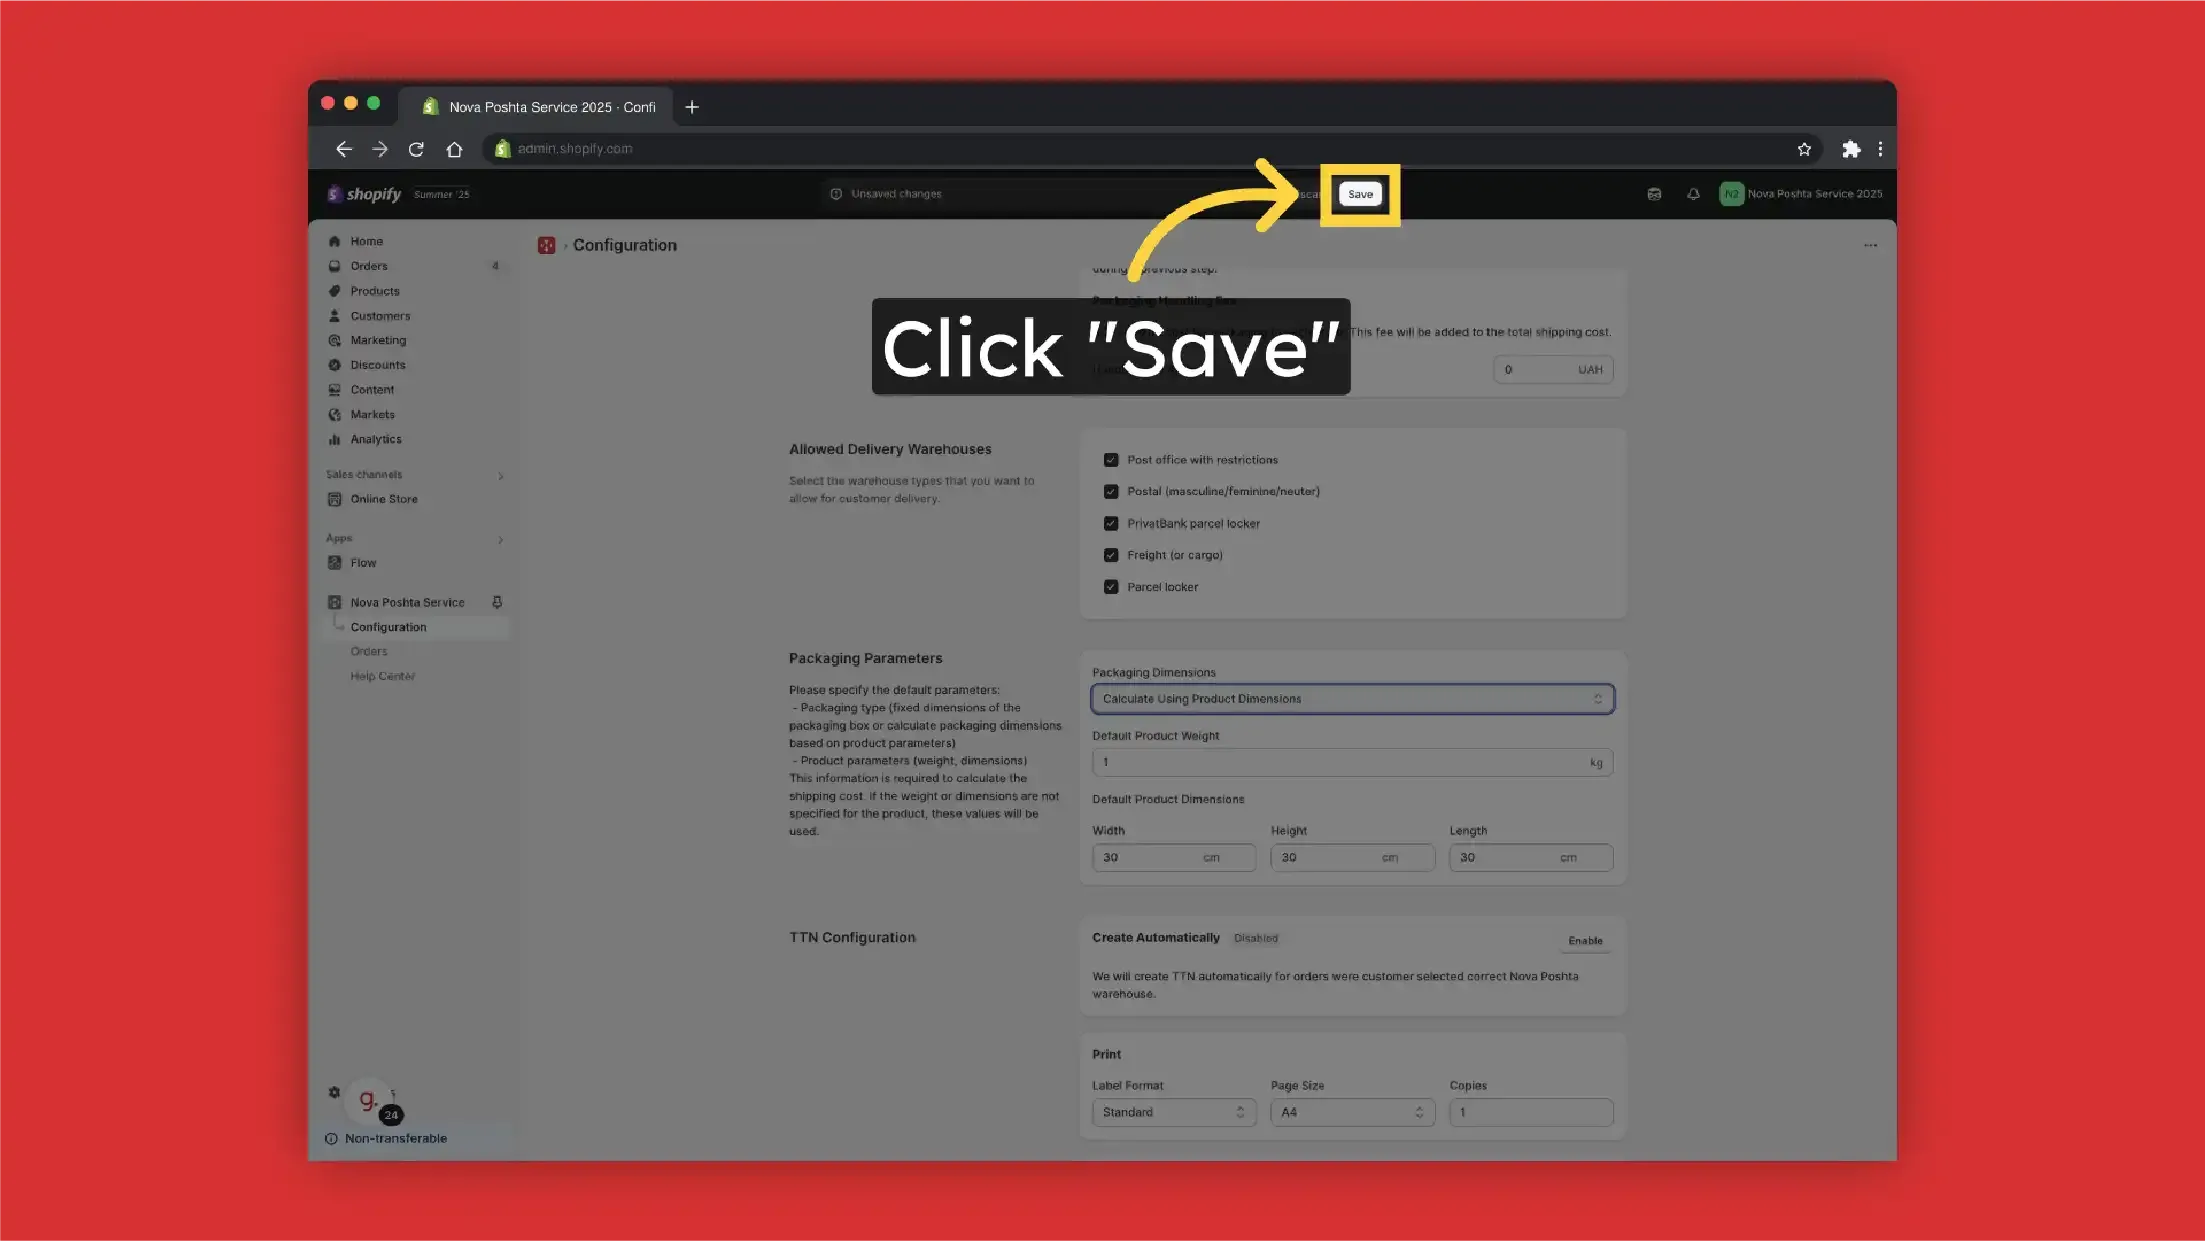
- Save Changes
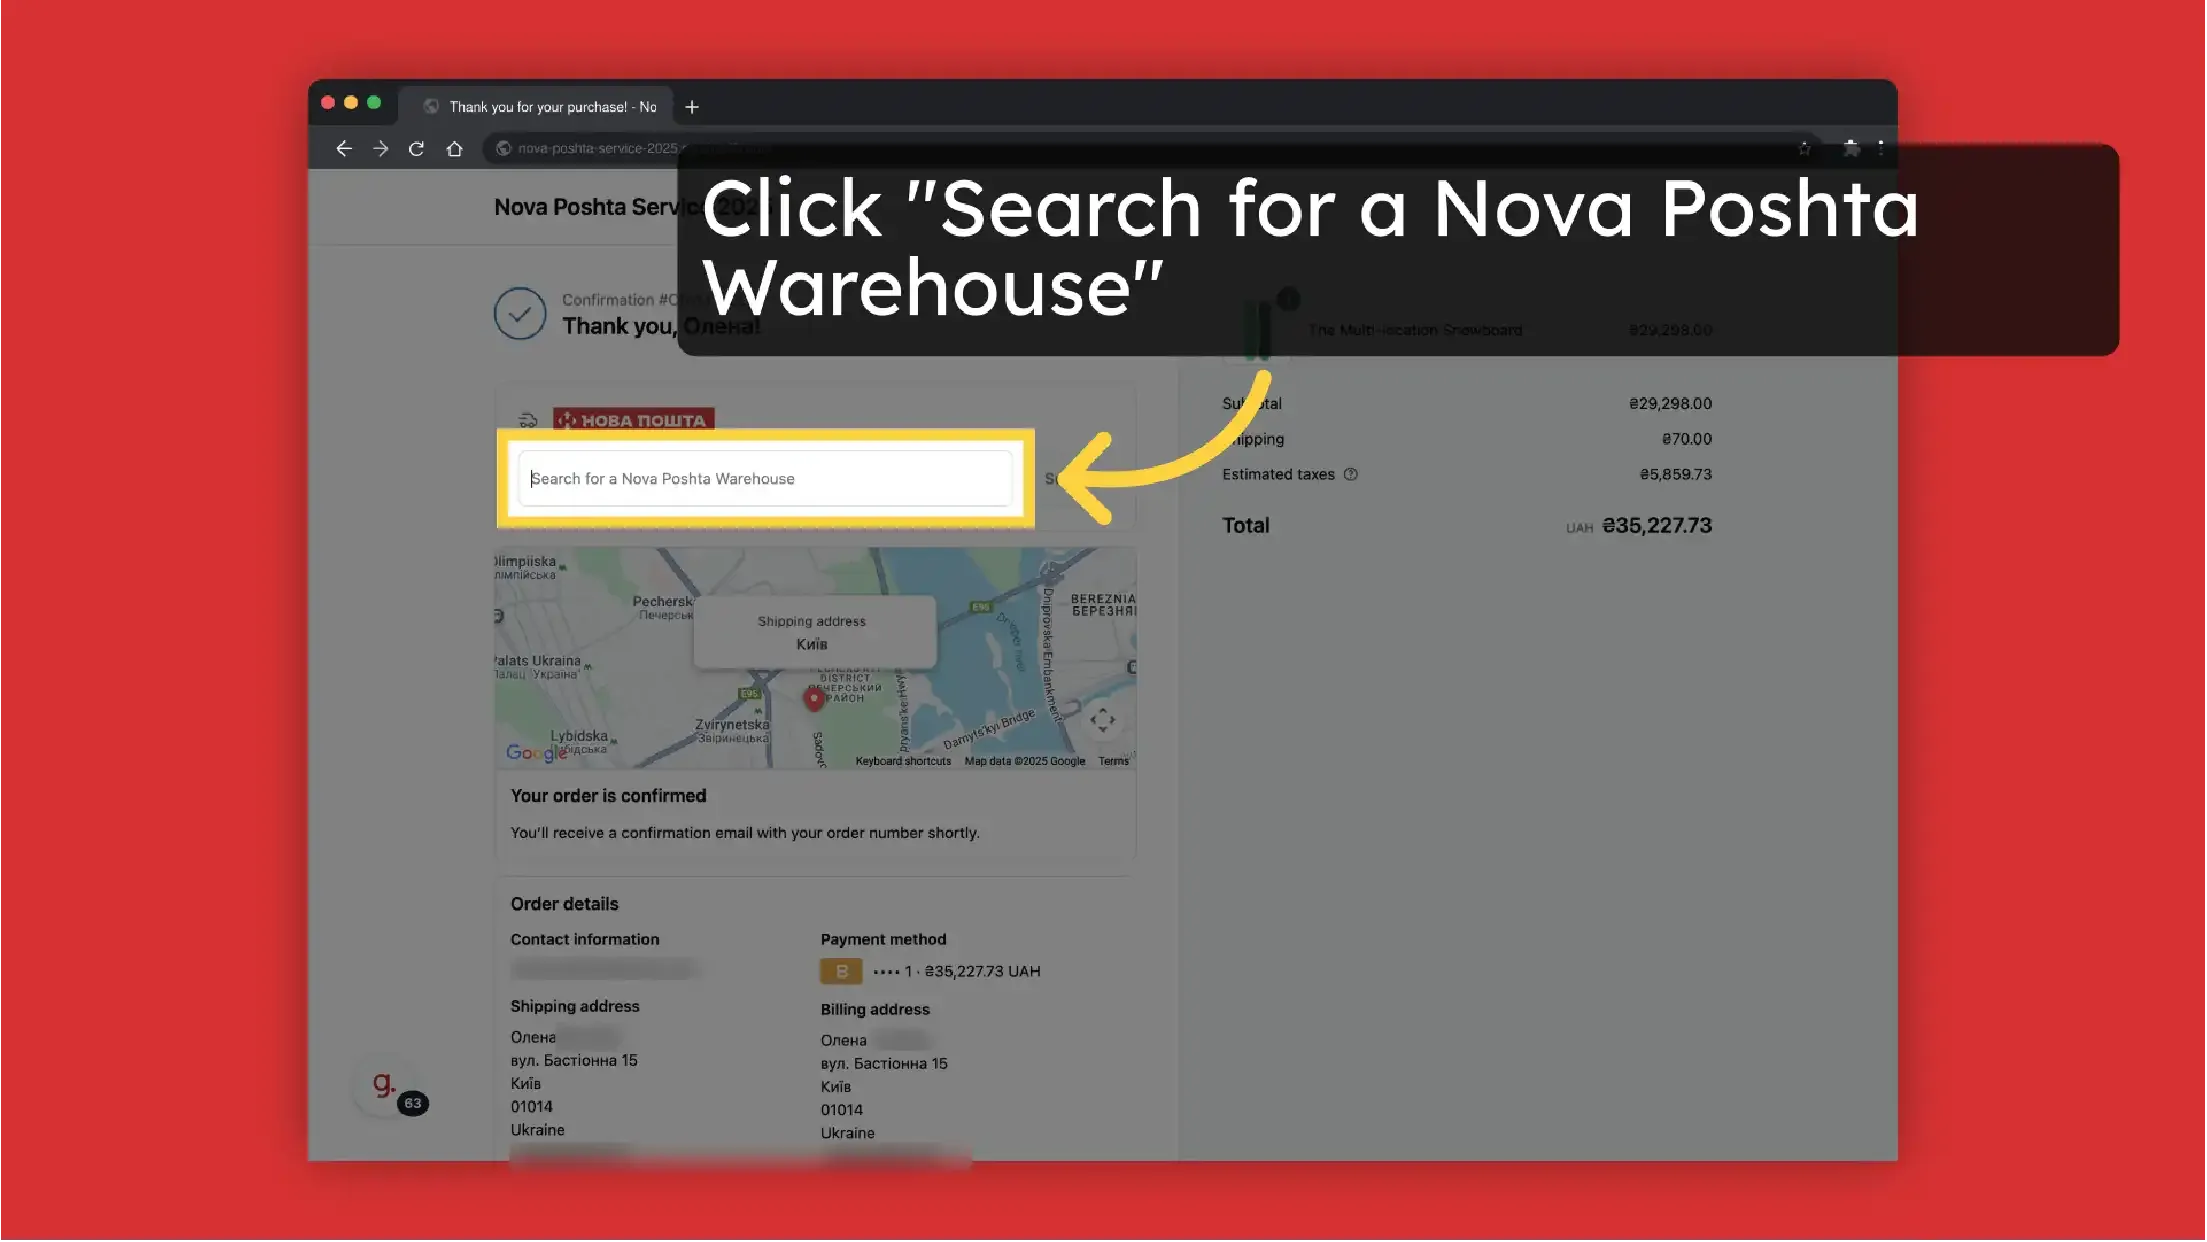
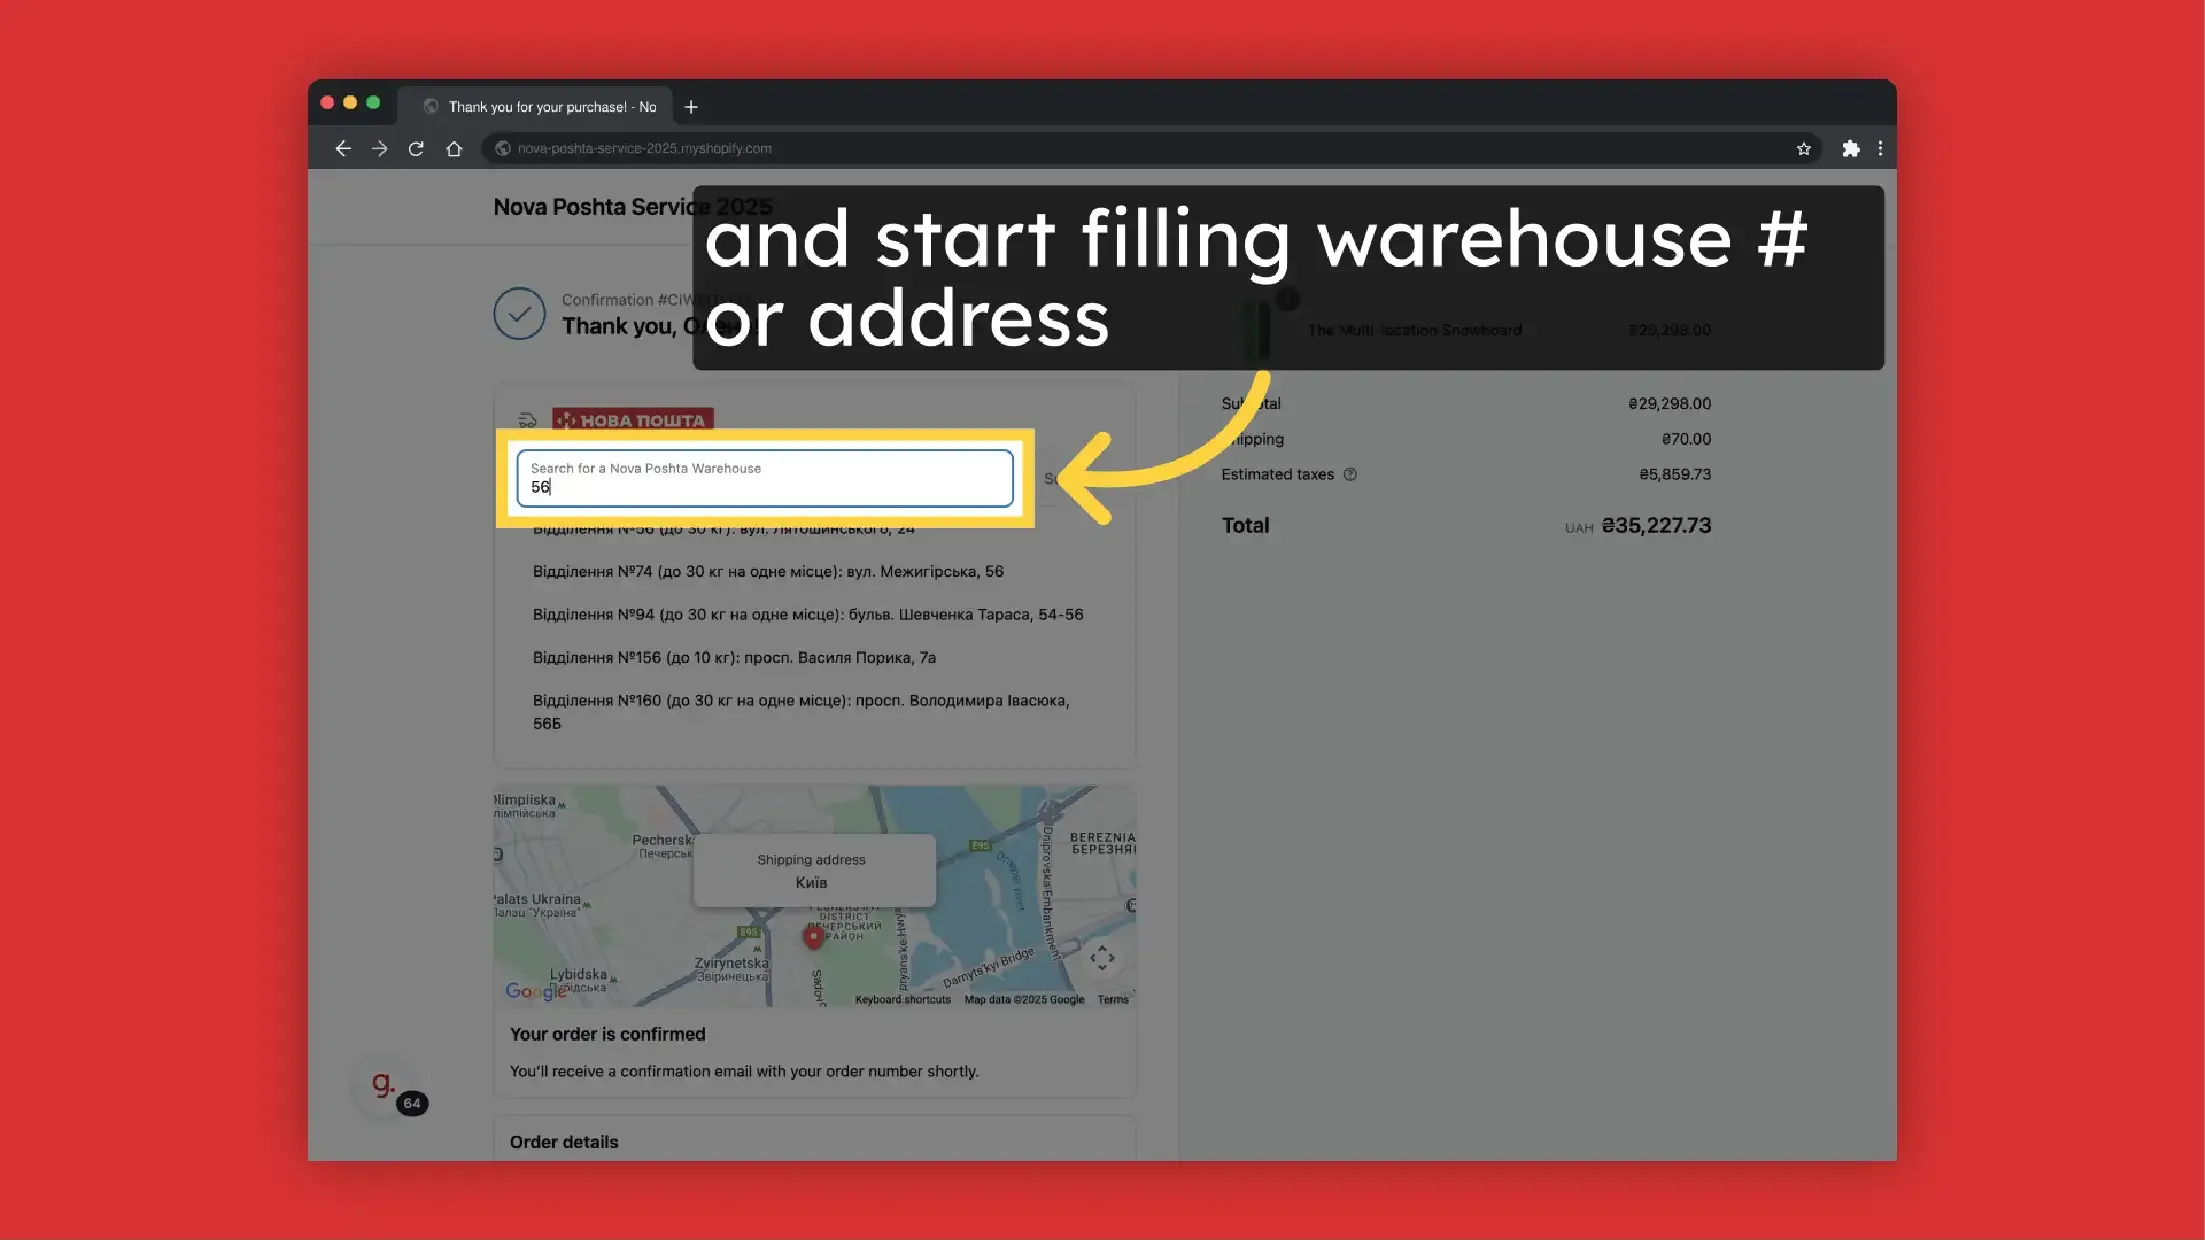
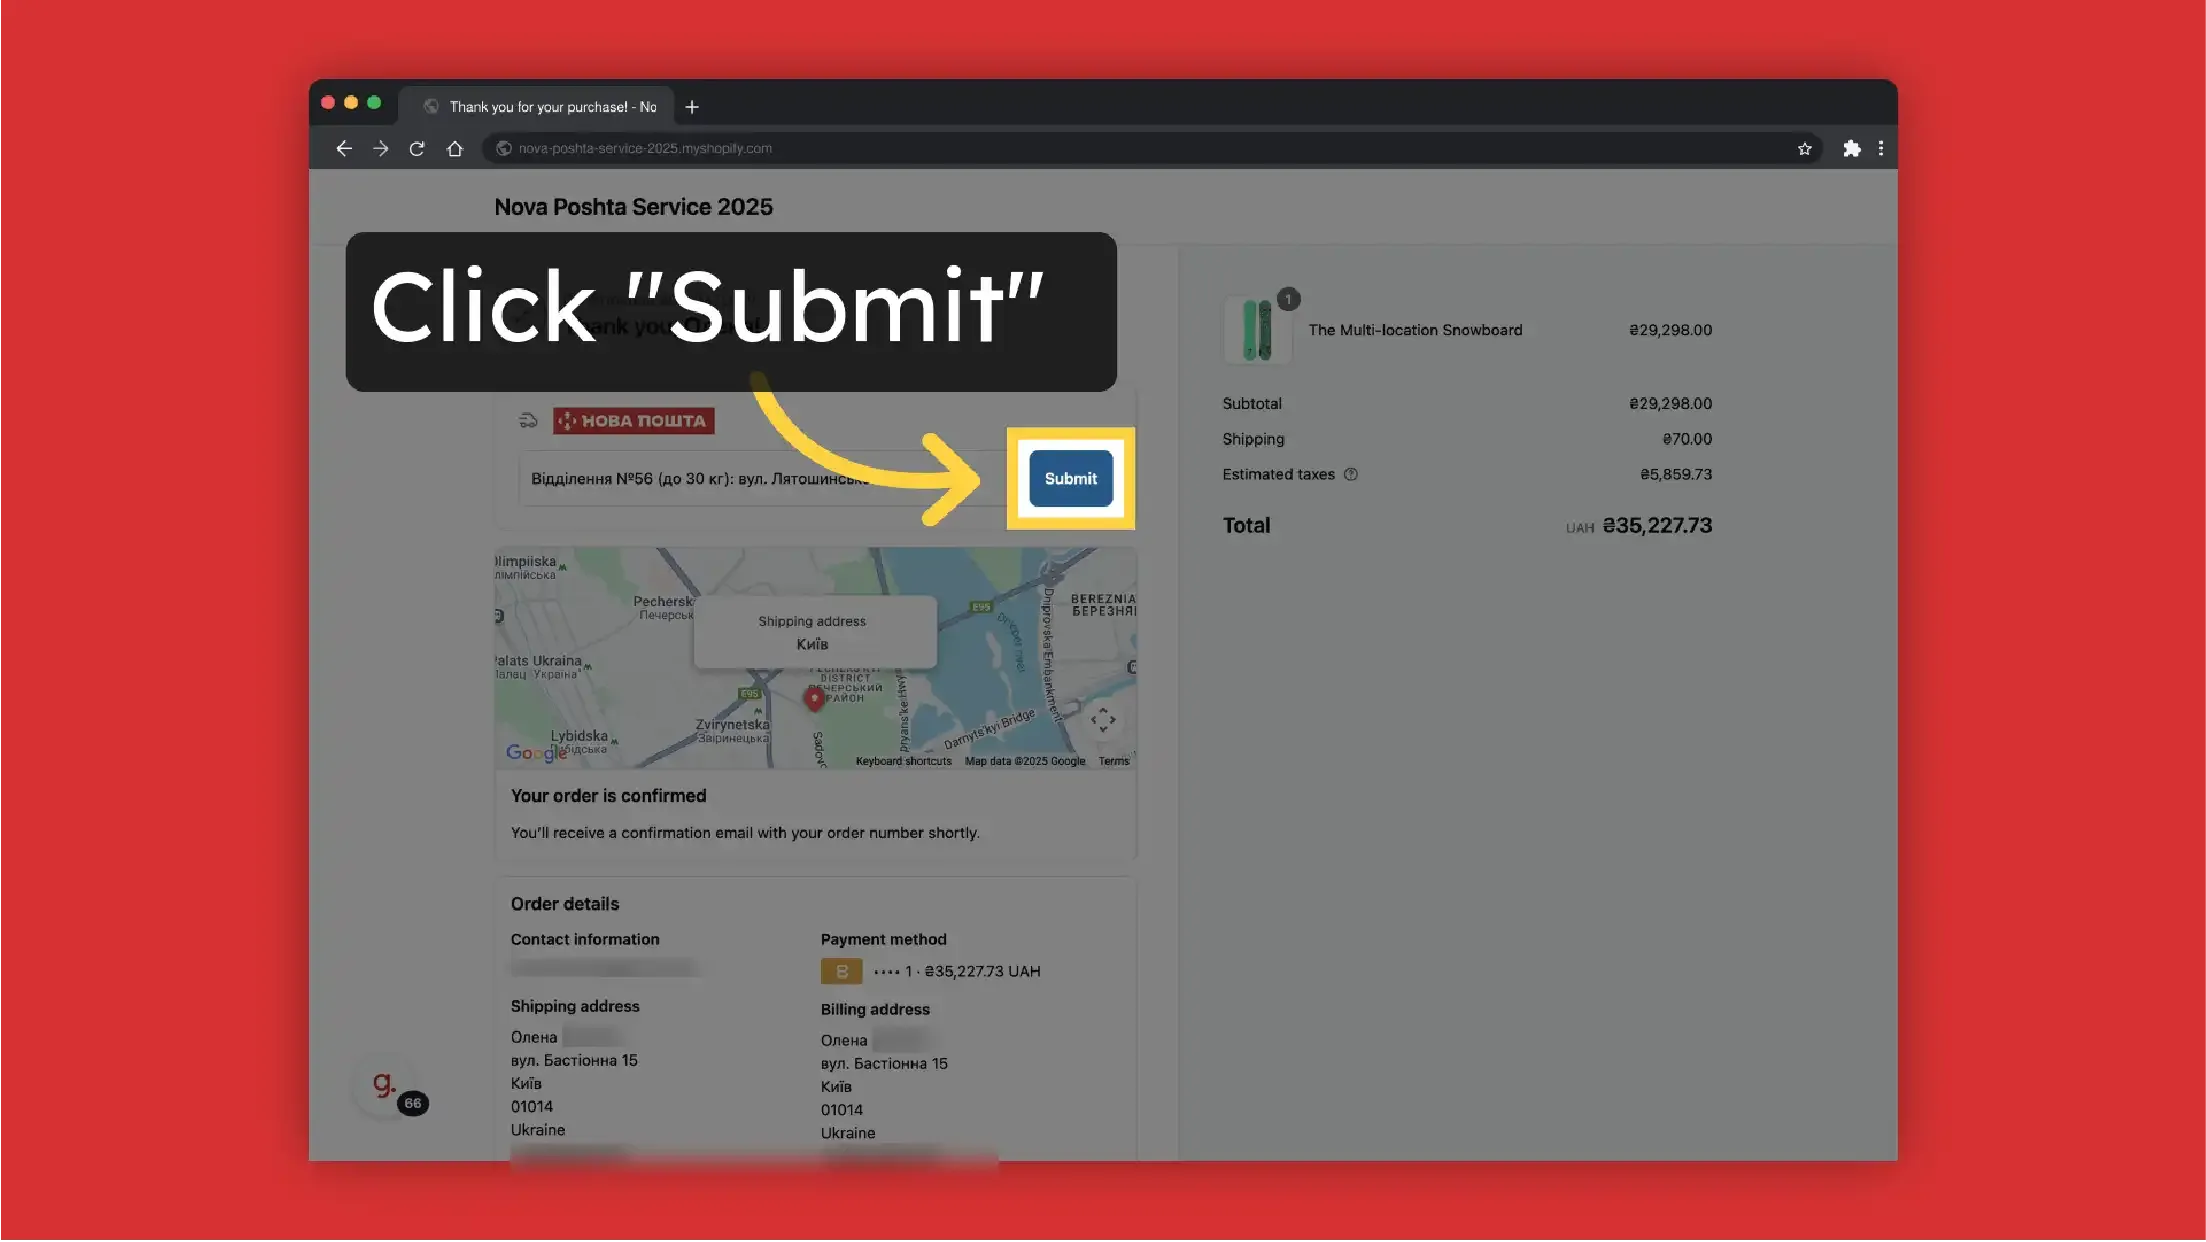
Display dropdown with Nova Poshta branches without shipping cost calculation + Result
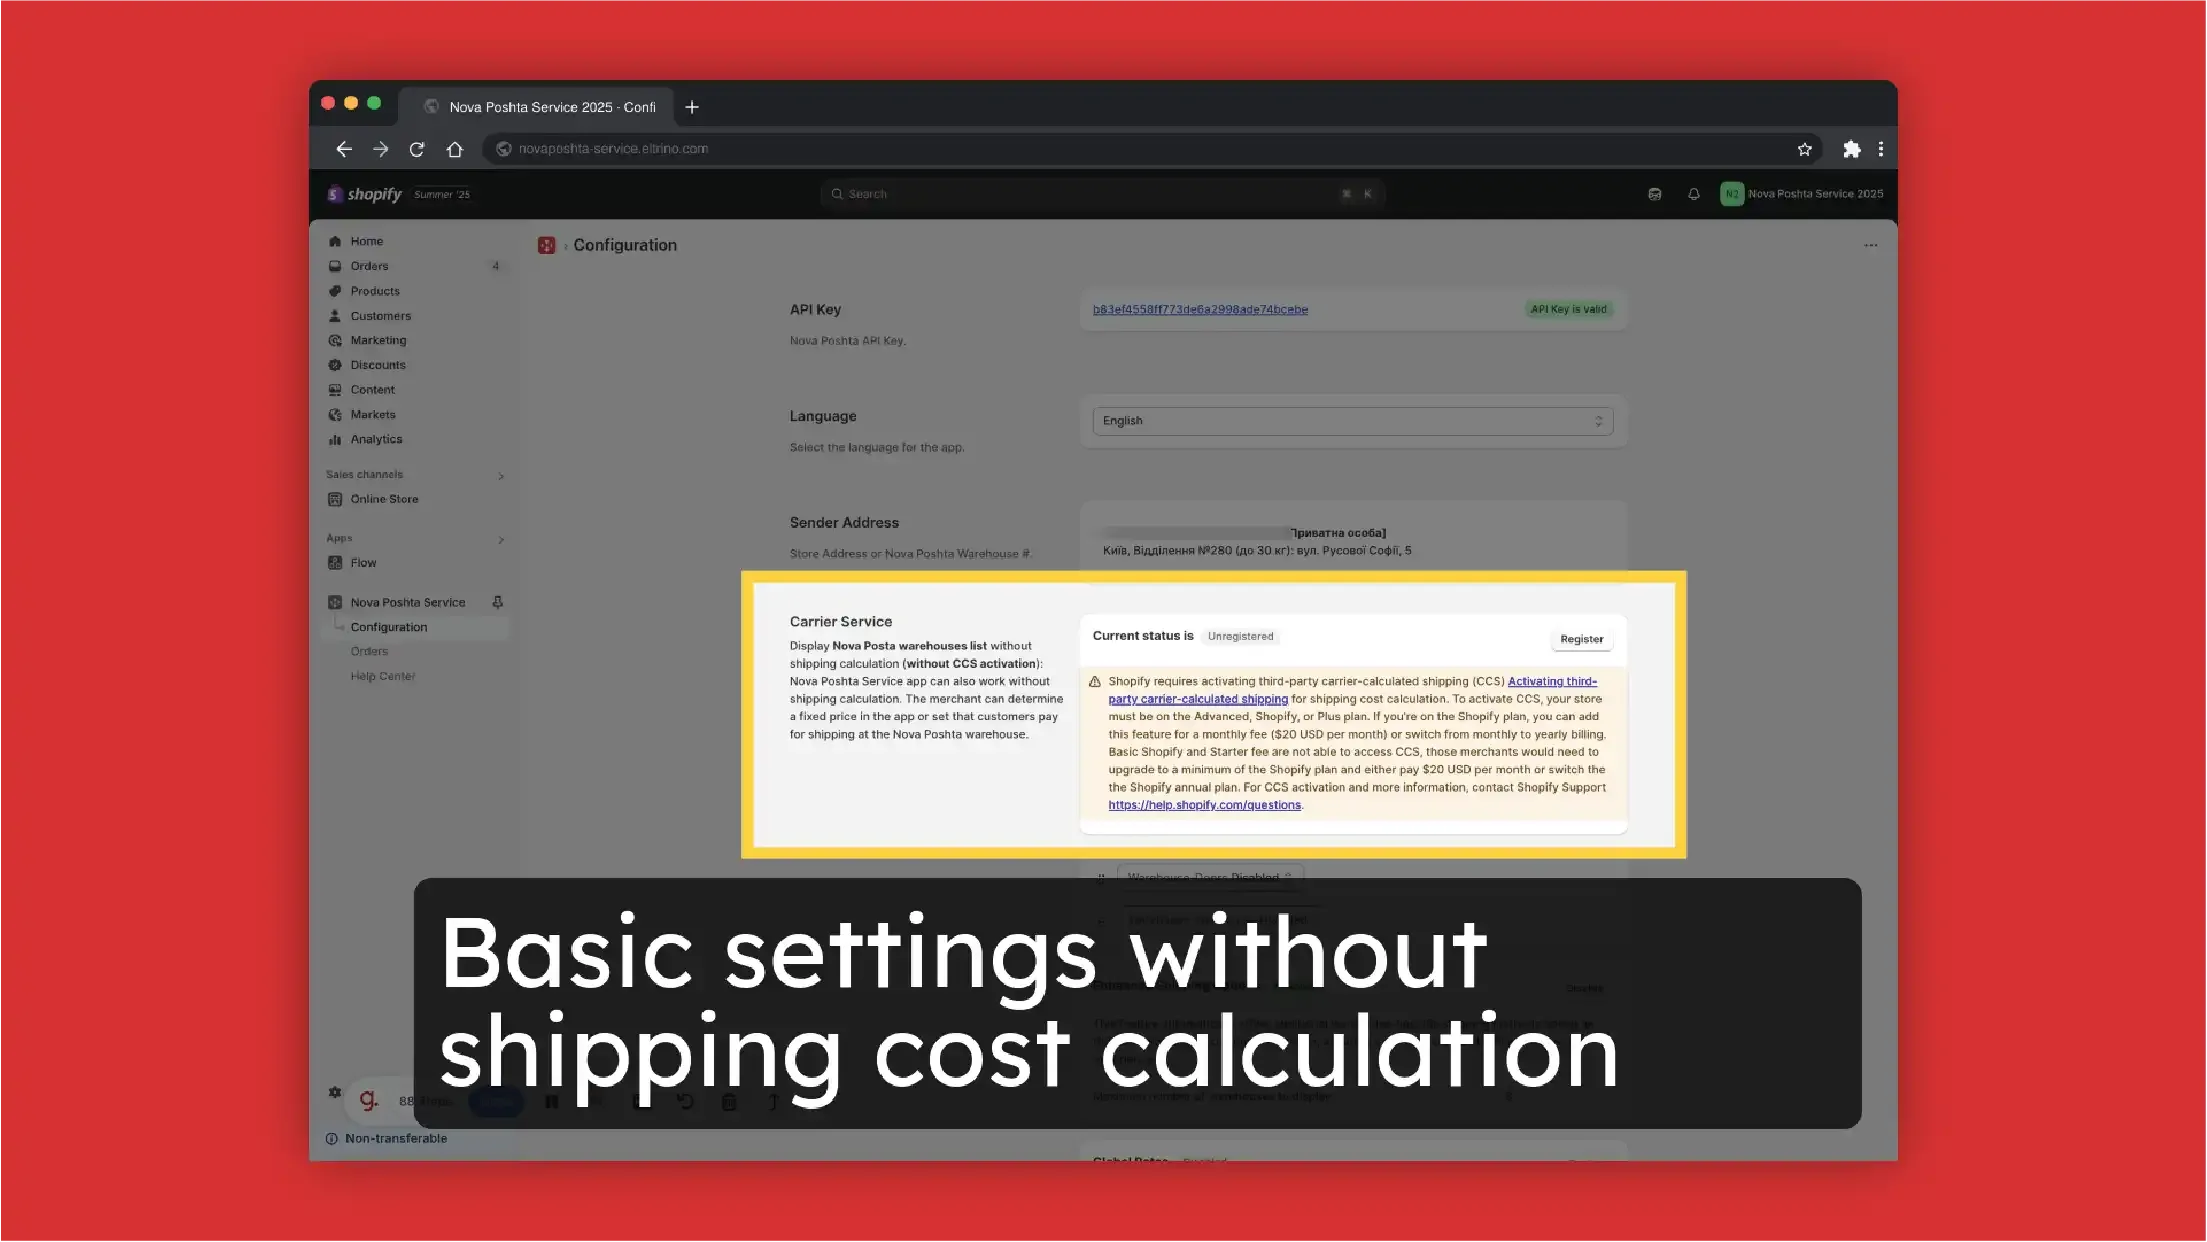
Let's take a look at basic settings without shipping cost calculation (without activating third-party carrier-calculated shipping (CCS)). Don't register
Starting from August 2025, Shopify is updating the checkout customization capabilities for the Basic, Shopify, and Advanced plans, and will be disabling previously installed scripts on the "Thank You" and "Order Status" pages. Therefore, to display a dropdown menu with Nova Poshta branches on these pages, the widget will need to be manually added in the checkout customization section. You can read more about these changes in Shopify's changelog.
-
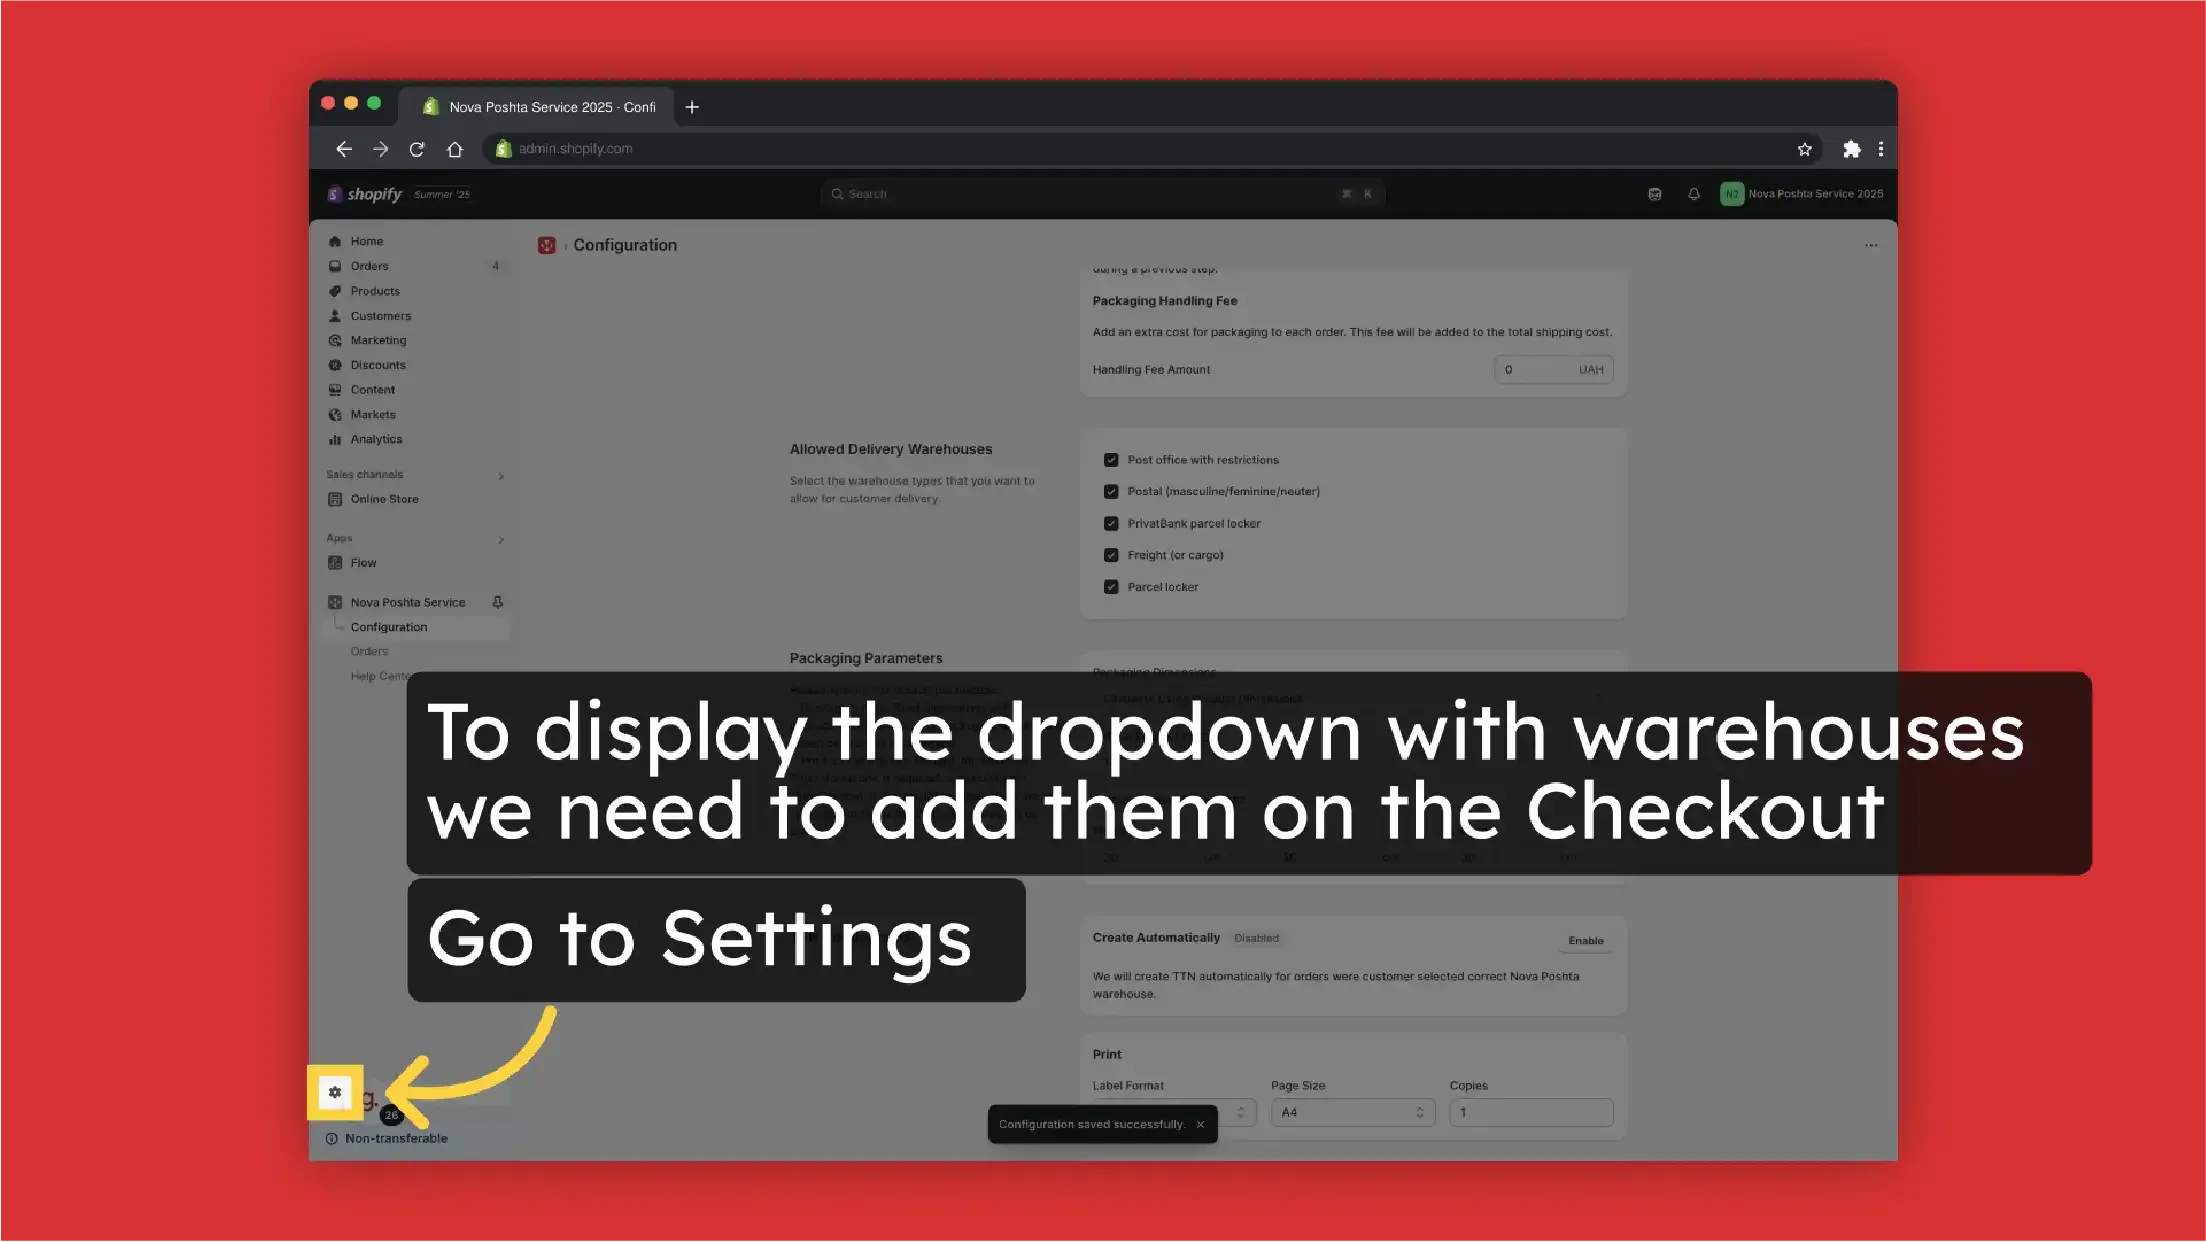
To display the dropdown with warehouses we need to add them on the Checkout (Thank you Page or Order Status Page). Go to Settings
-
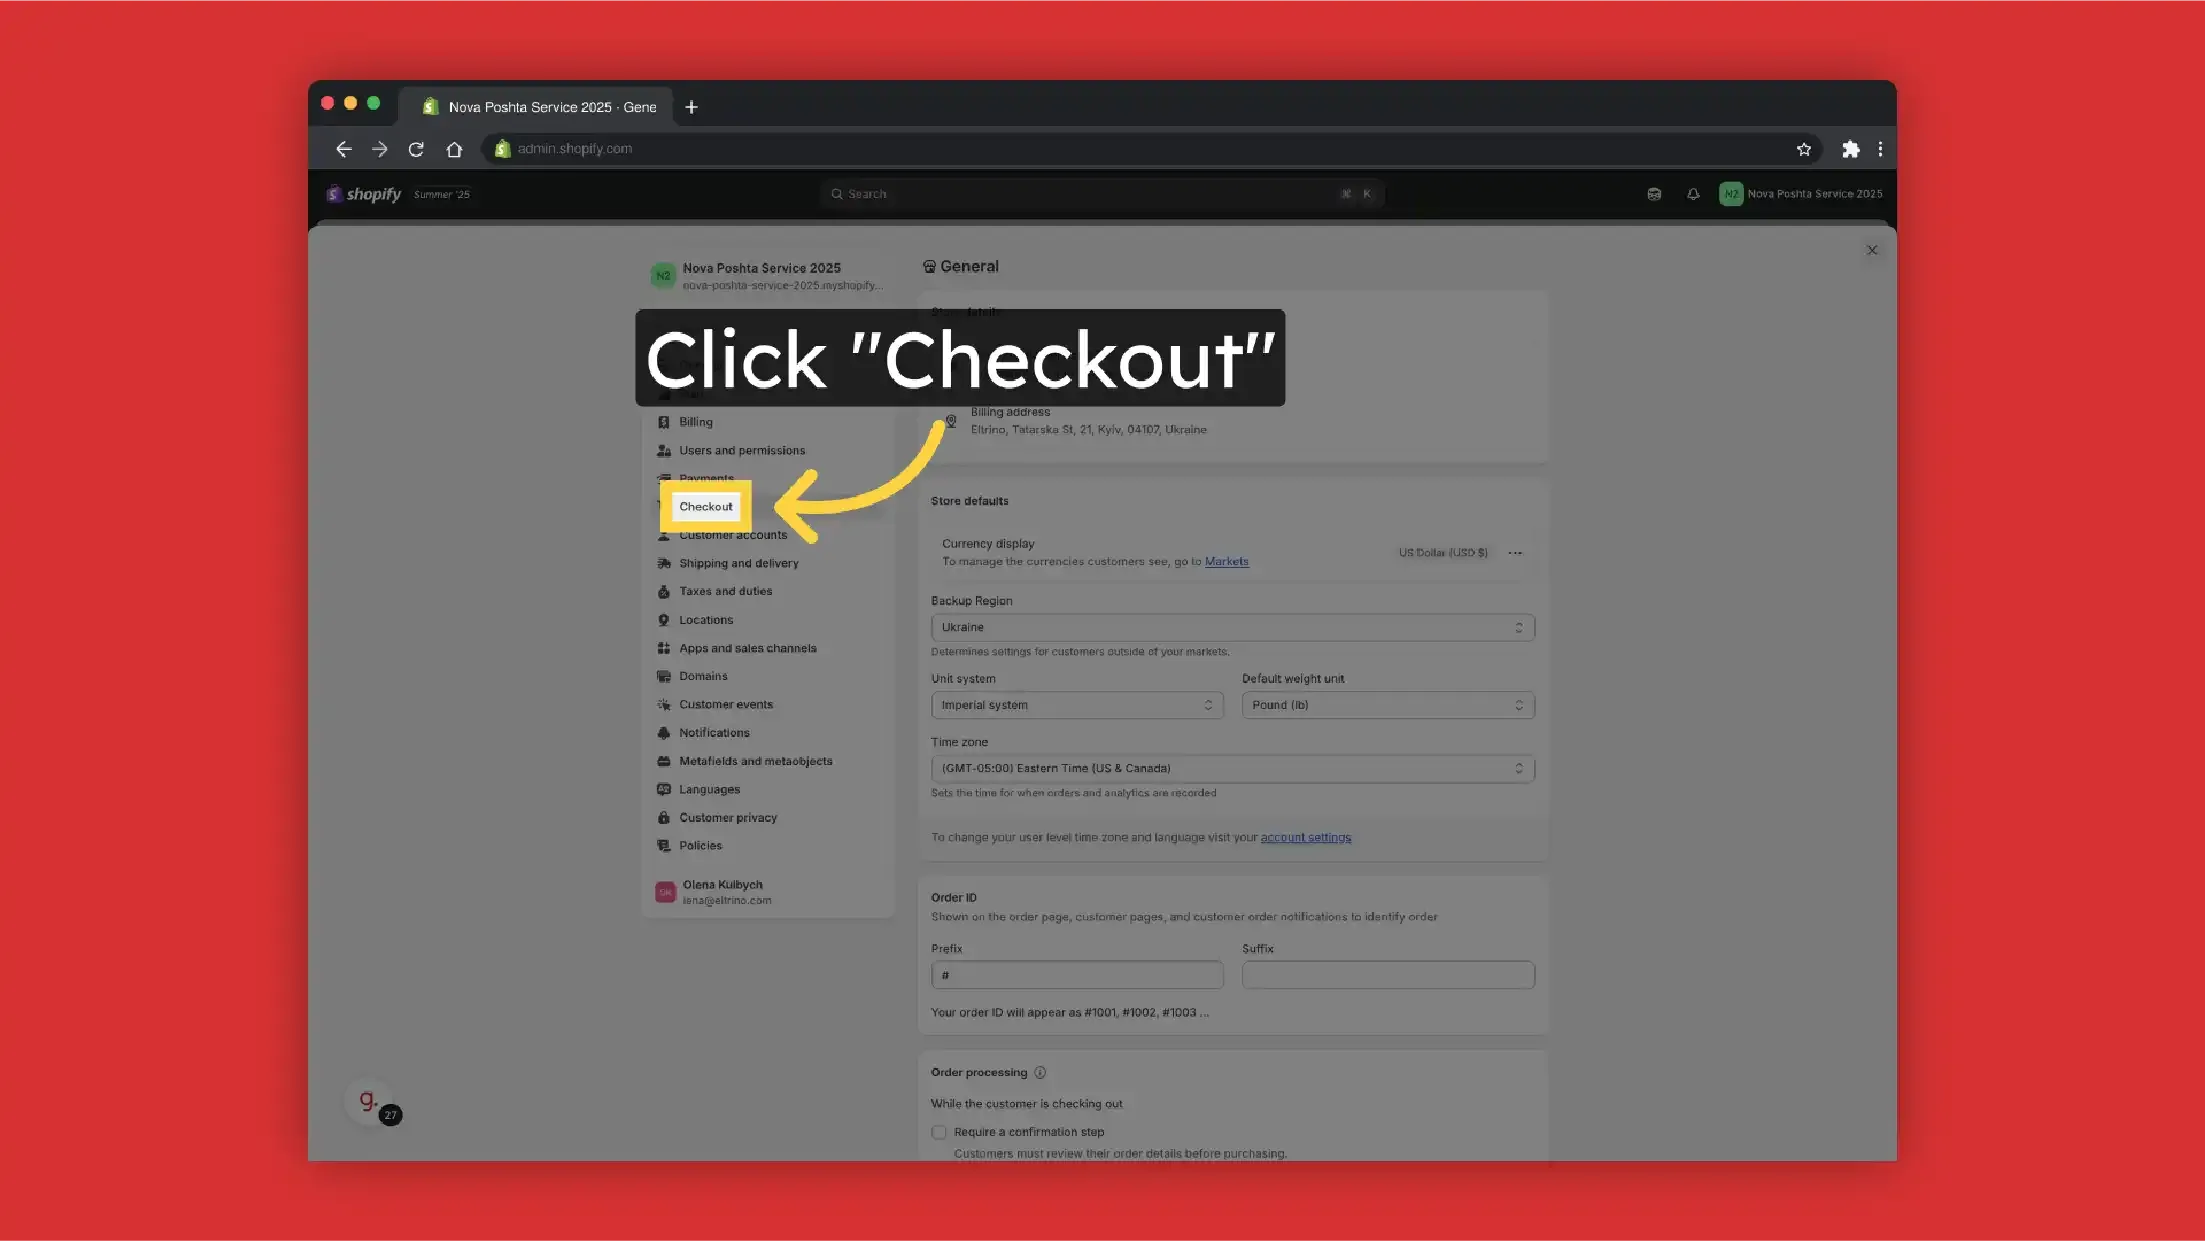
Select Checkout
-
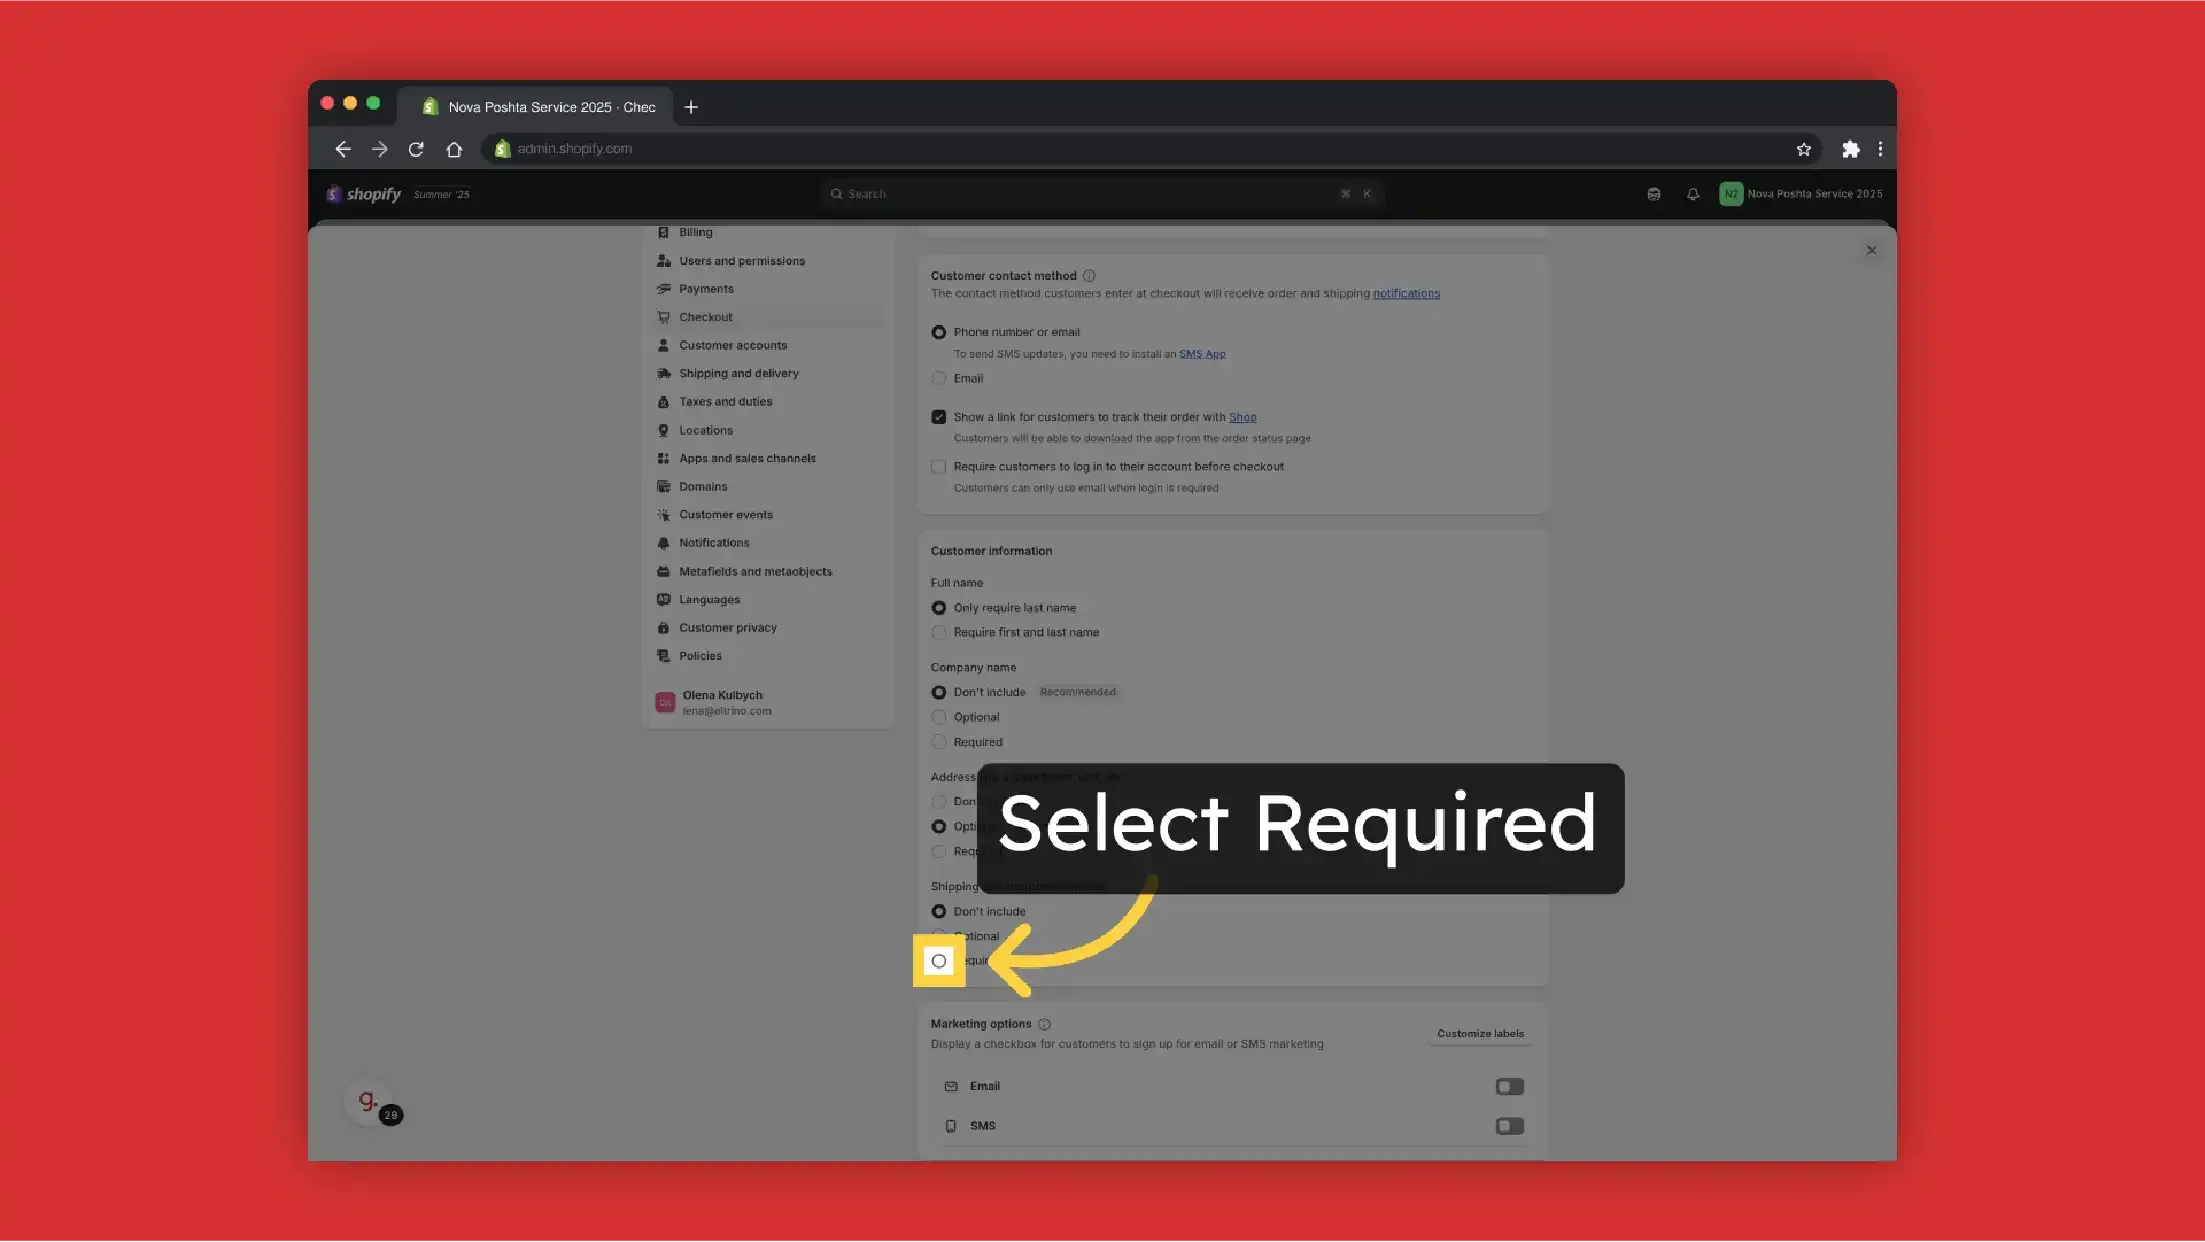
Nova Poshta requires customer phone number that's why "Shipping address phone number" should be required
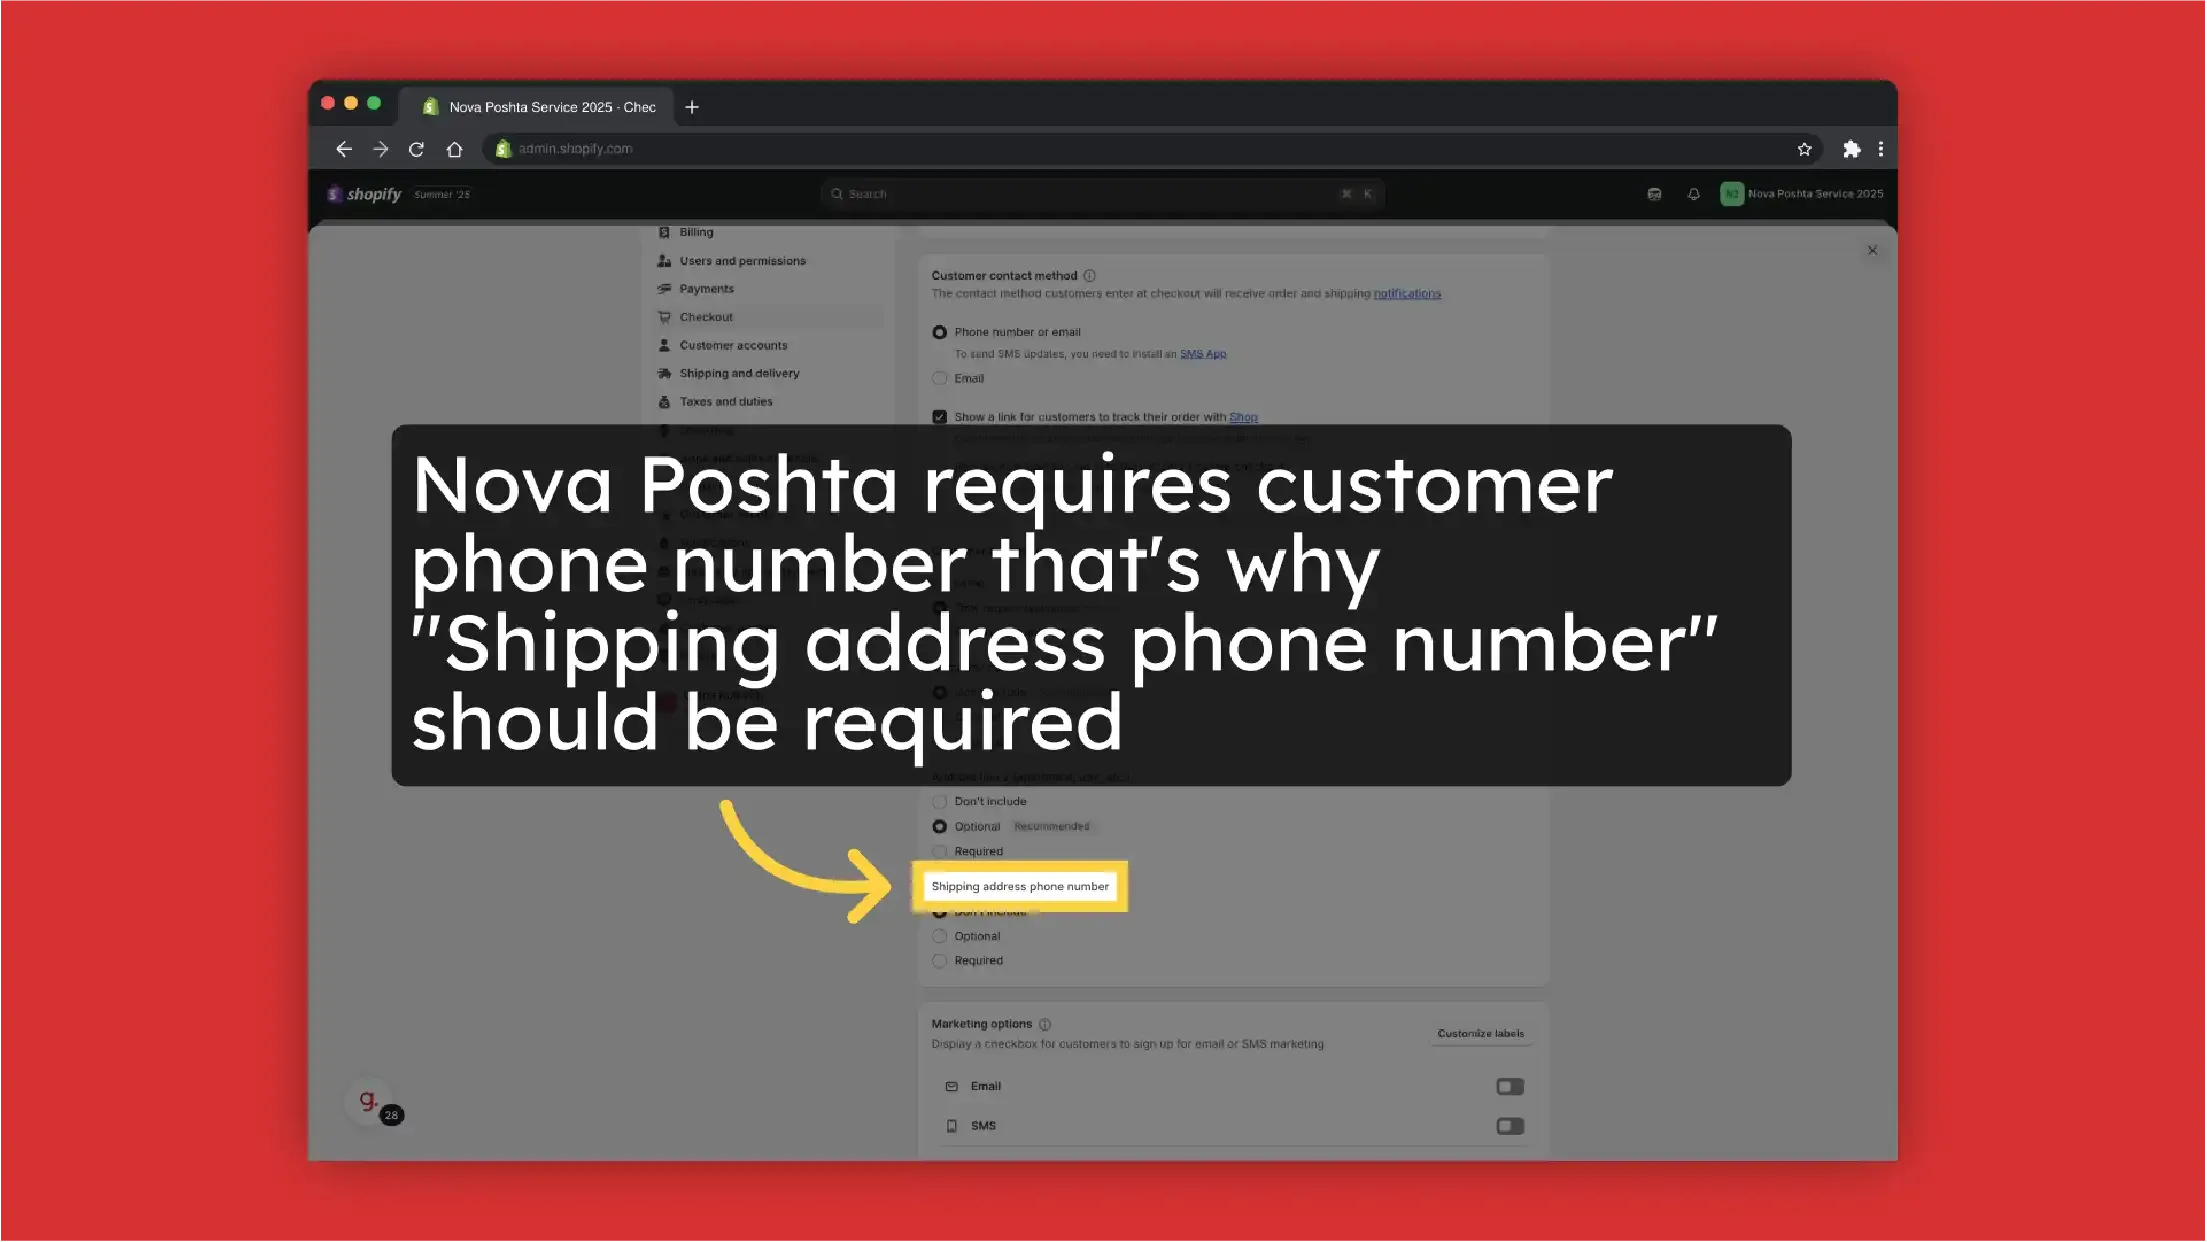 Select Required
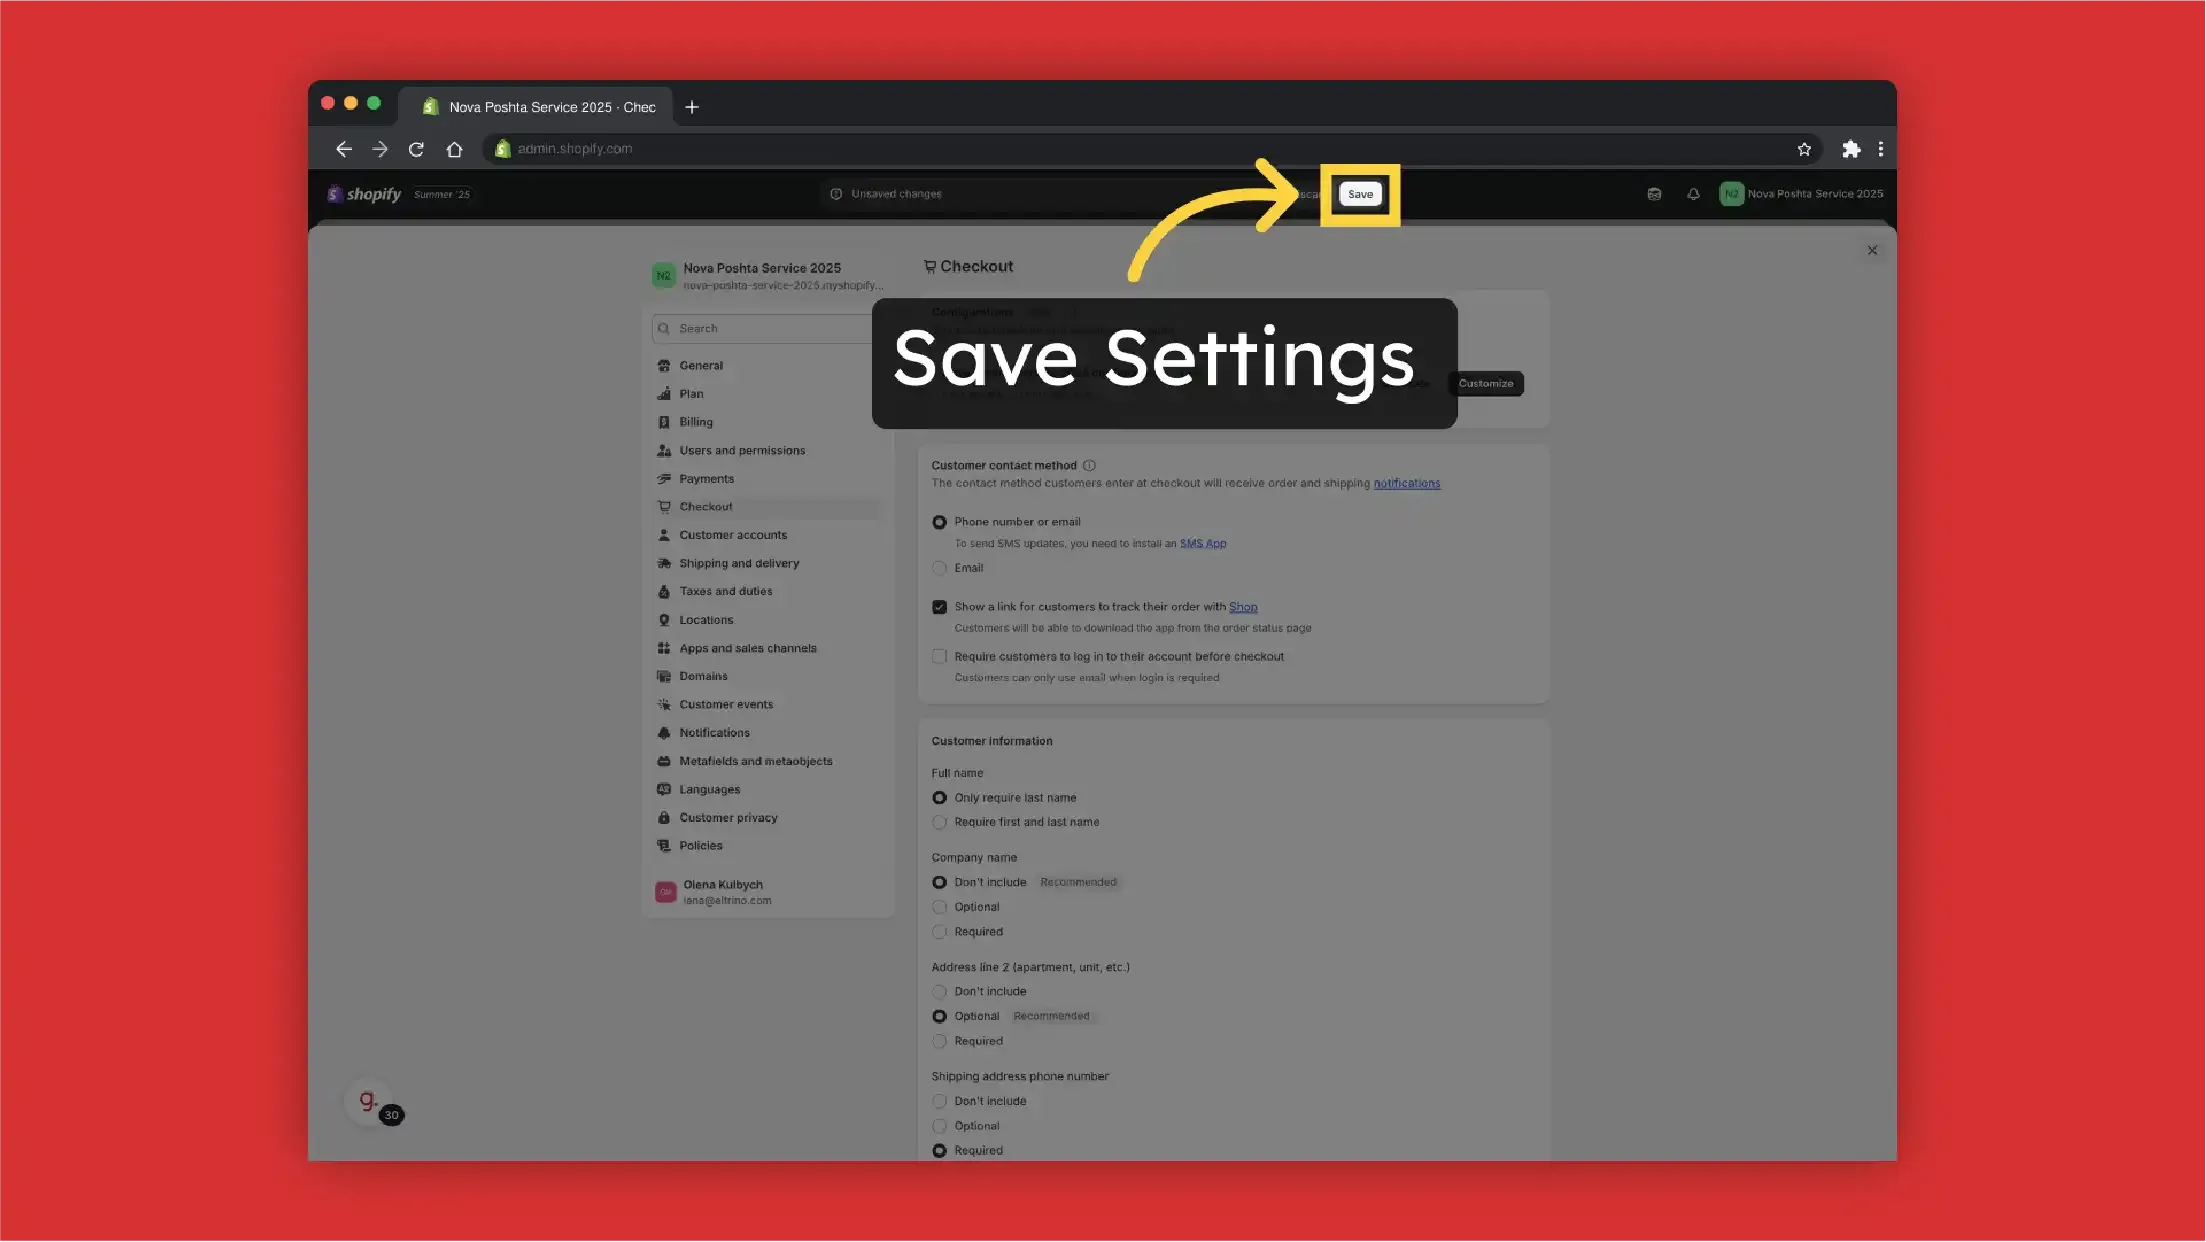
 Save Settings
-
Now we need to add the app to the Theme. Click "Customize"
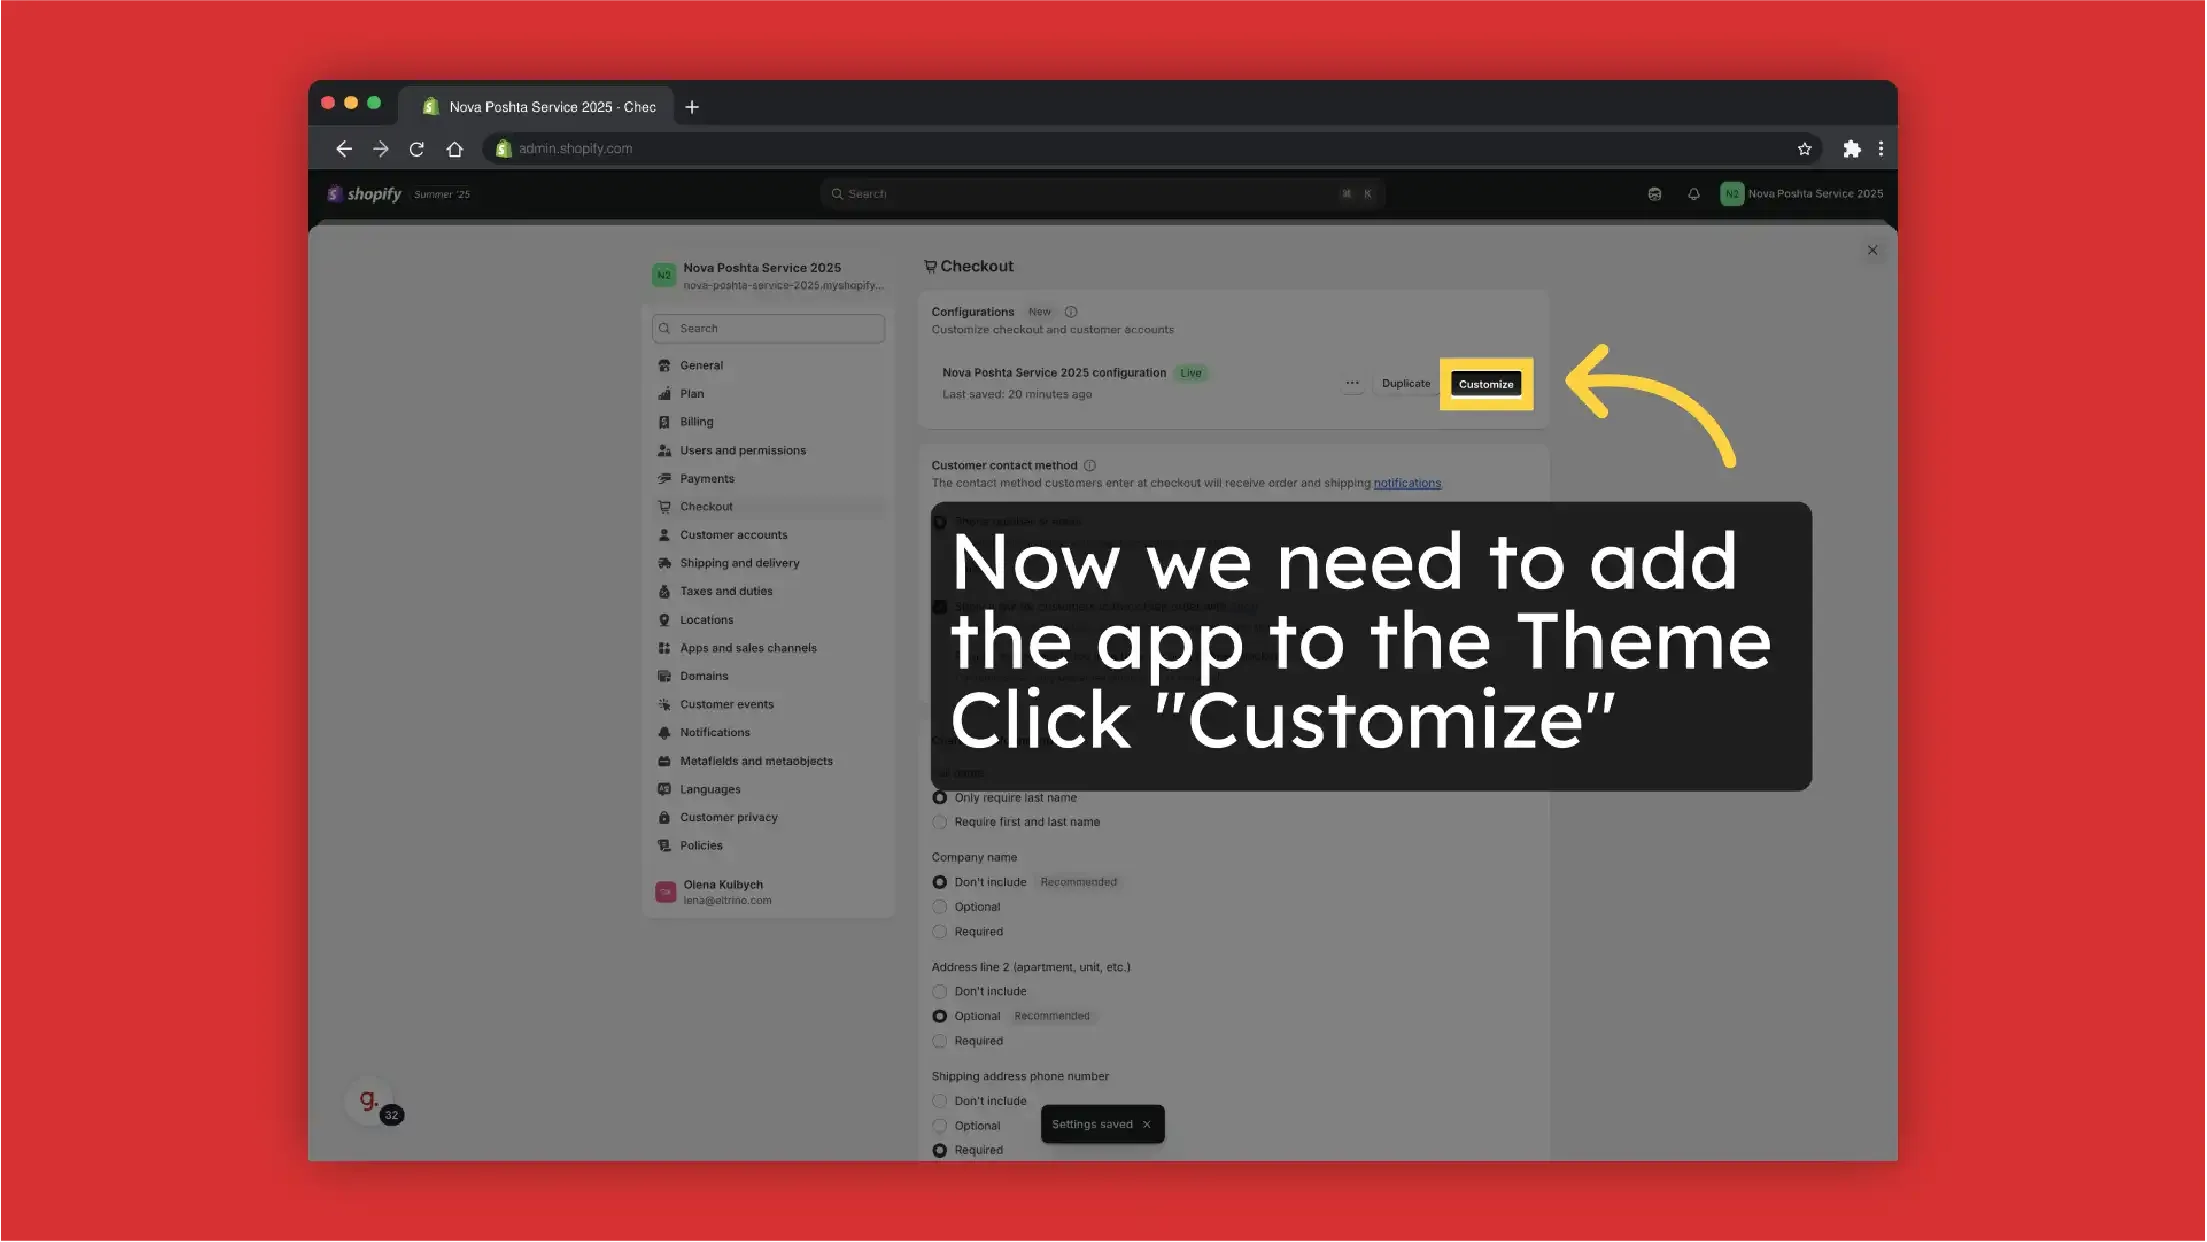
-
Click on Apps
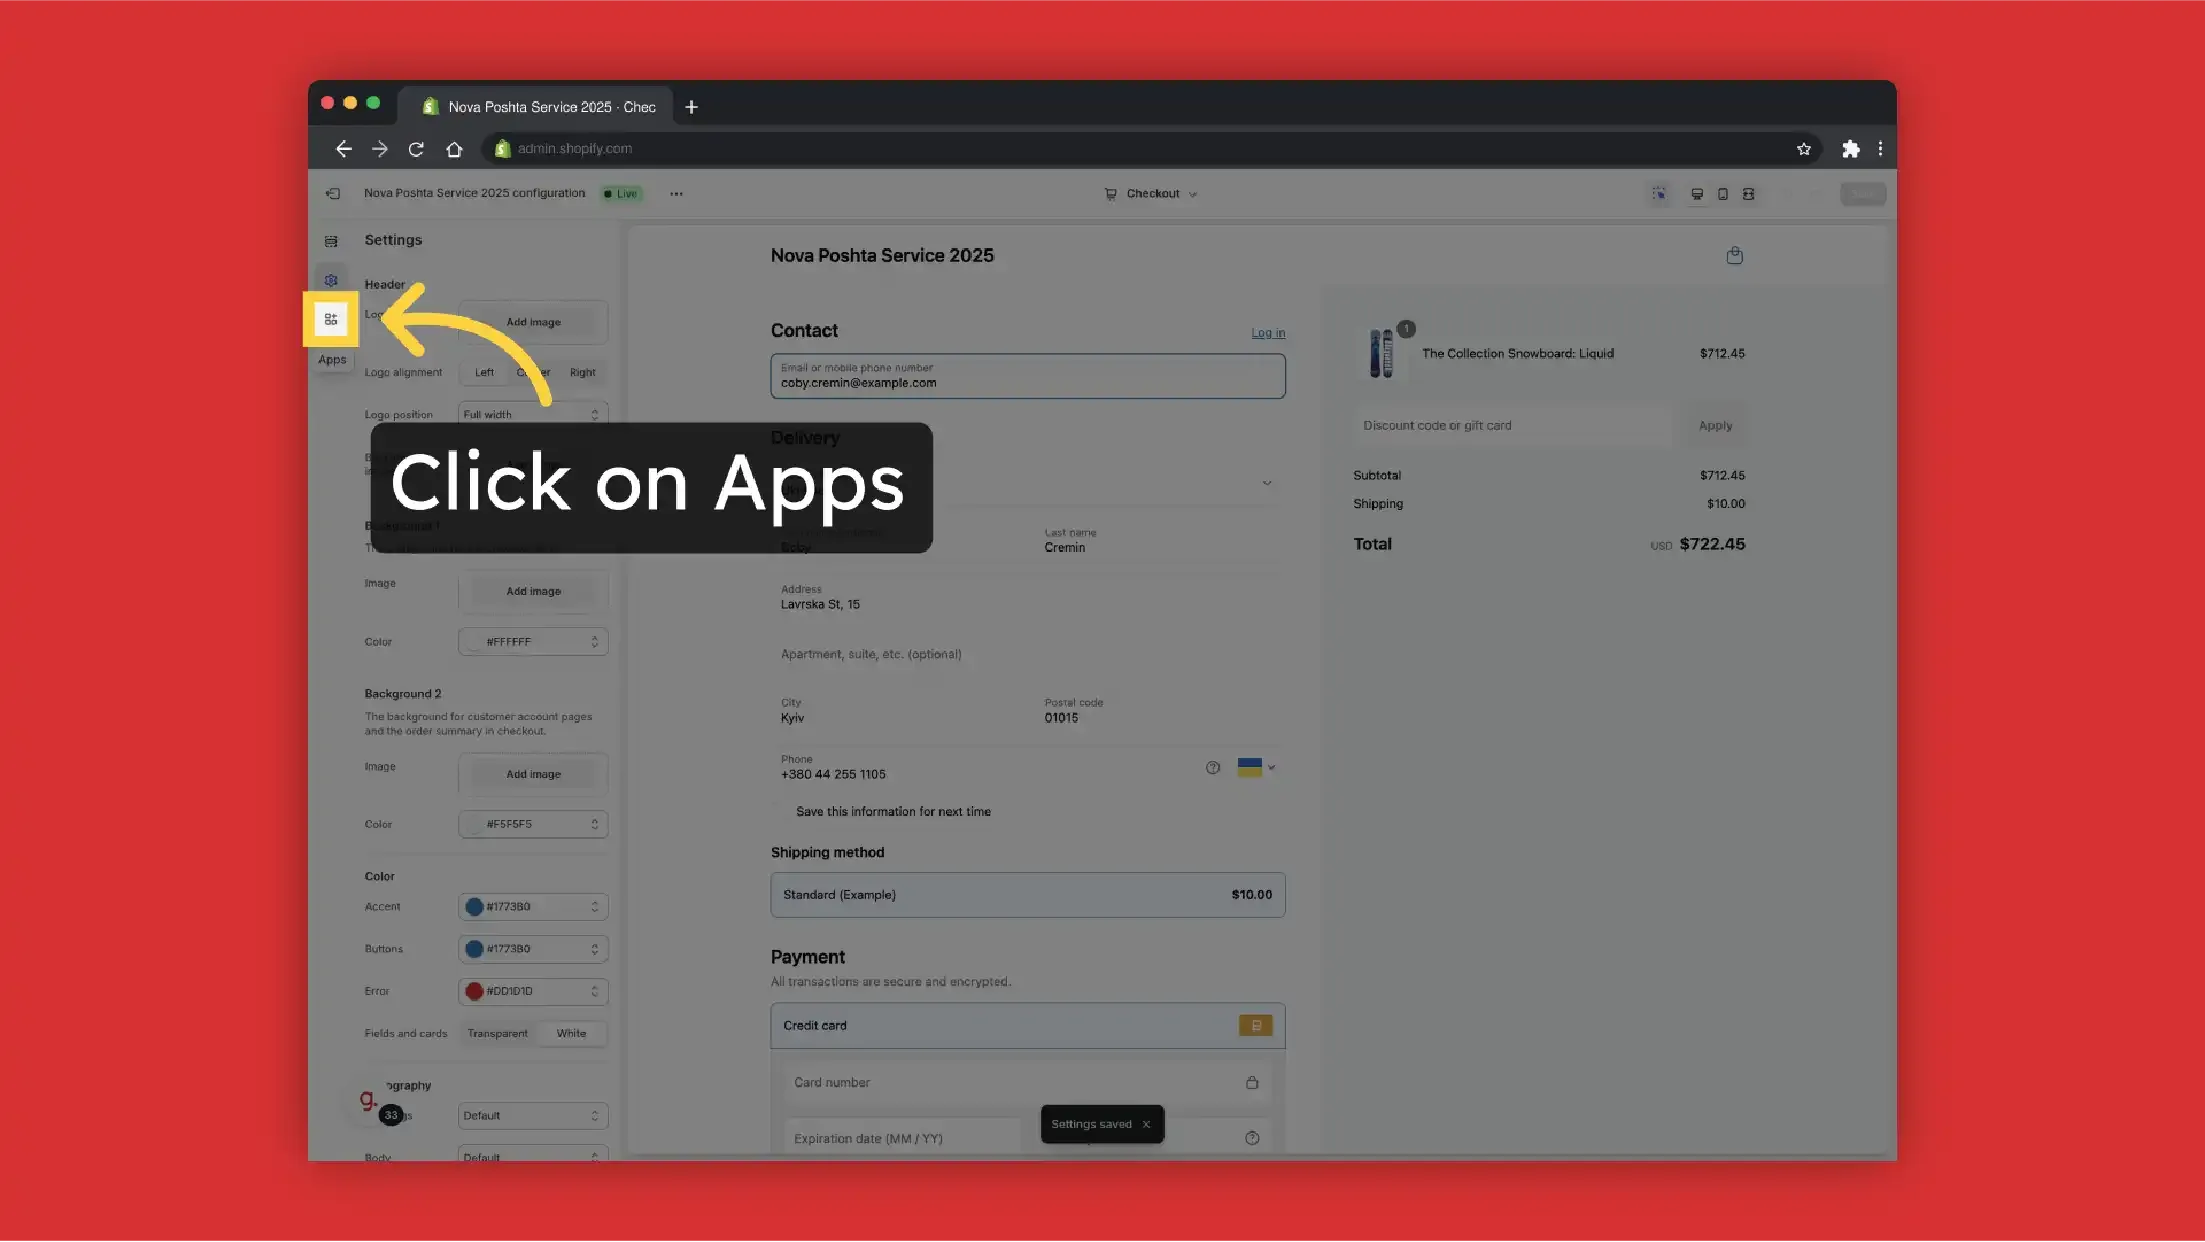
-
Click add
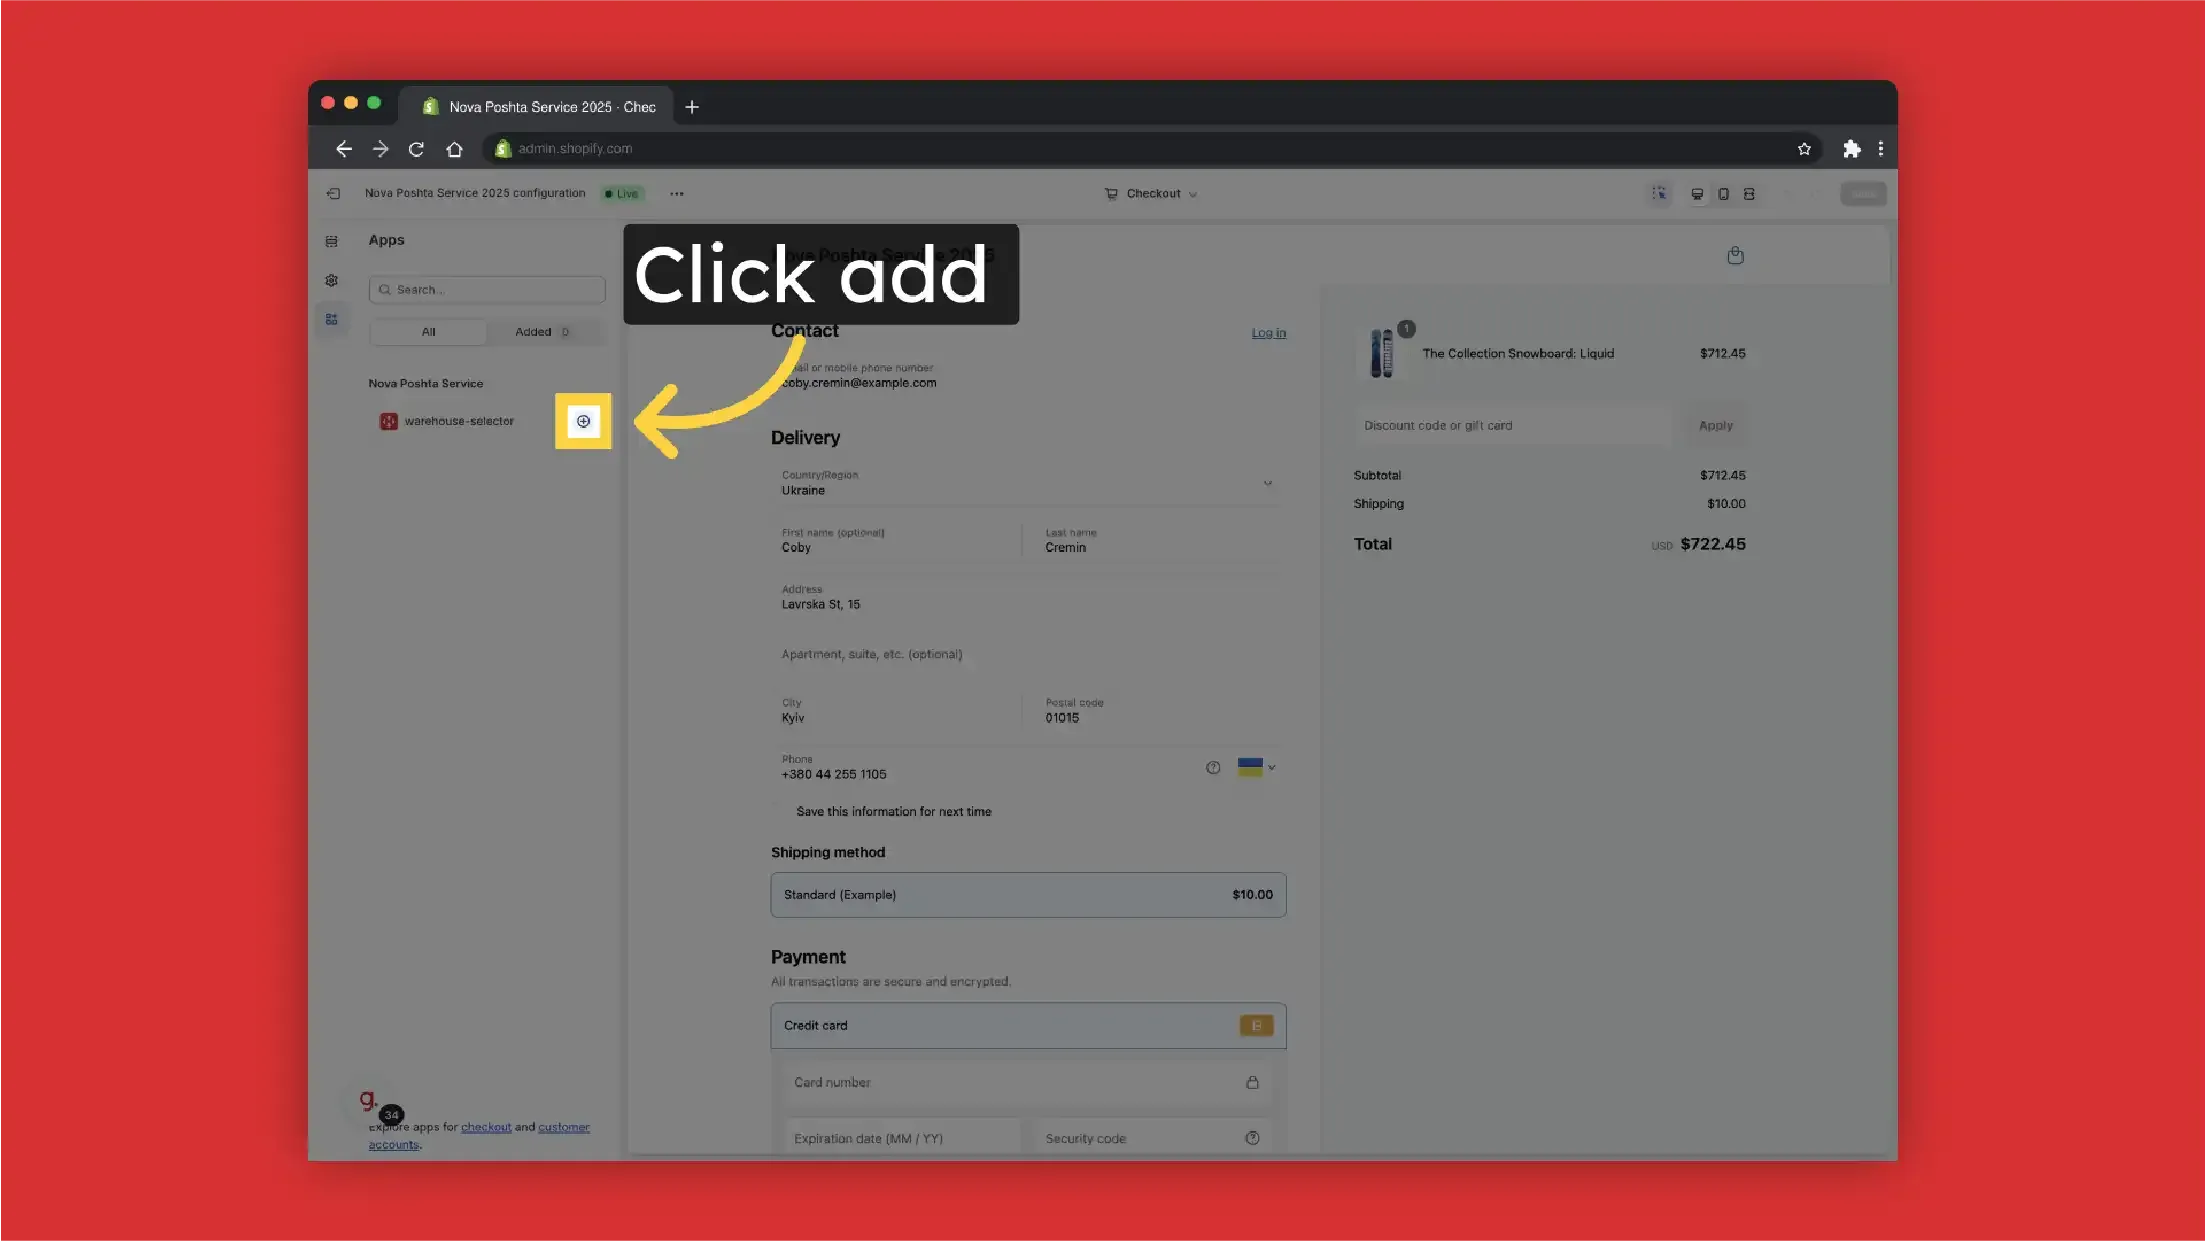
-
Select on what page you want to show the dropdown with Nova Poshta warehouses. We select "Thank you" Page but it also can be Order Status Page if needed
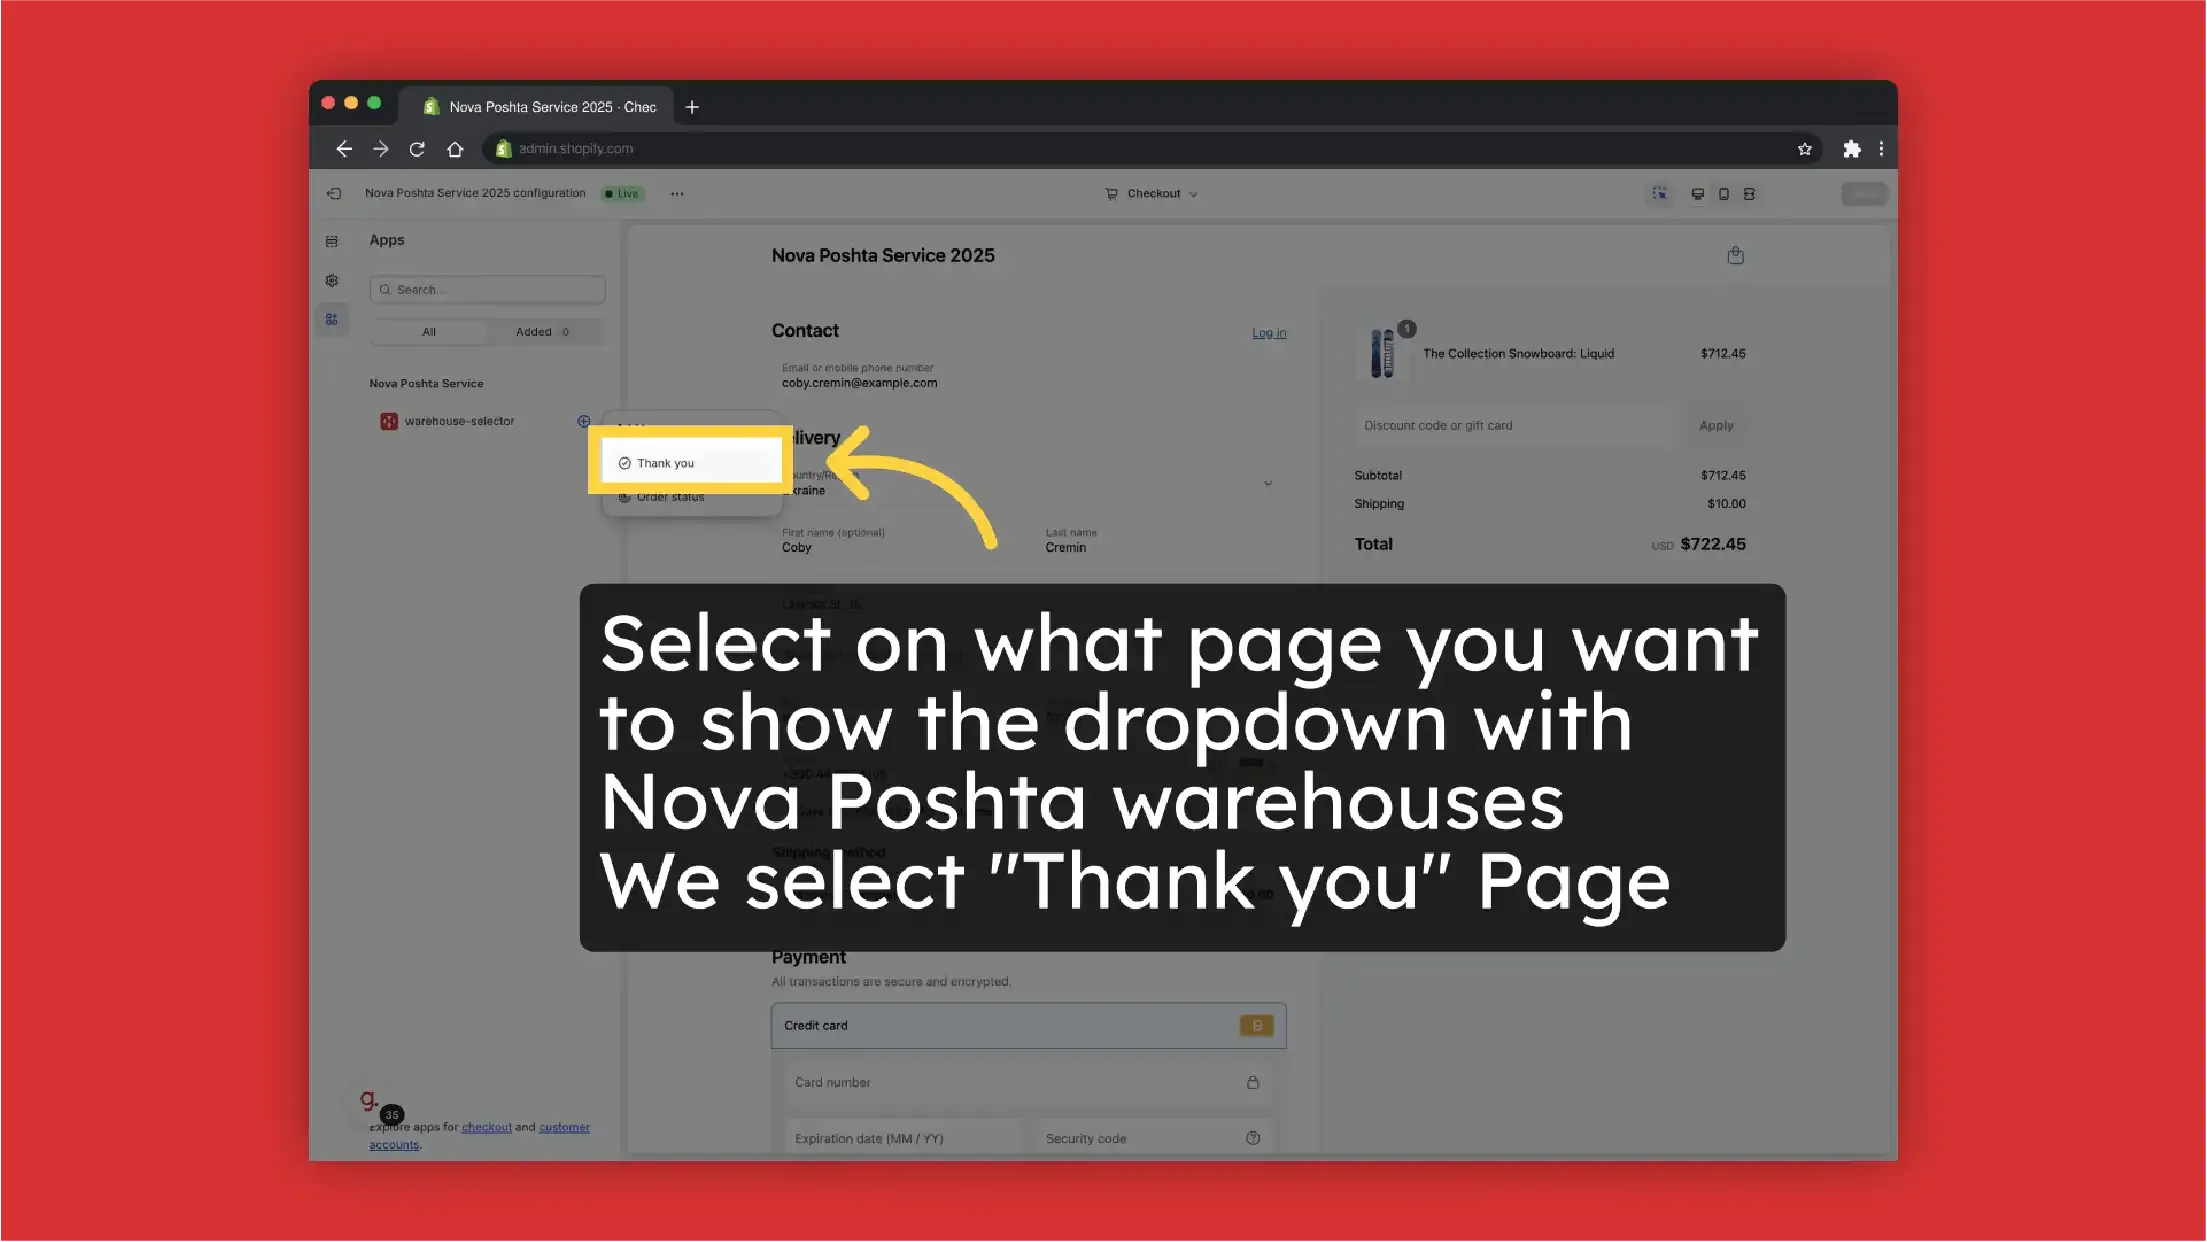
-
Save Changes
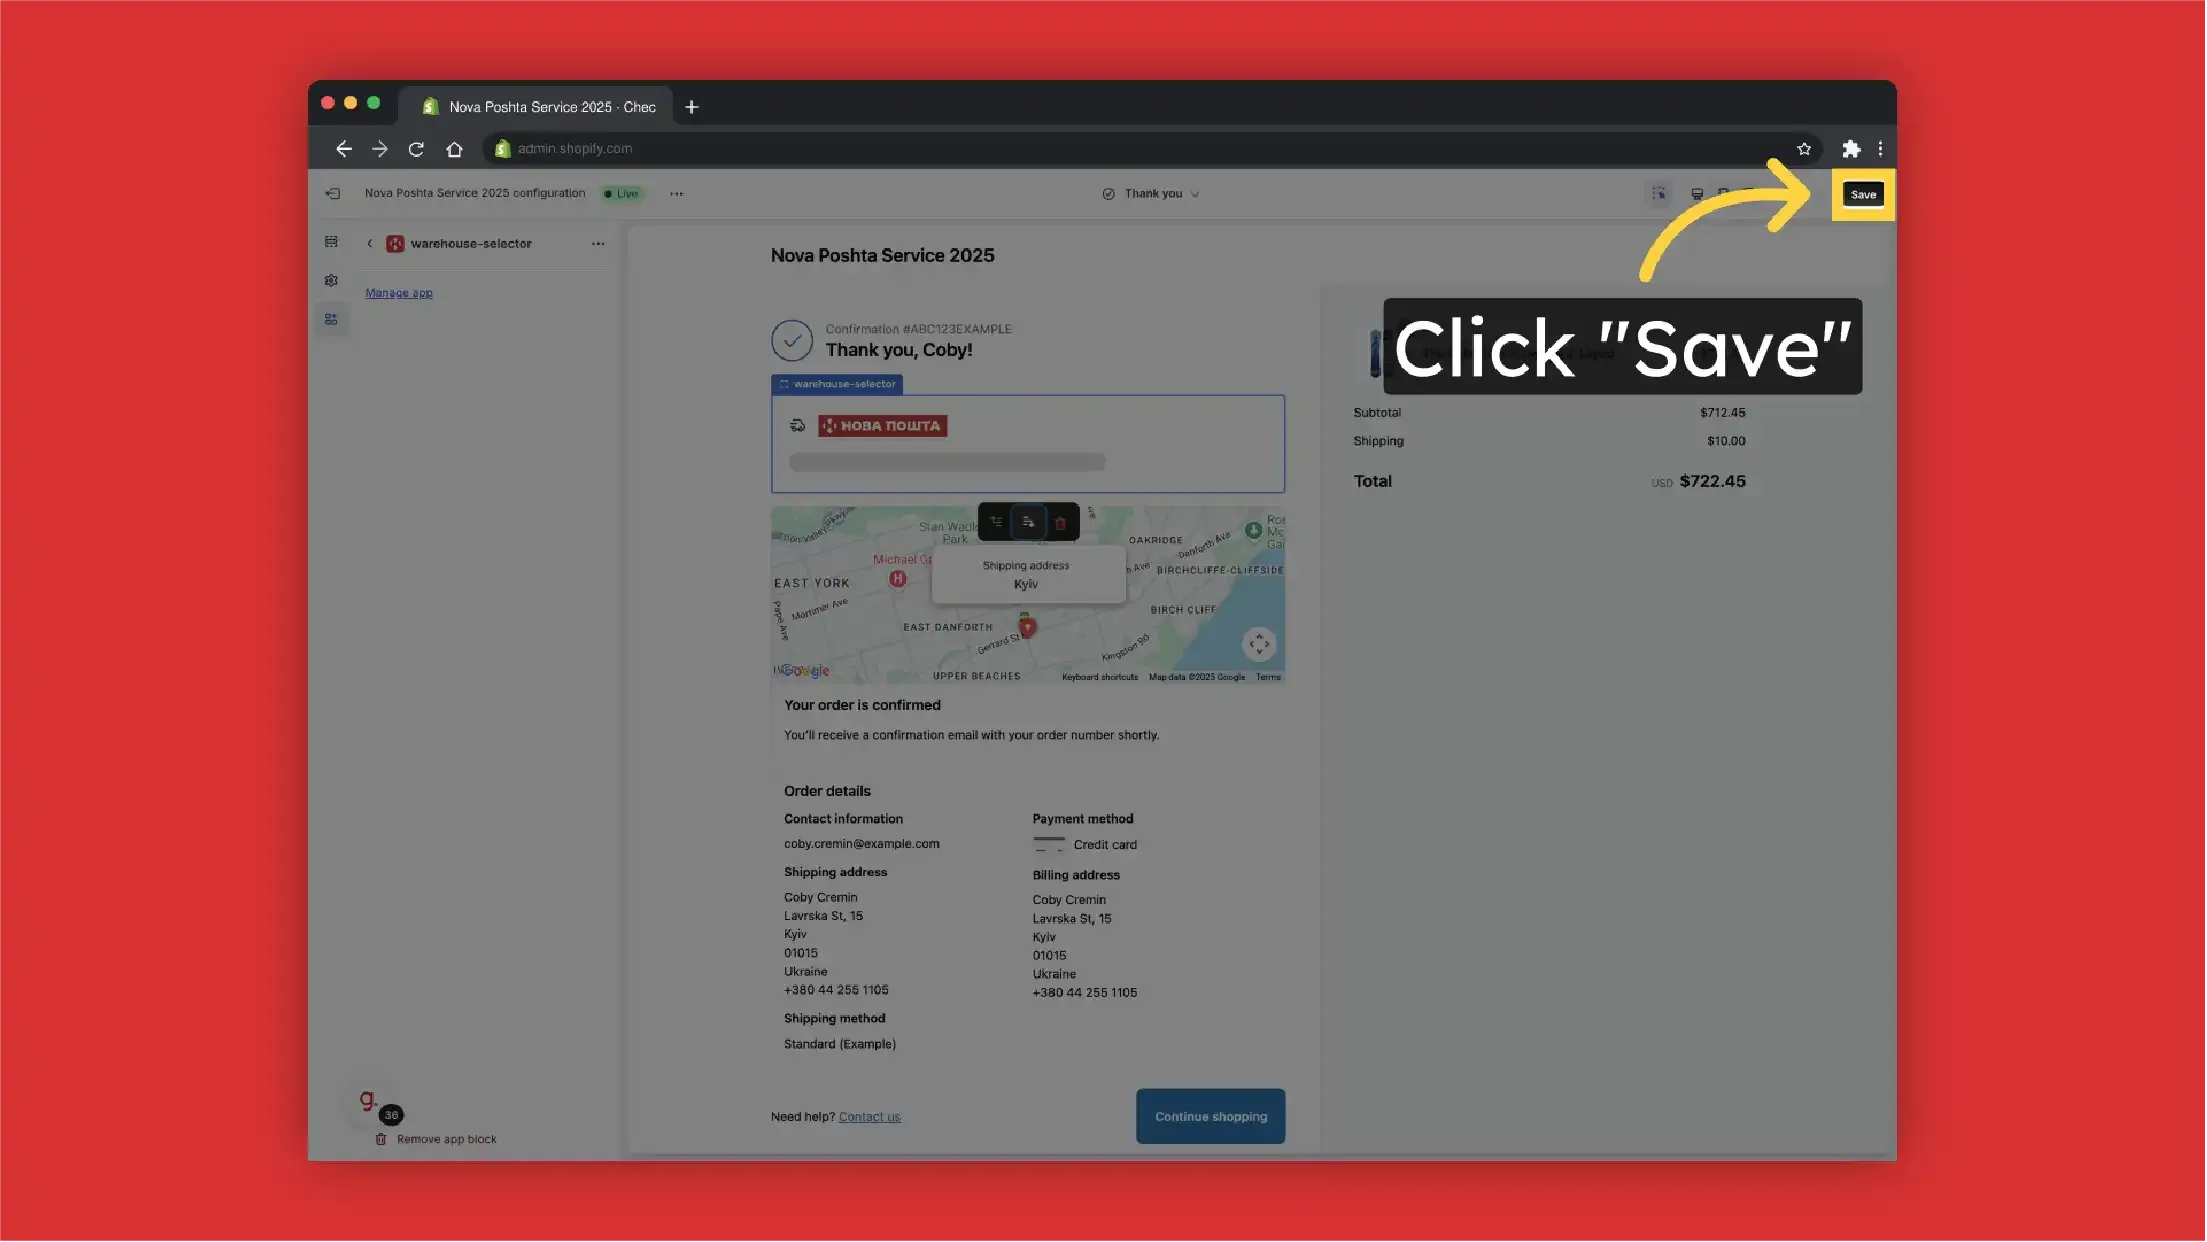
-
Go back
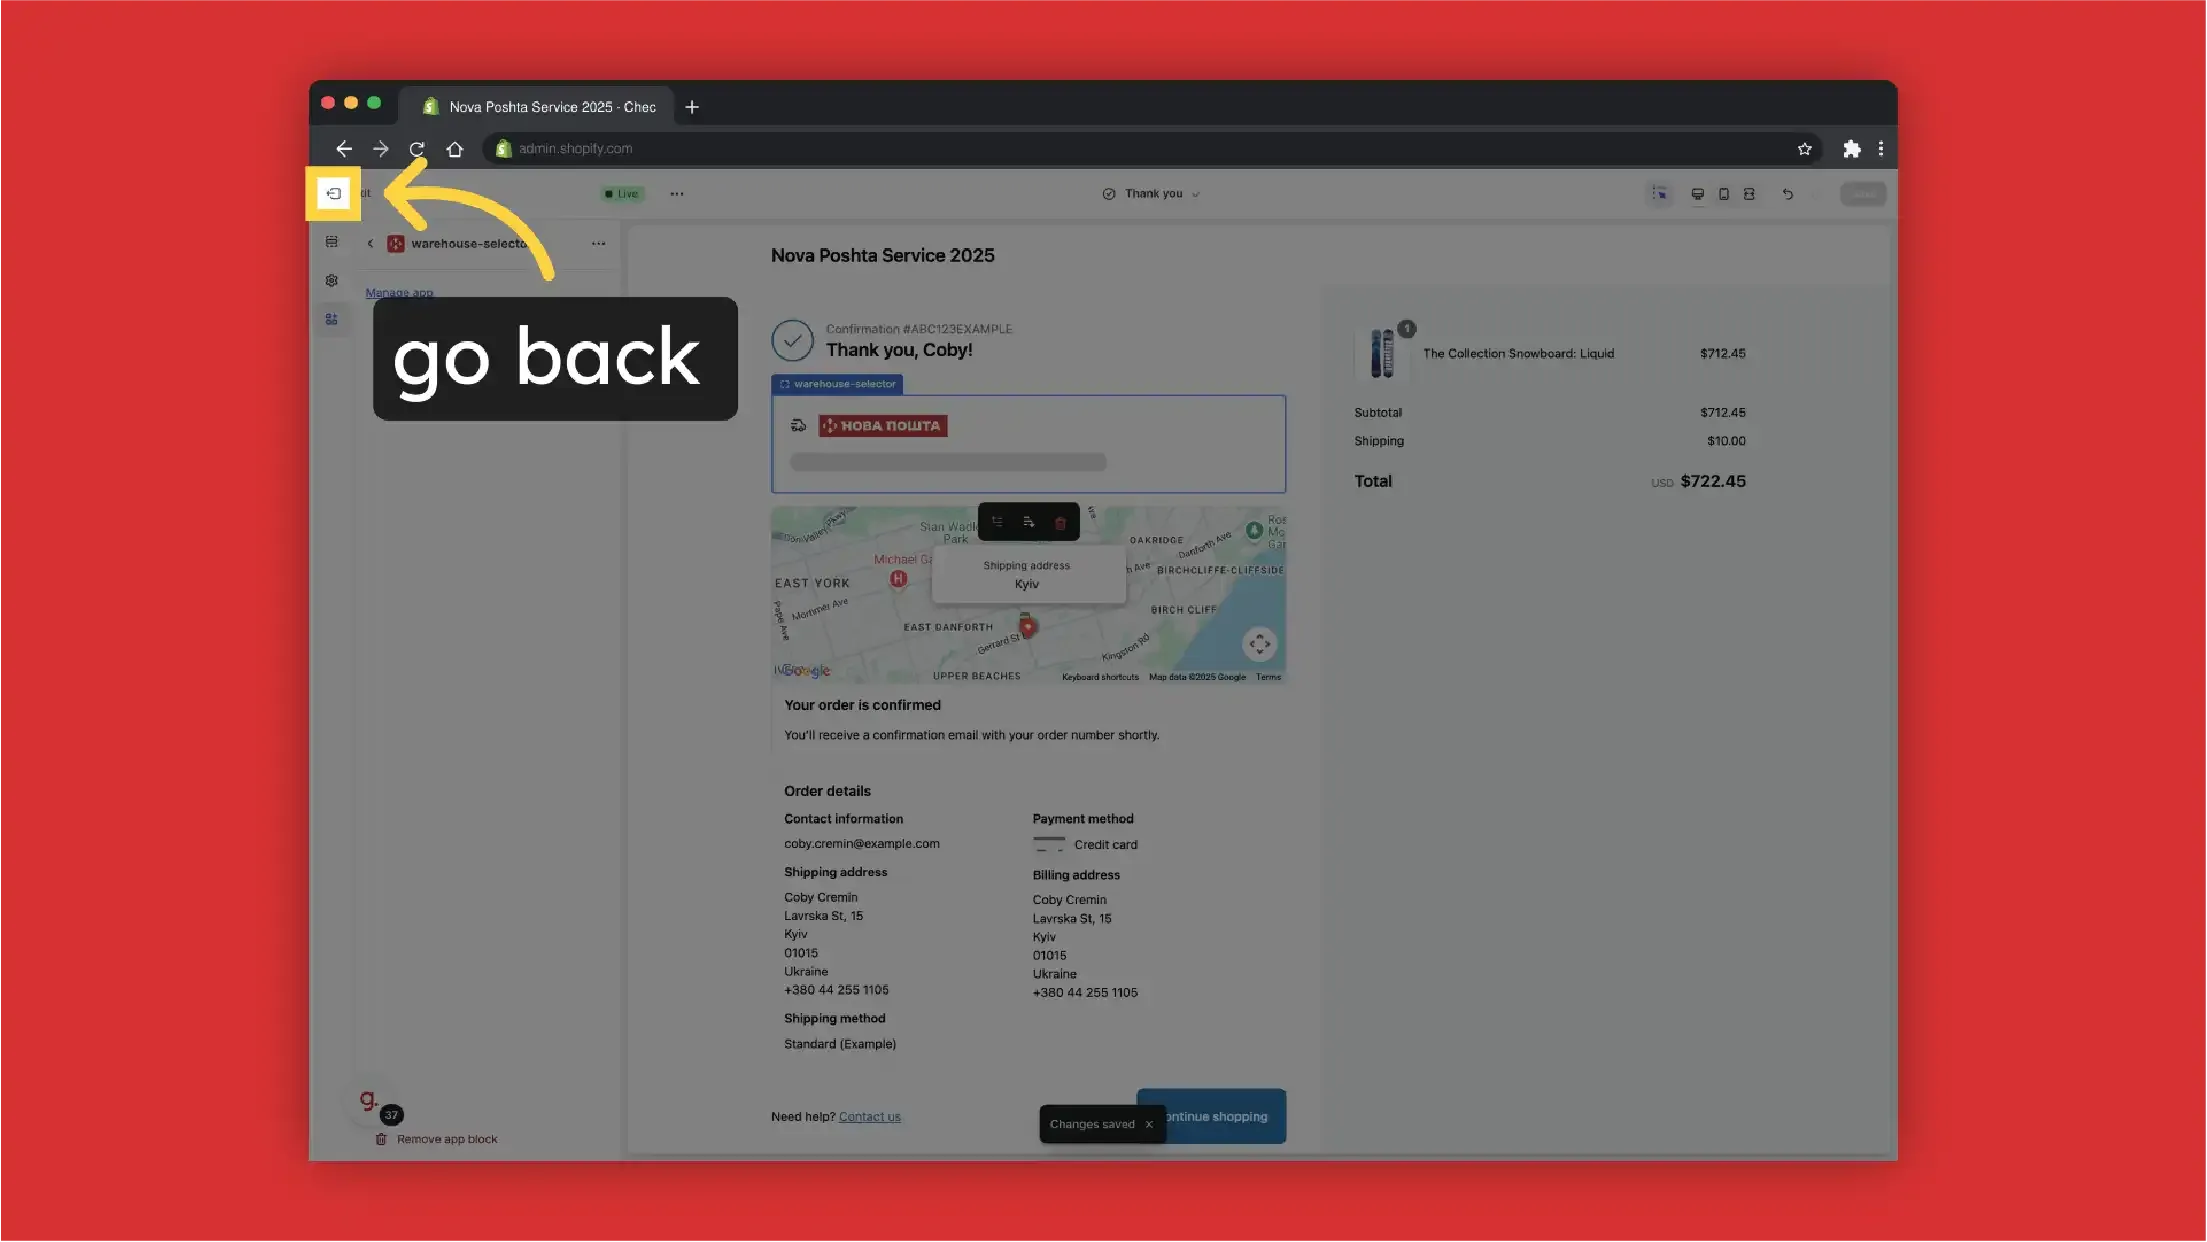
-
Now we need to set up Shipping rates manually (with activated CCS Nova Poshta rates are created automatically). Click "Shipping and delivery"
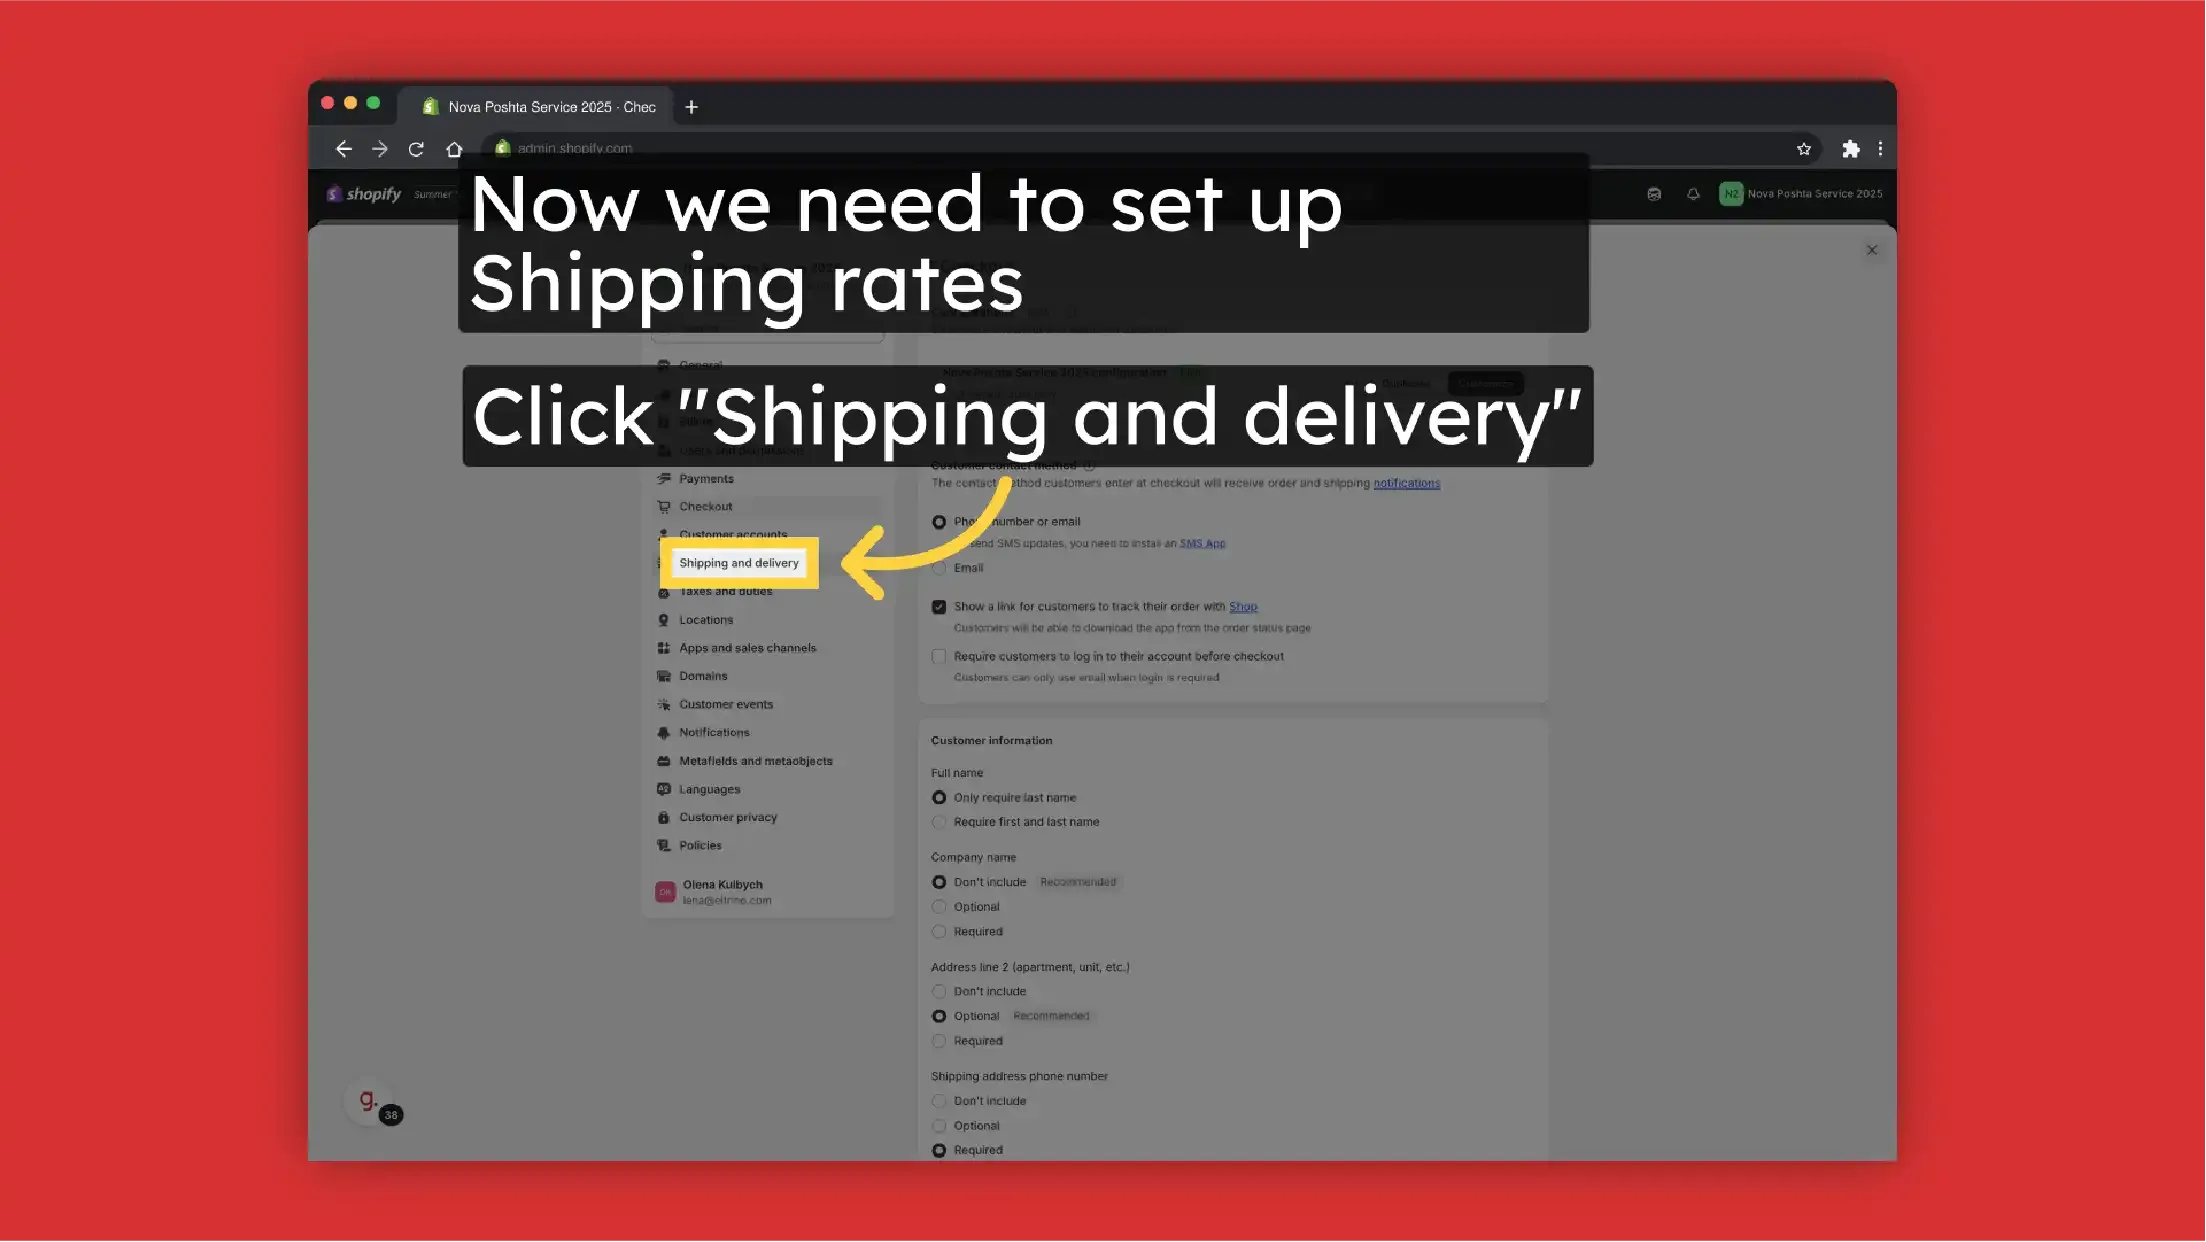
-
Select "General shipping rates"
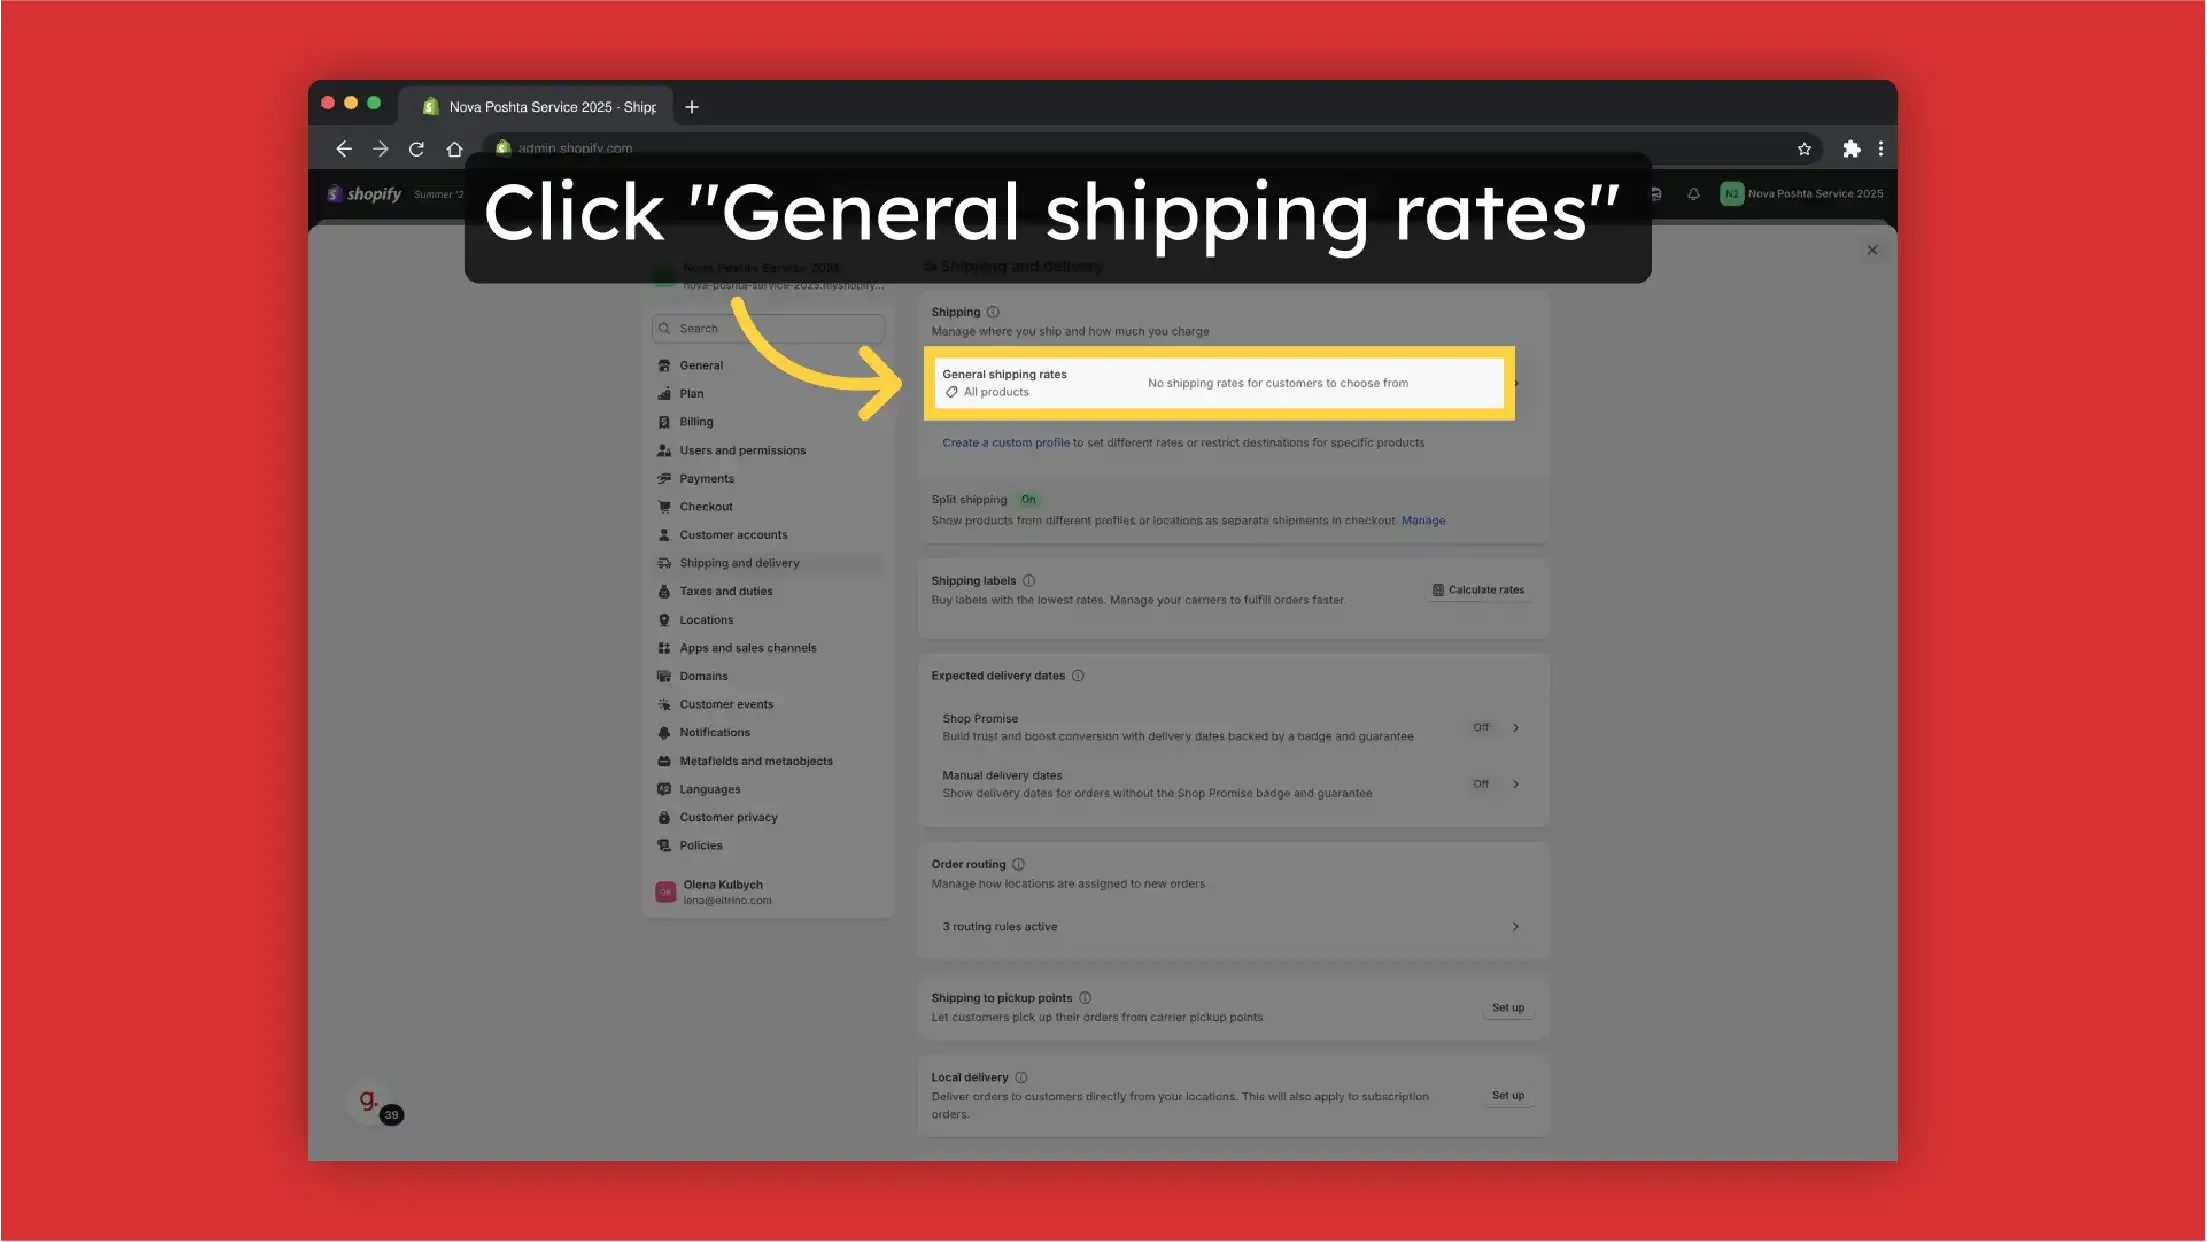
-
Click "Add rate"

-
Select Rate Type. In case without CCS activation, we can select just "Use flat rate"

-
Click on "Custom rate name"
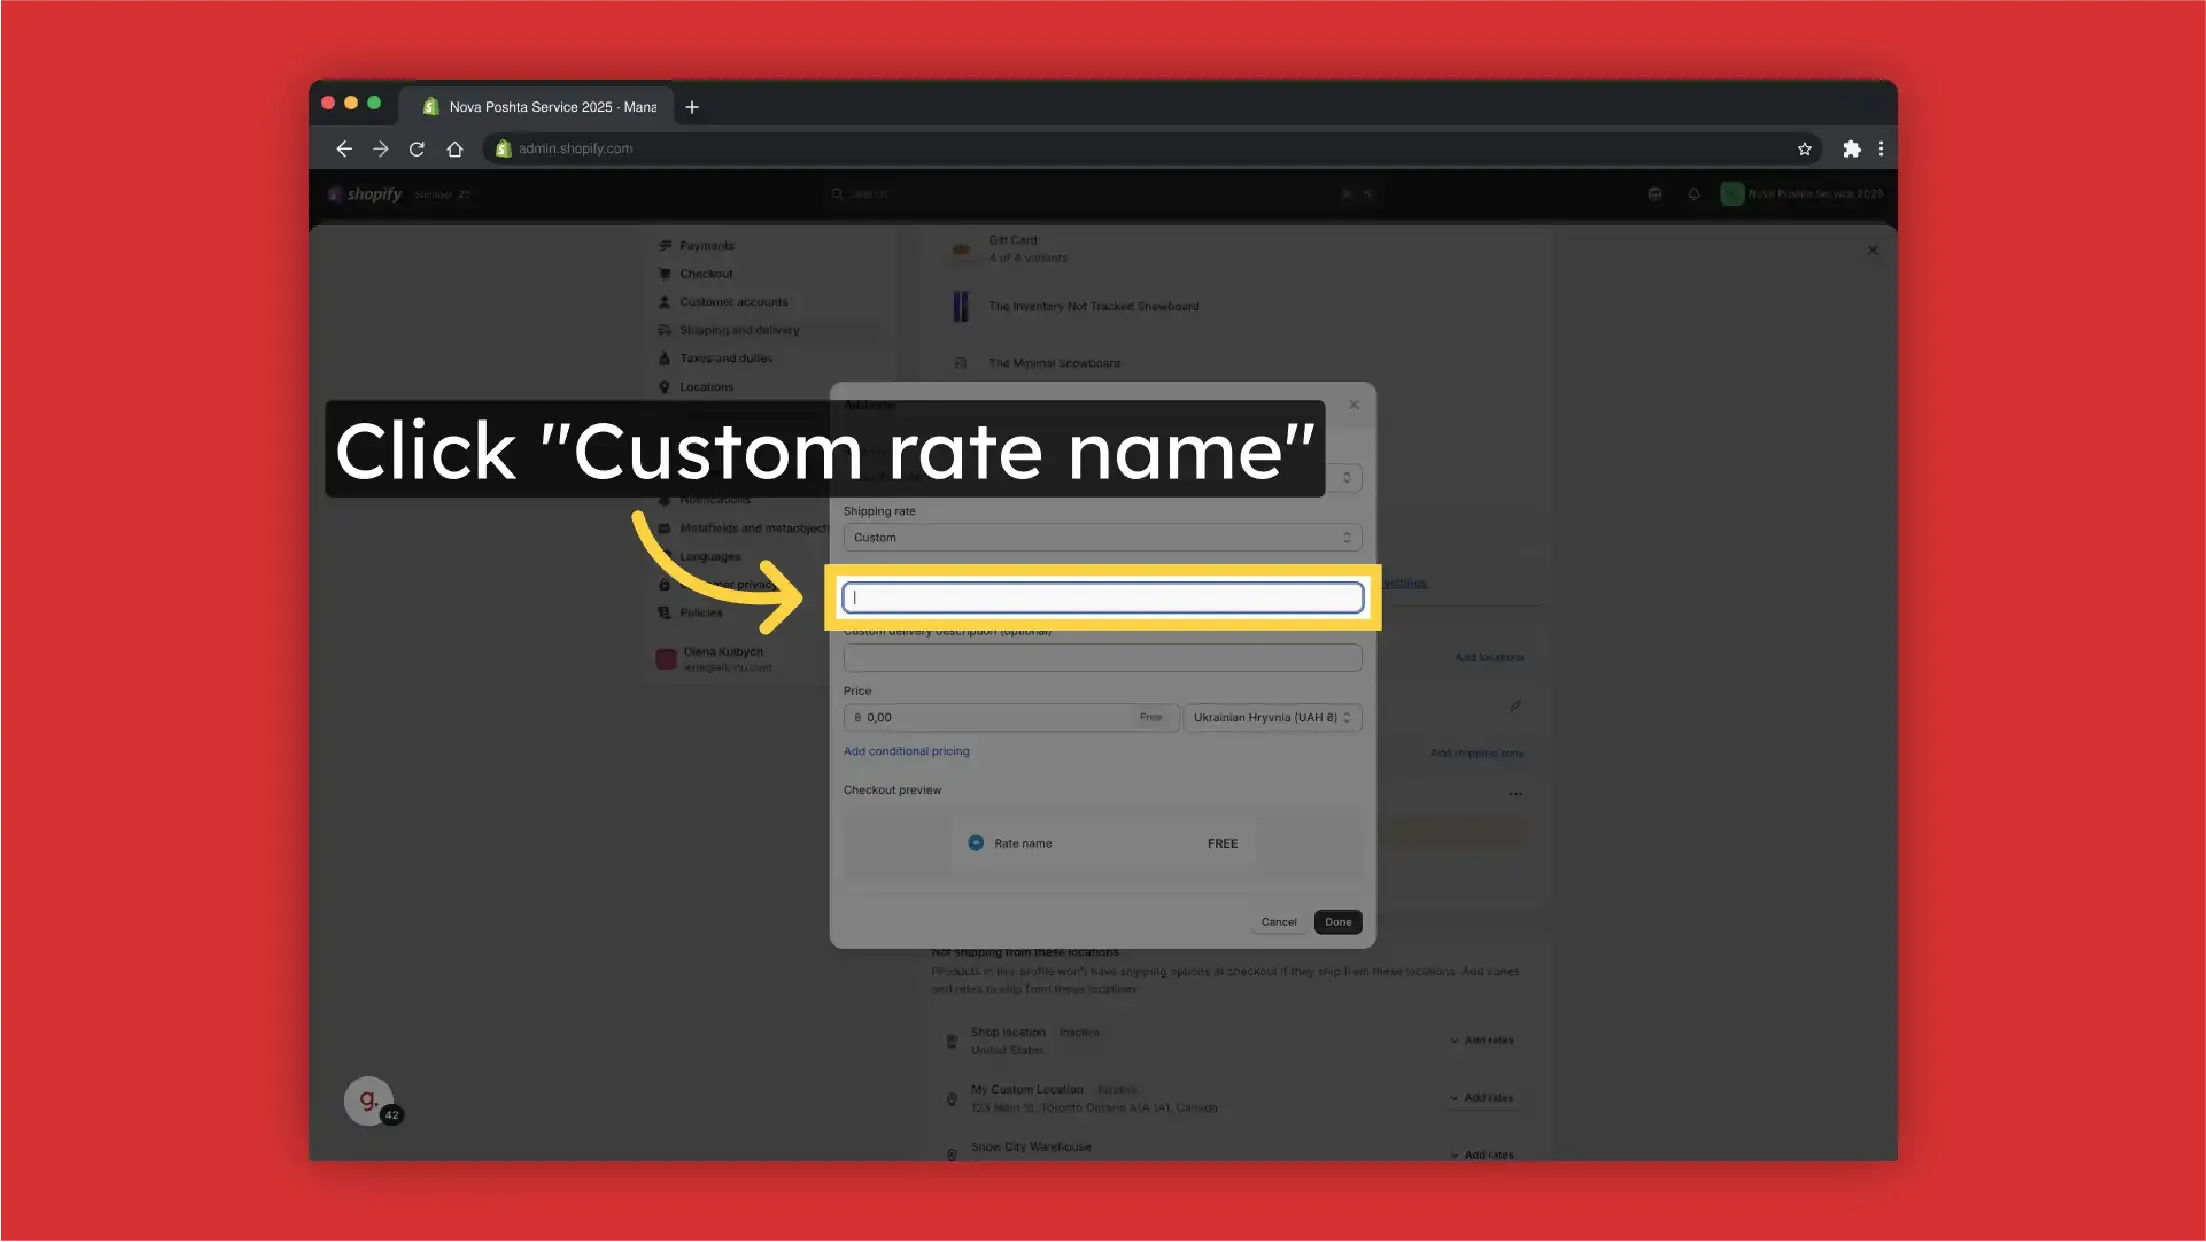
-
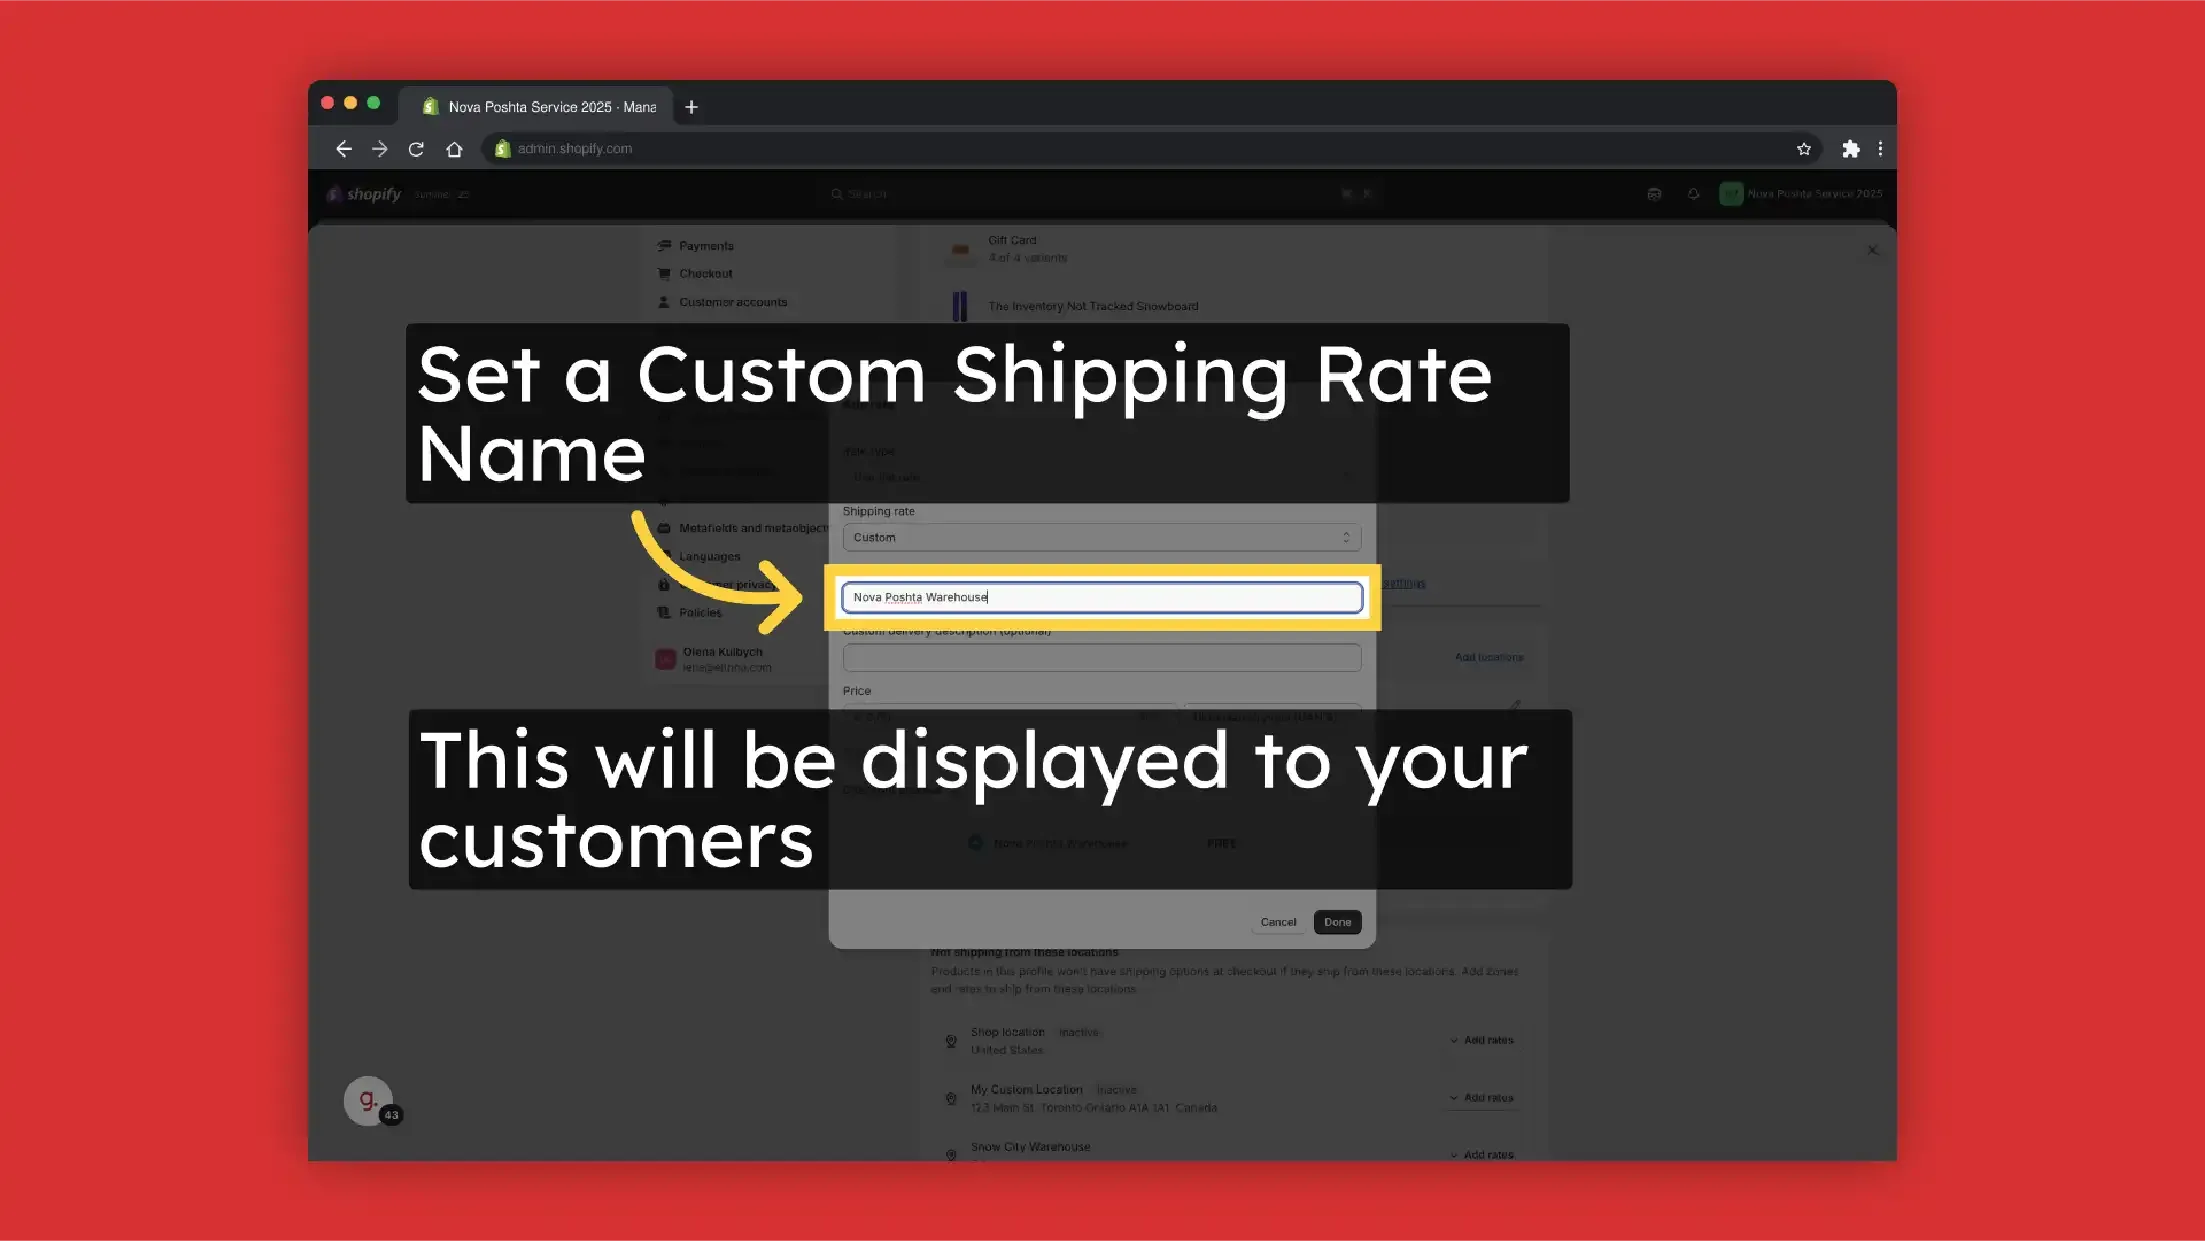
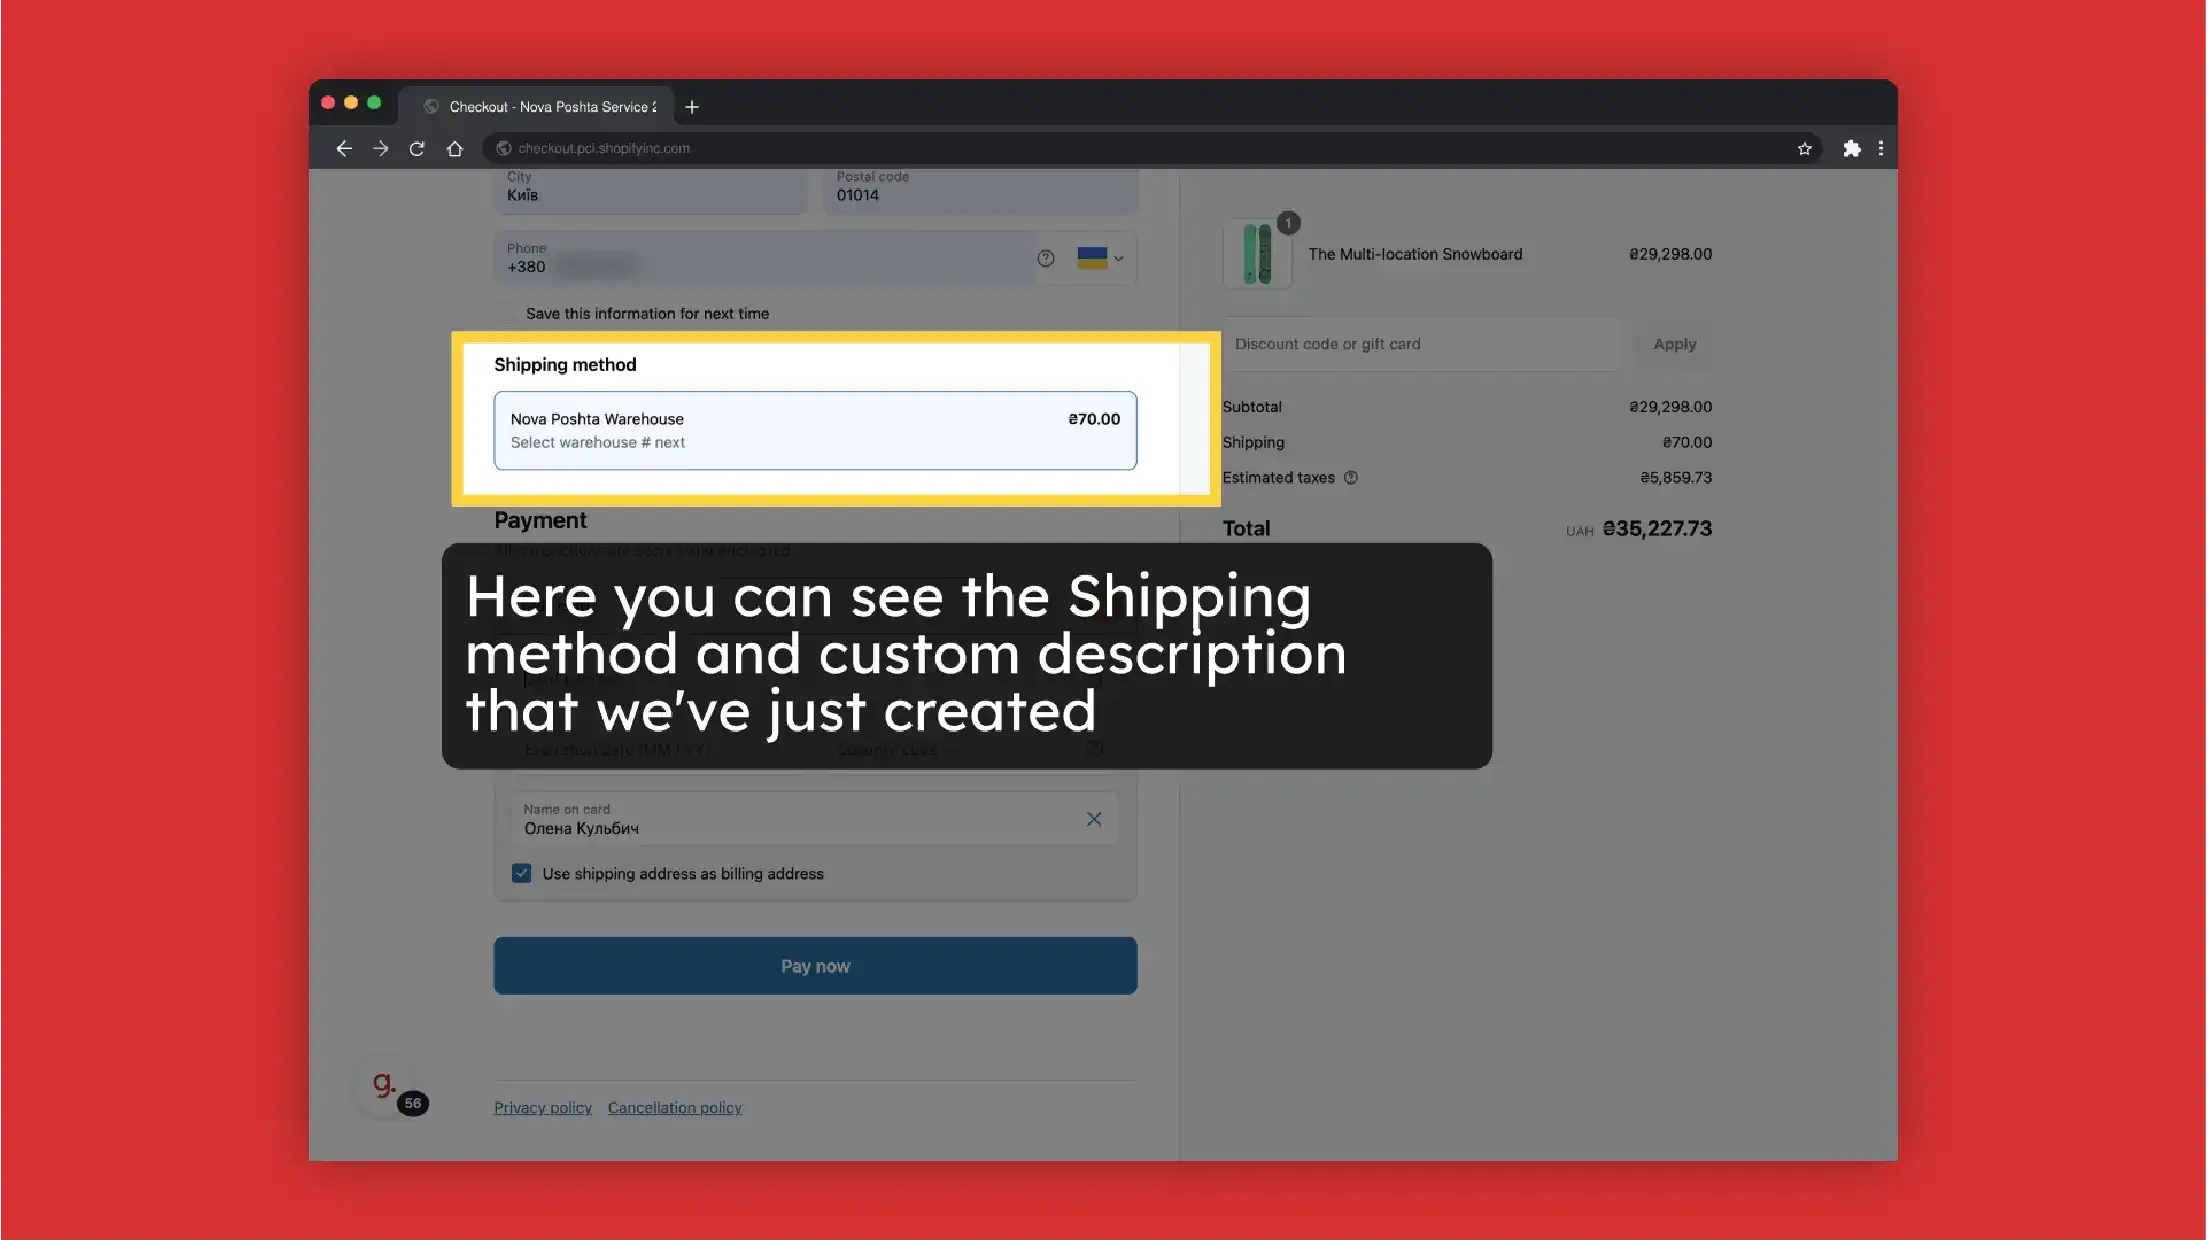
Set a Custom Shipping Rate Name. This will be displayed to your customers
-
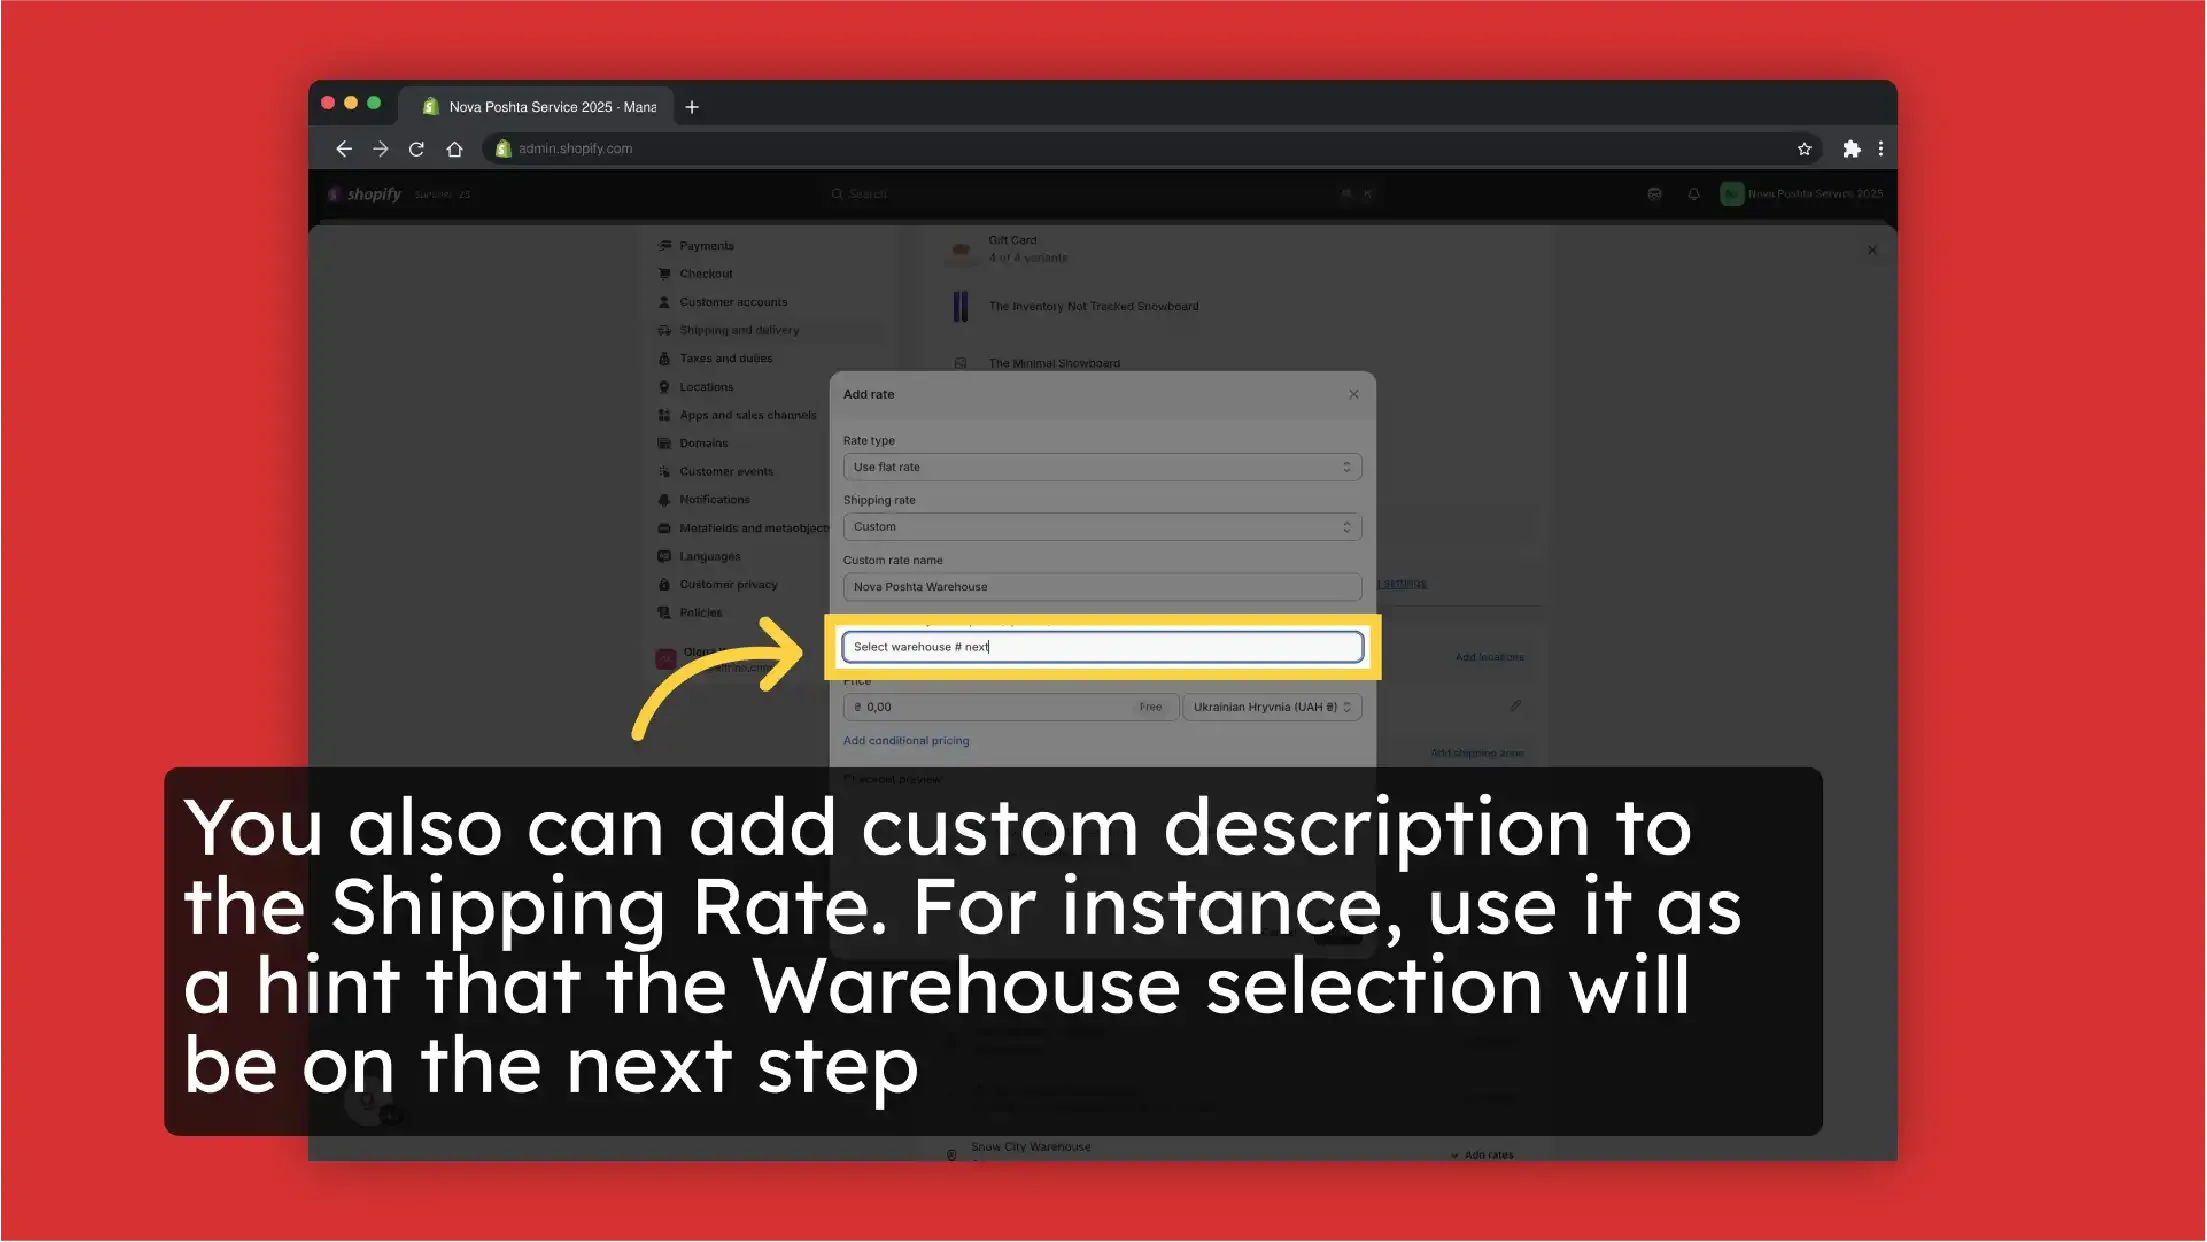
You also can add custom description to the Shipping Rate. For instance, use it as a hint that the Warehouse selection will be on the next step
-
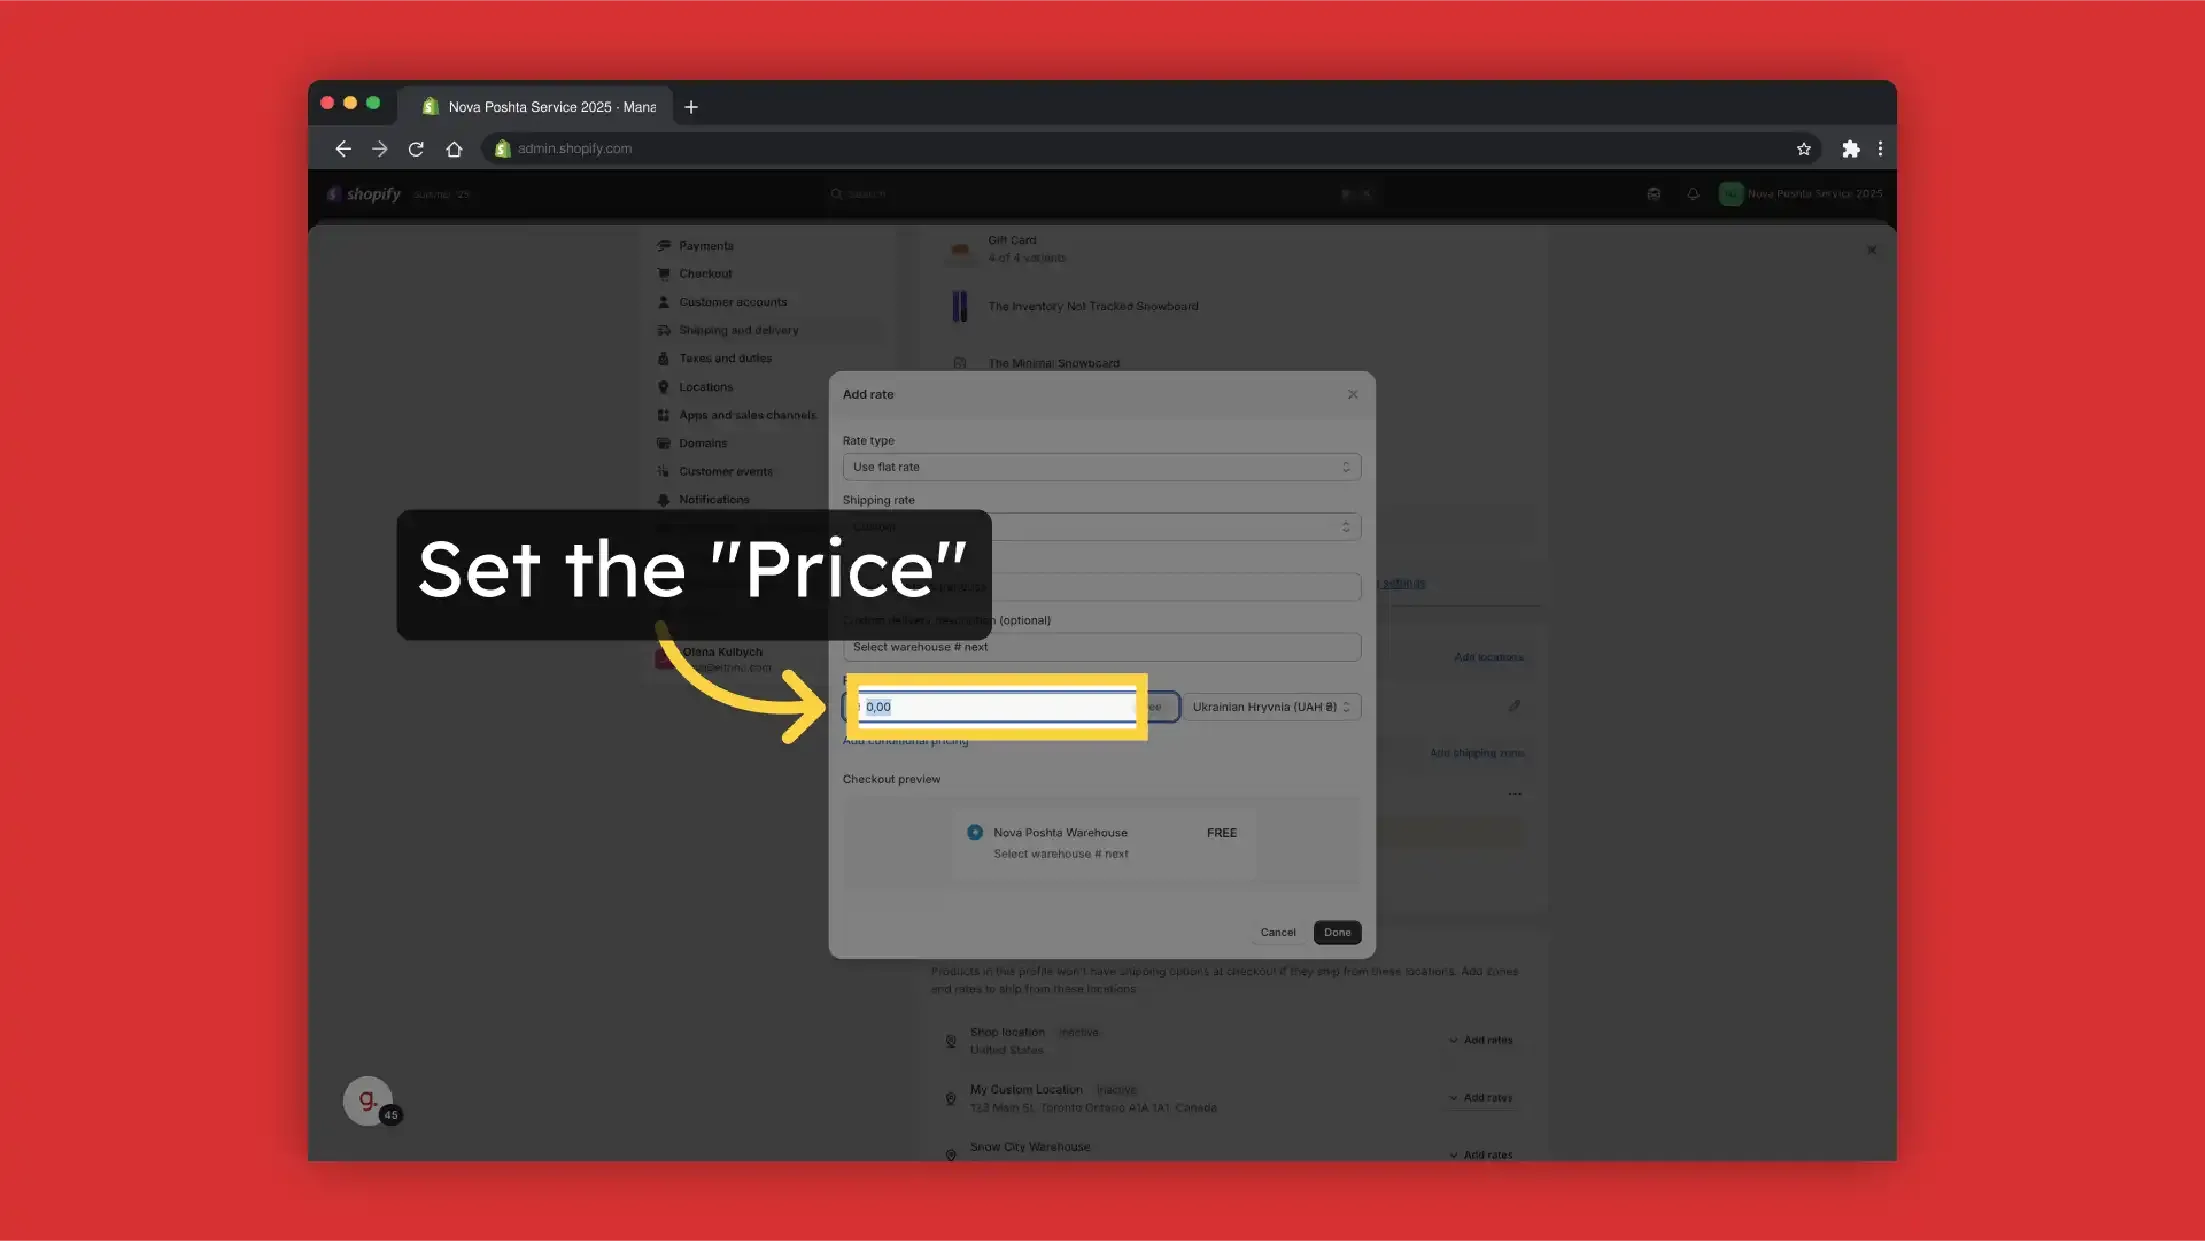
Set the "Price"
-
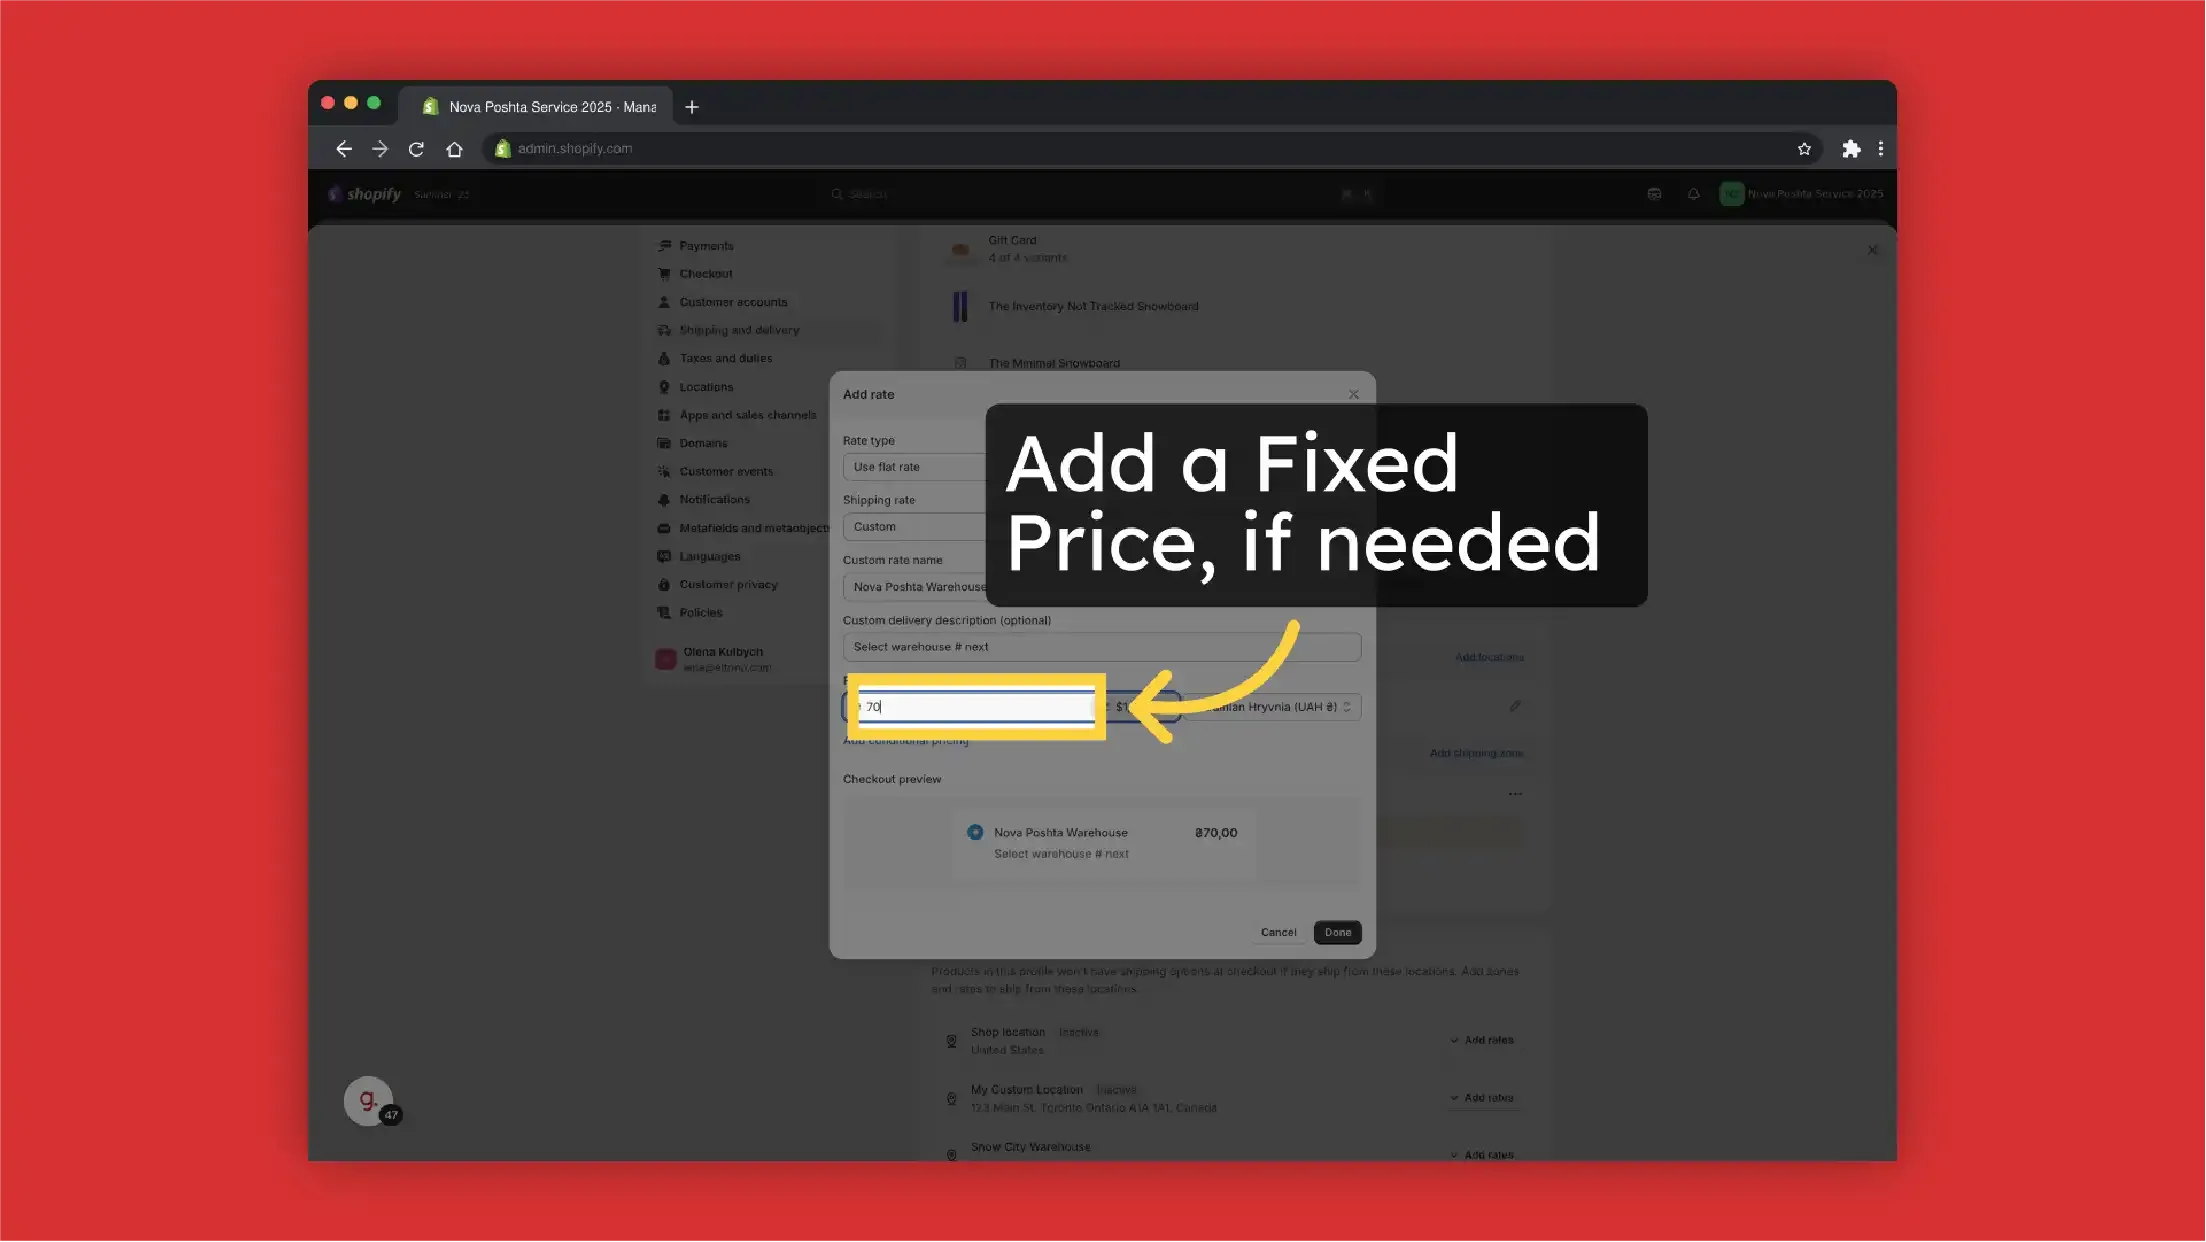
Add a Fixed Price, if needed
-
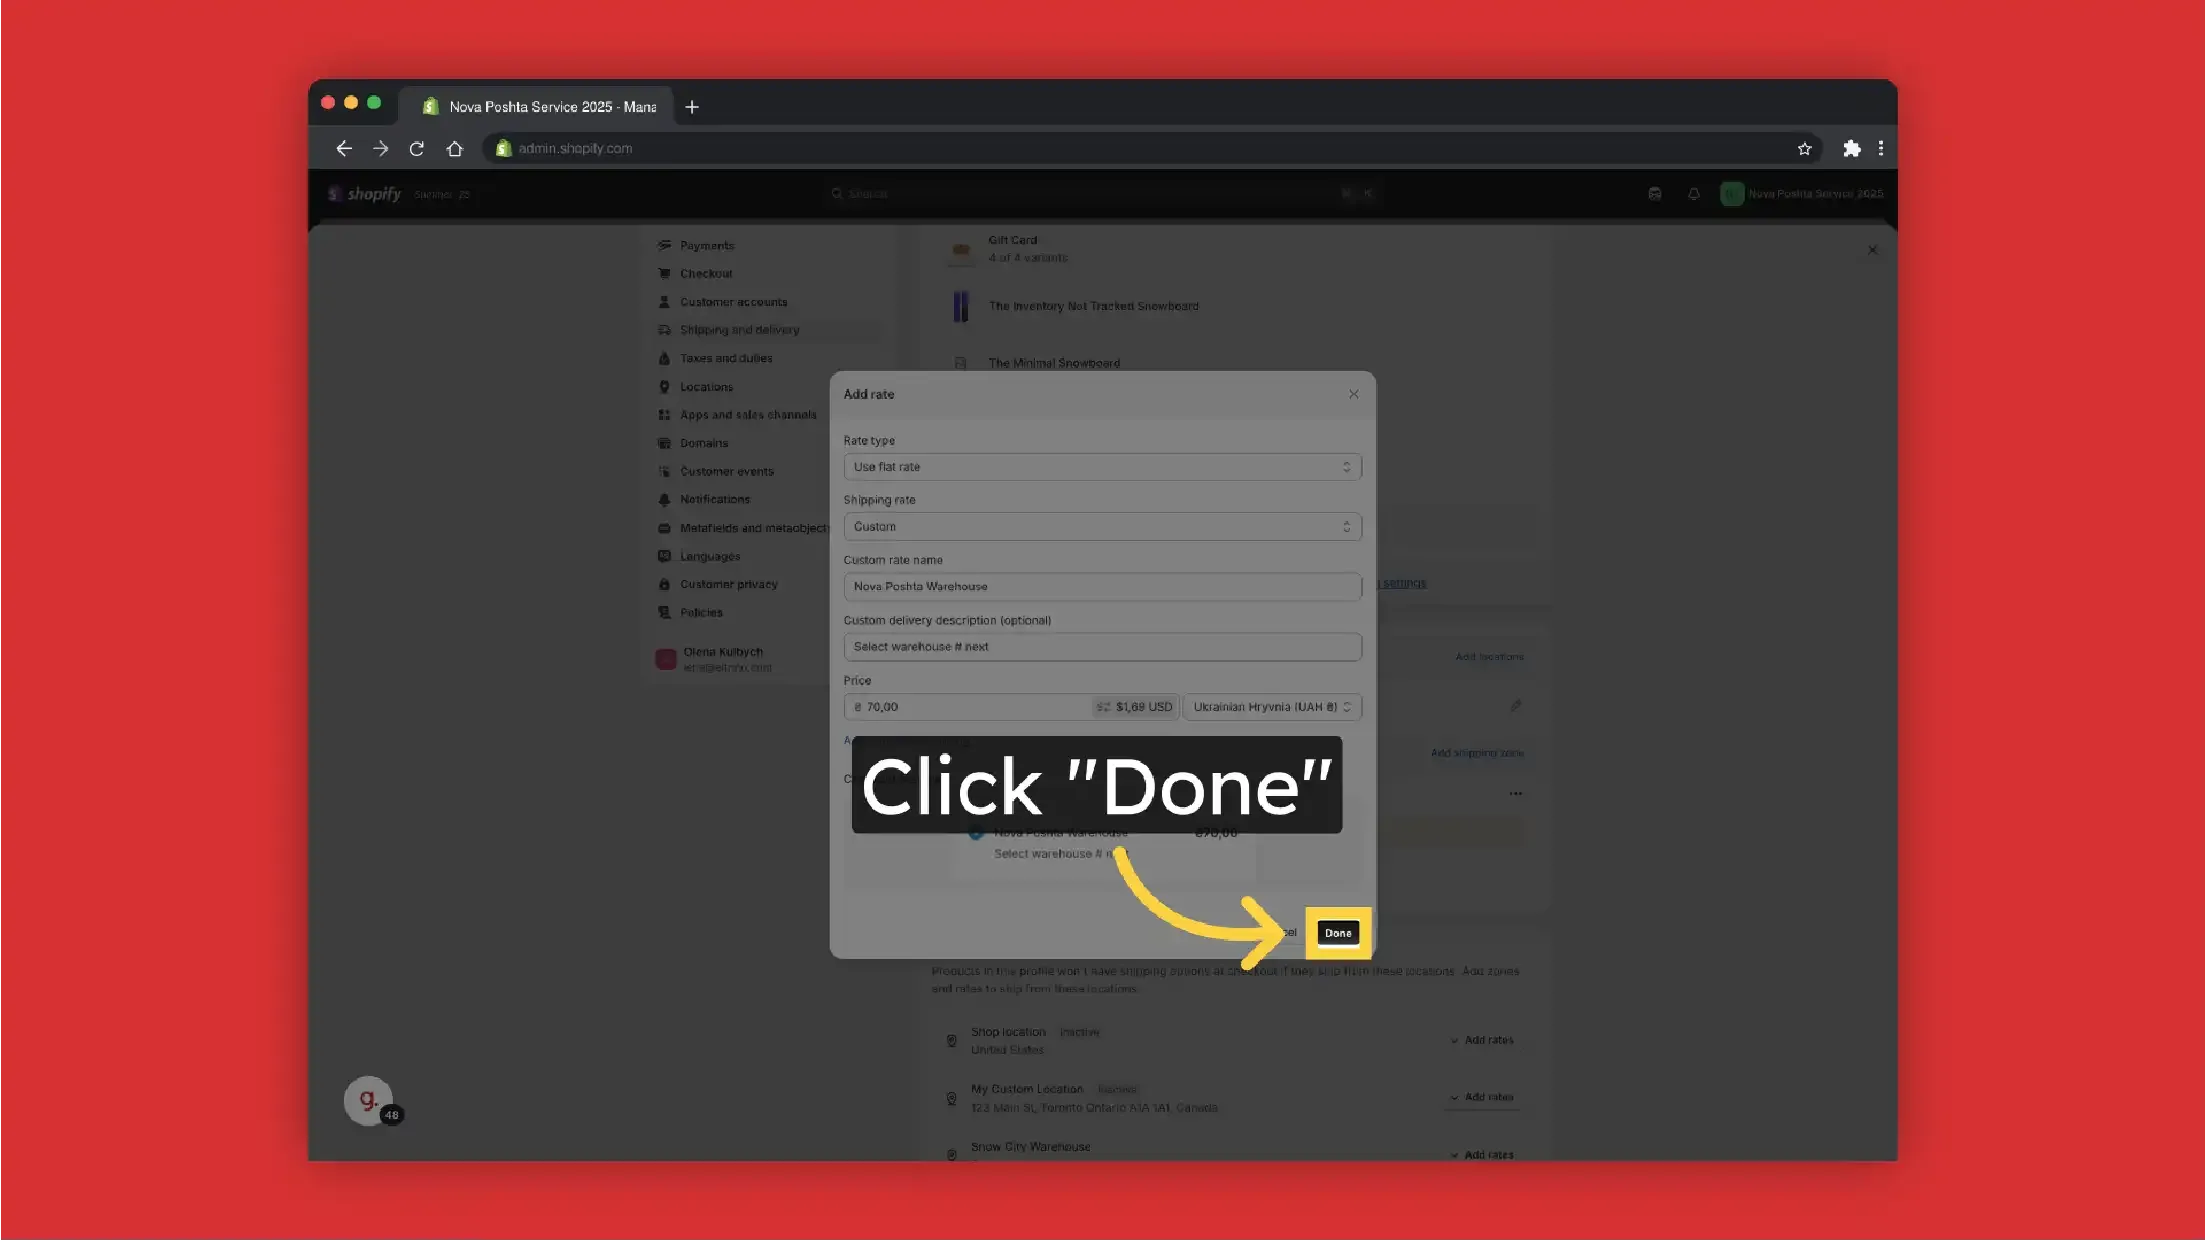
Click "Done"
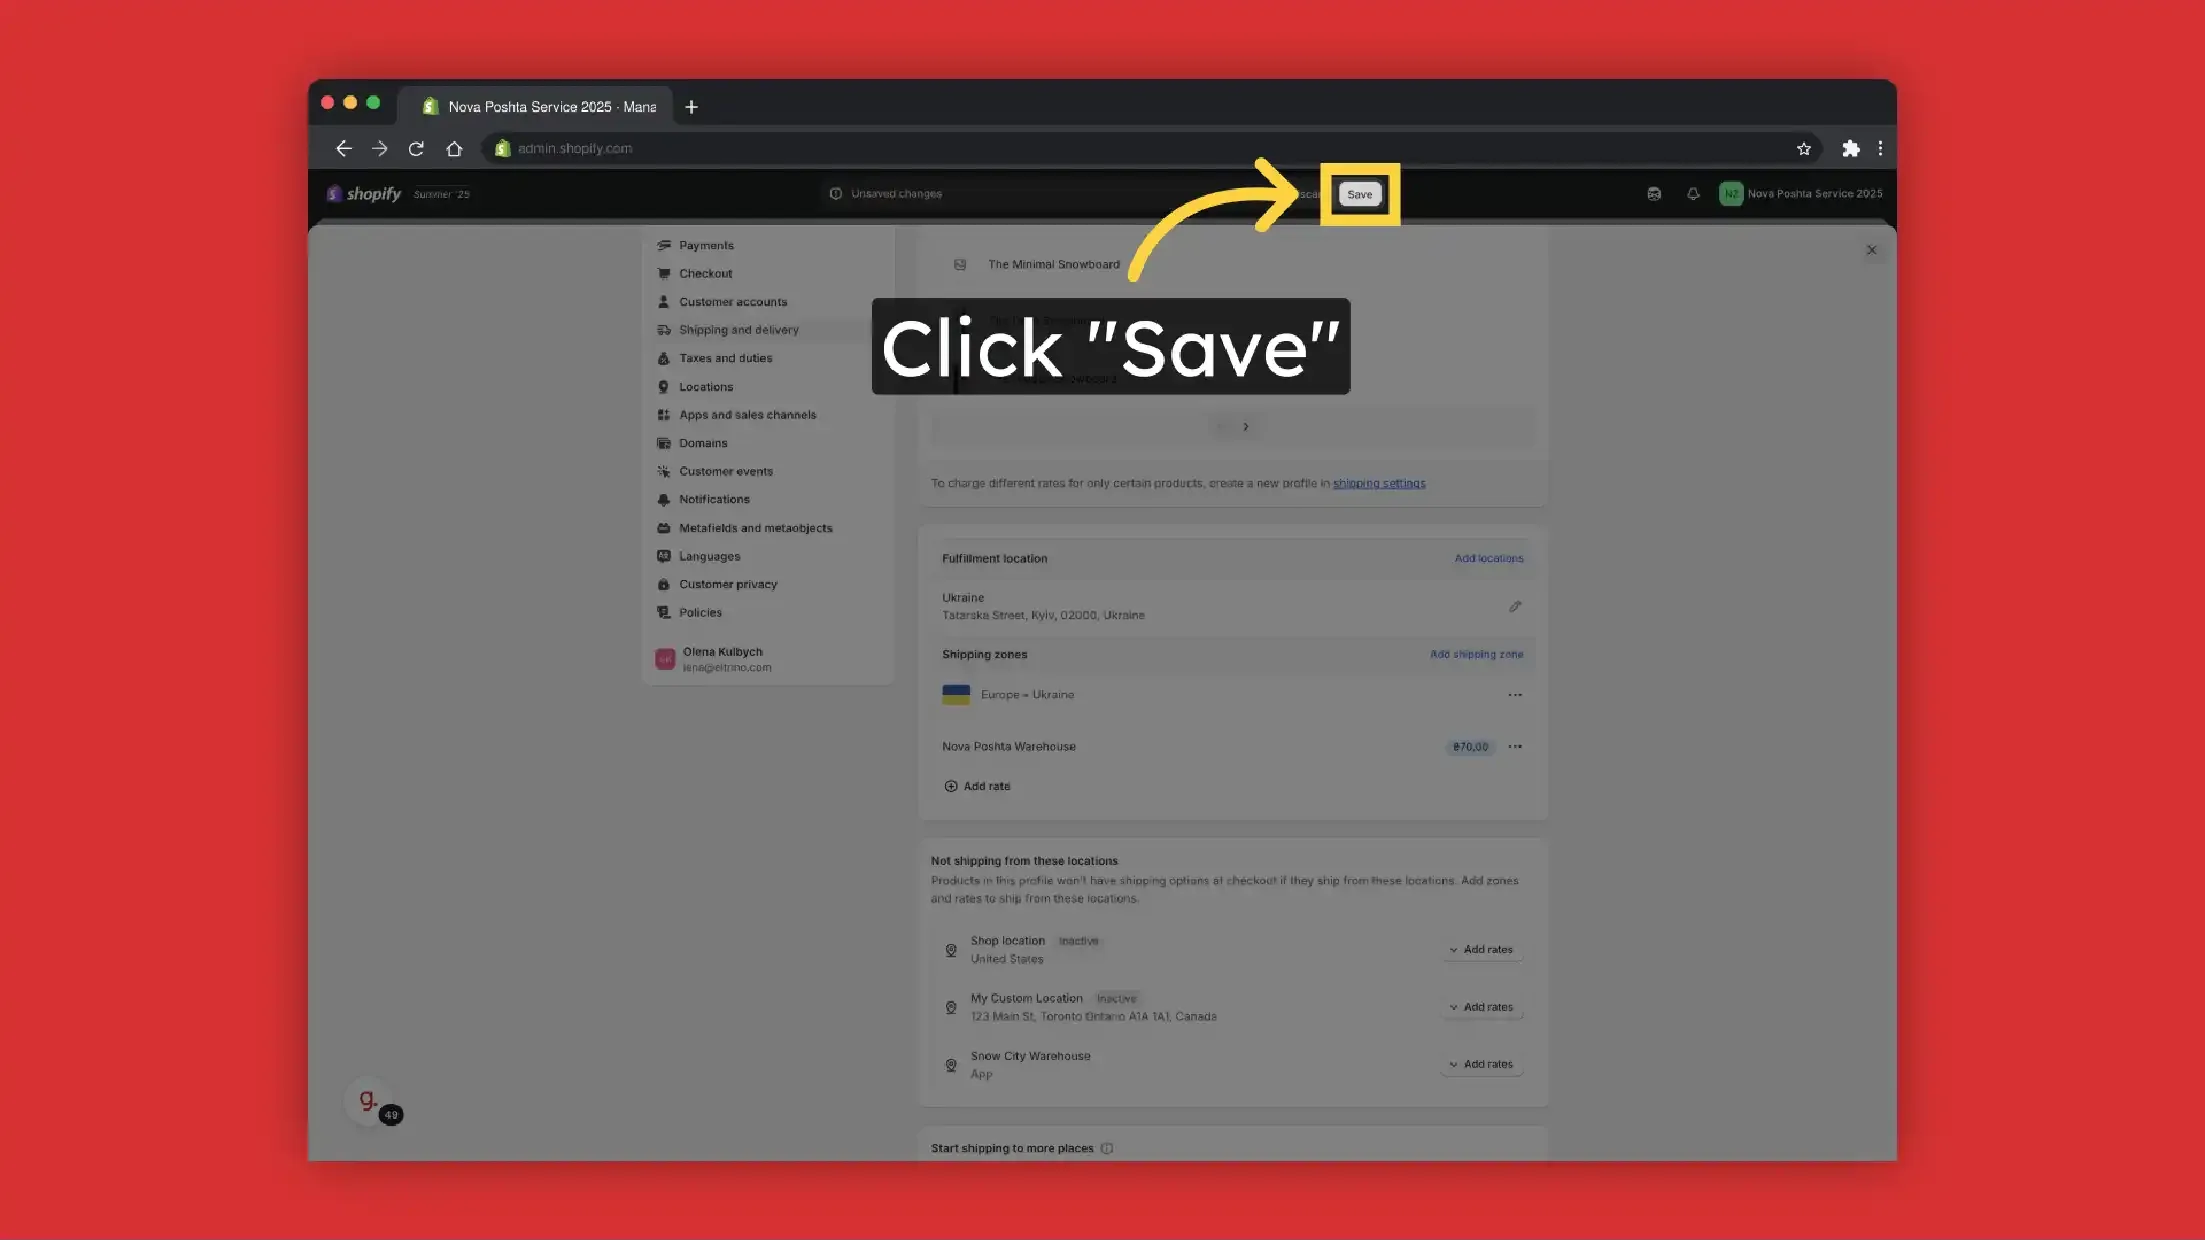
-
Save Changes
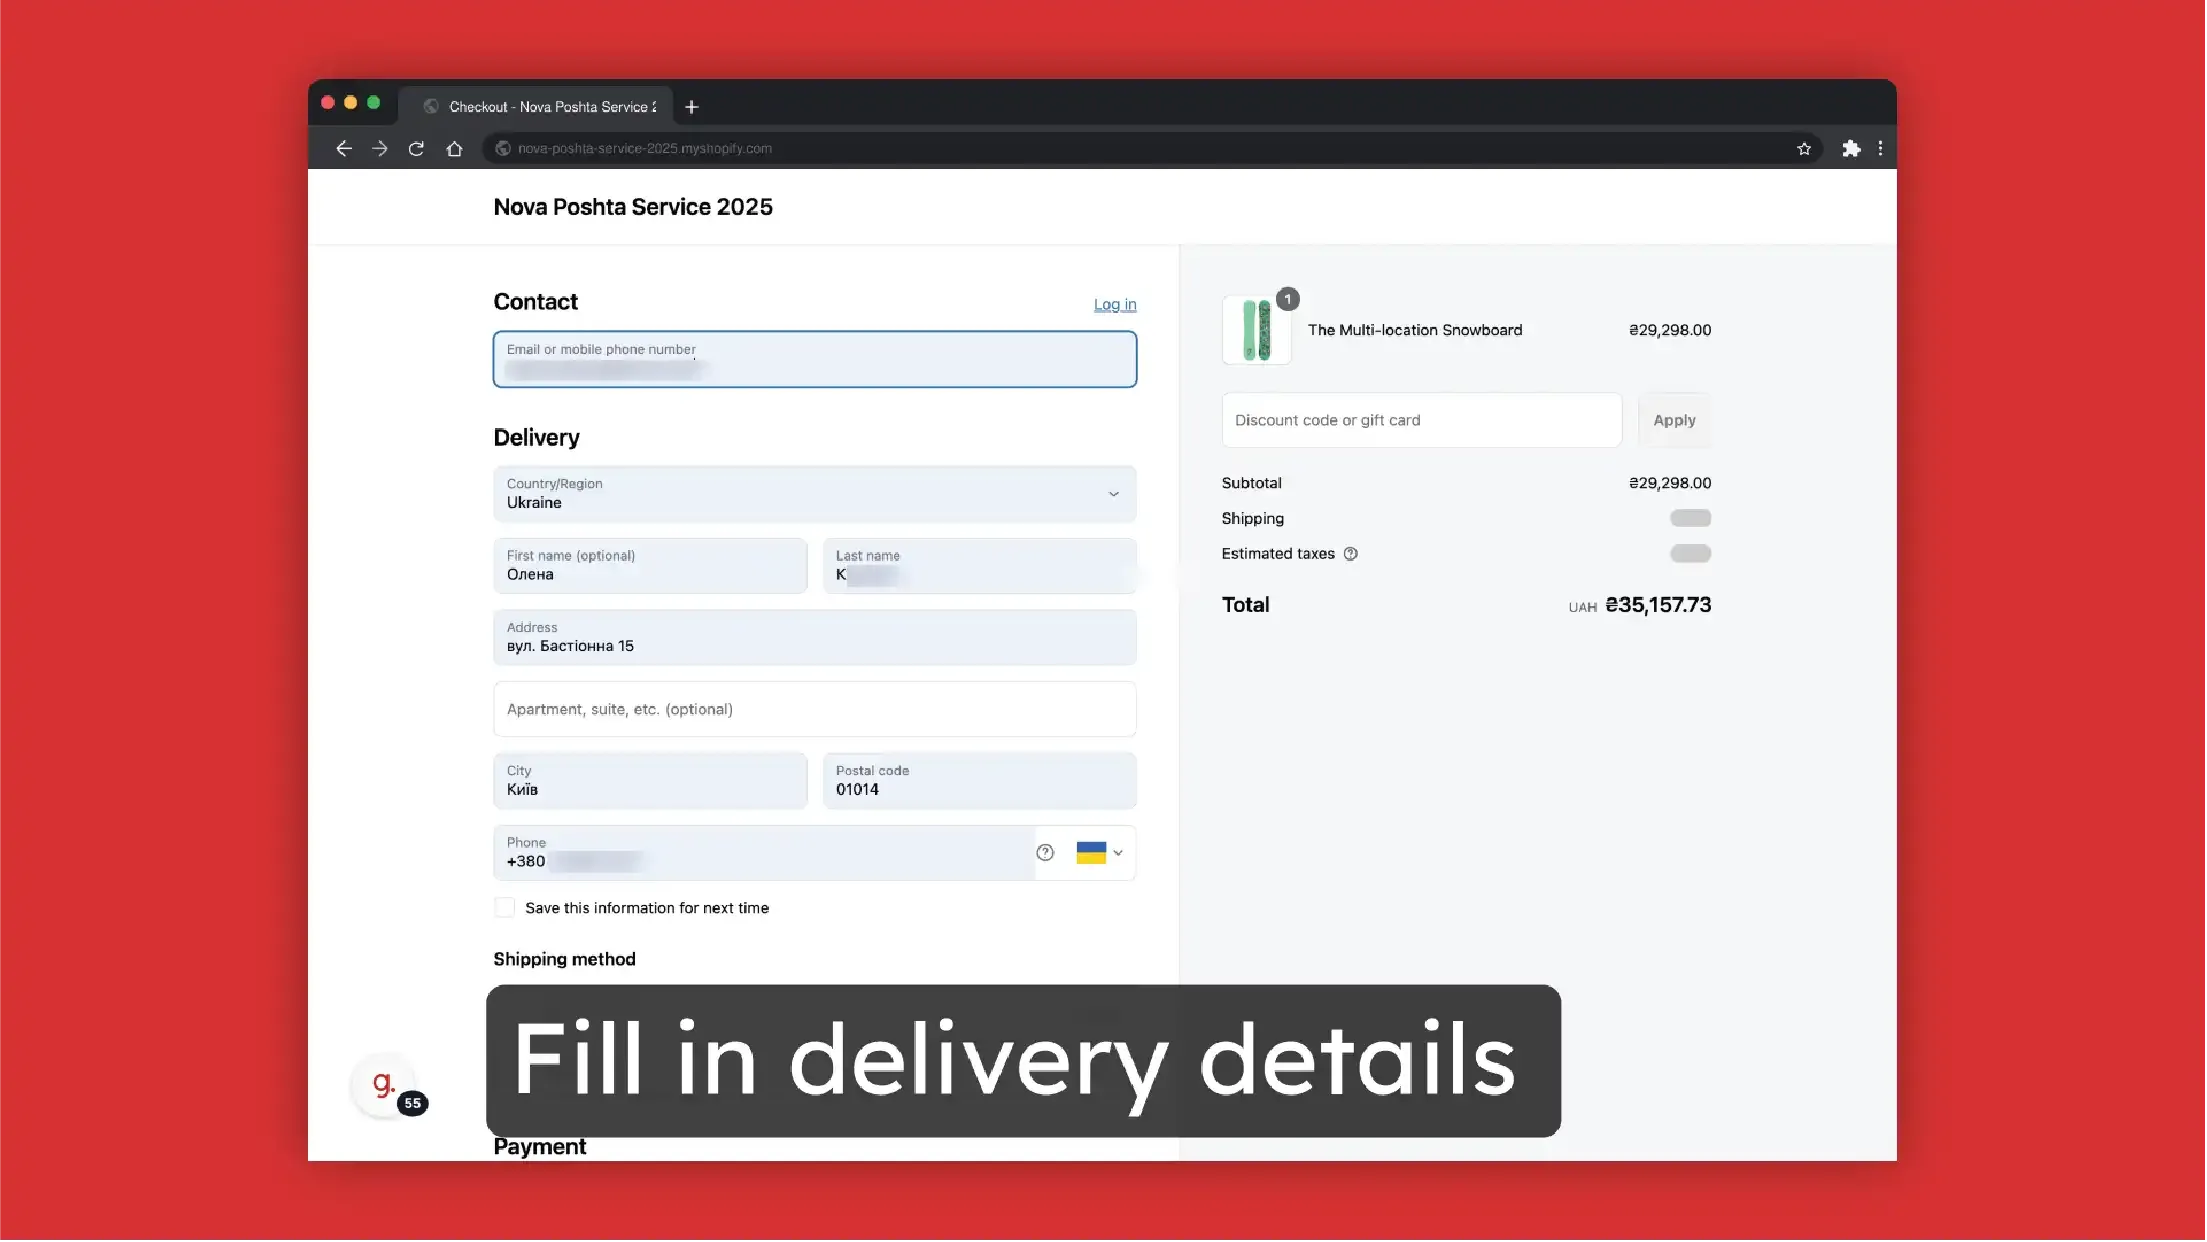
Result on the frontend

Order functionality
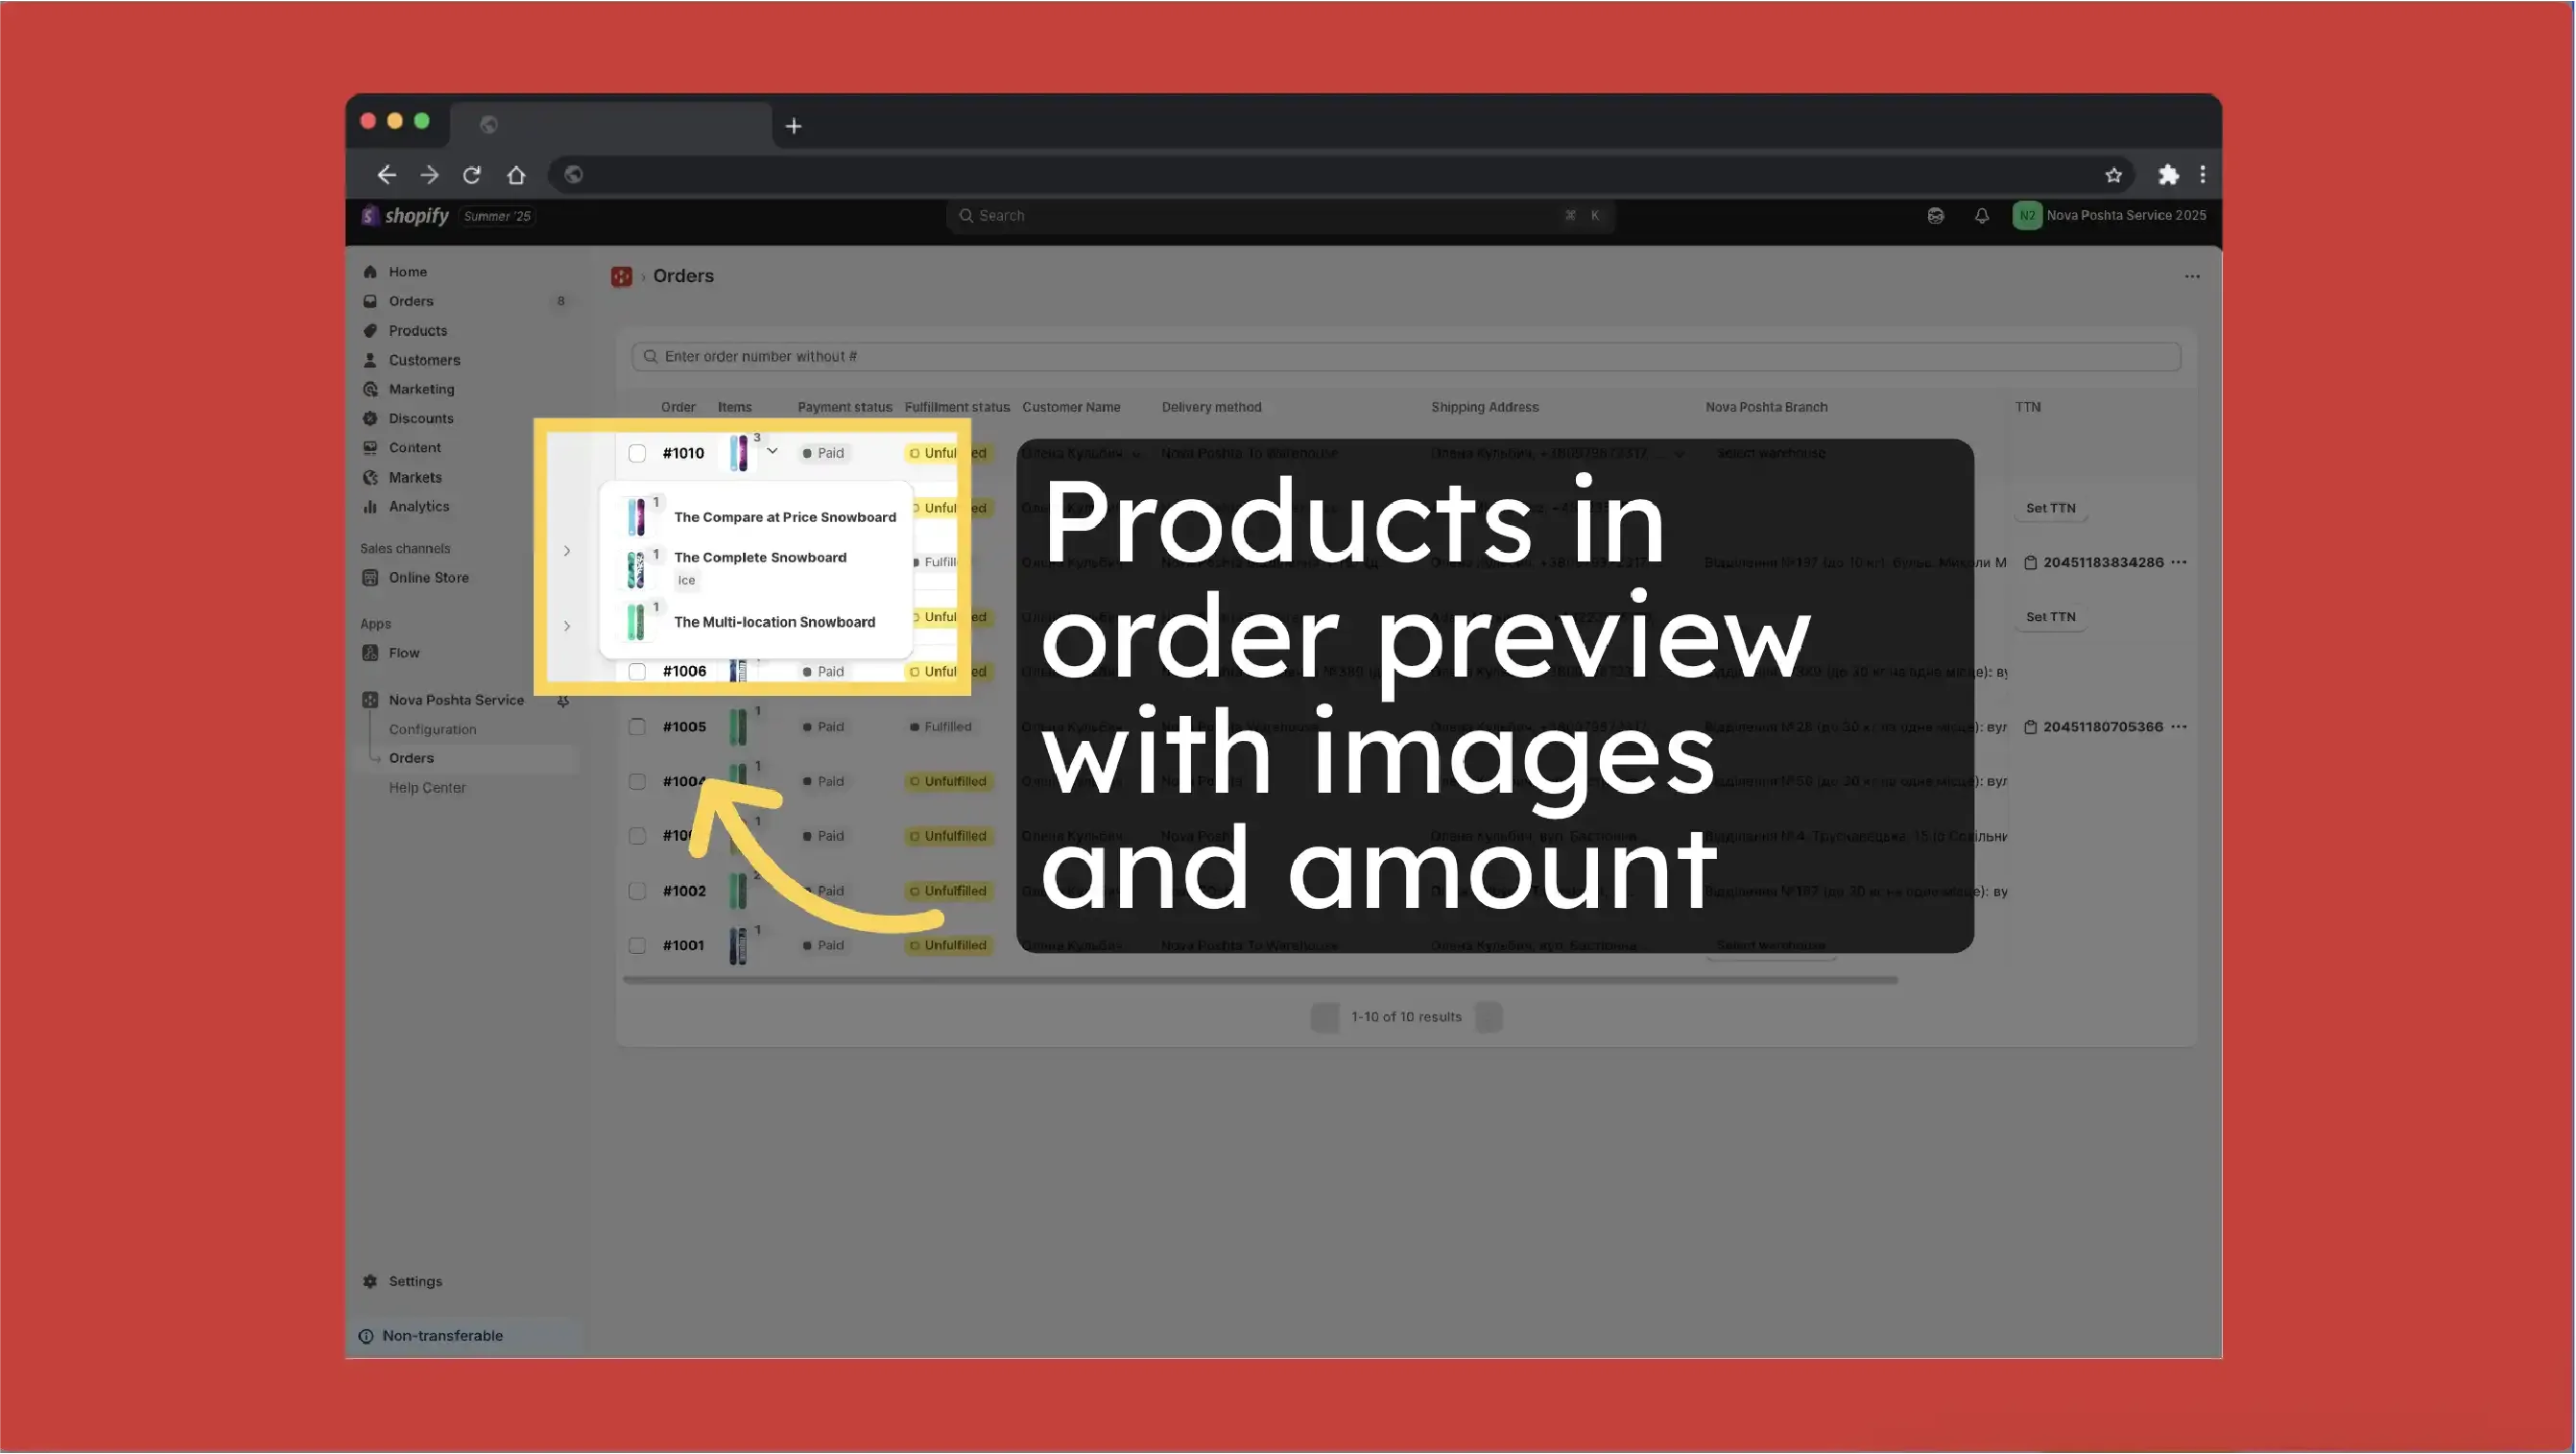
Apps >> Nova Poshta Service >> Orders
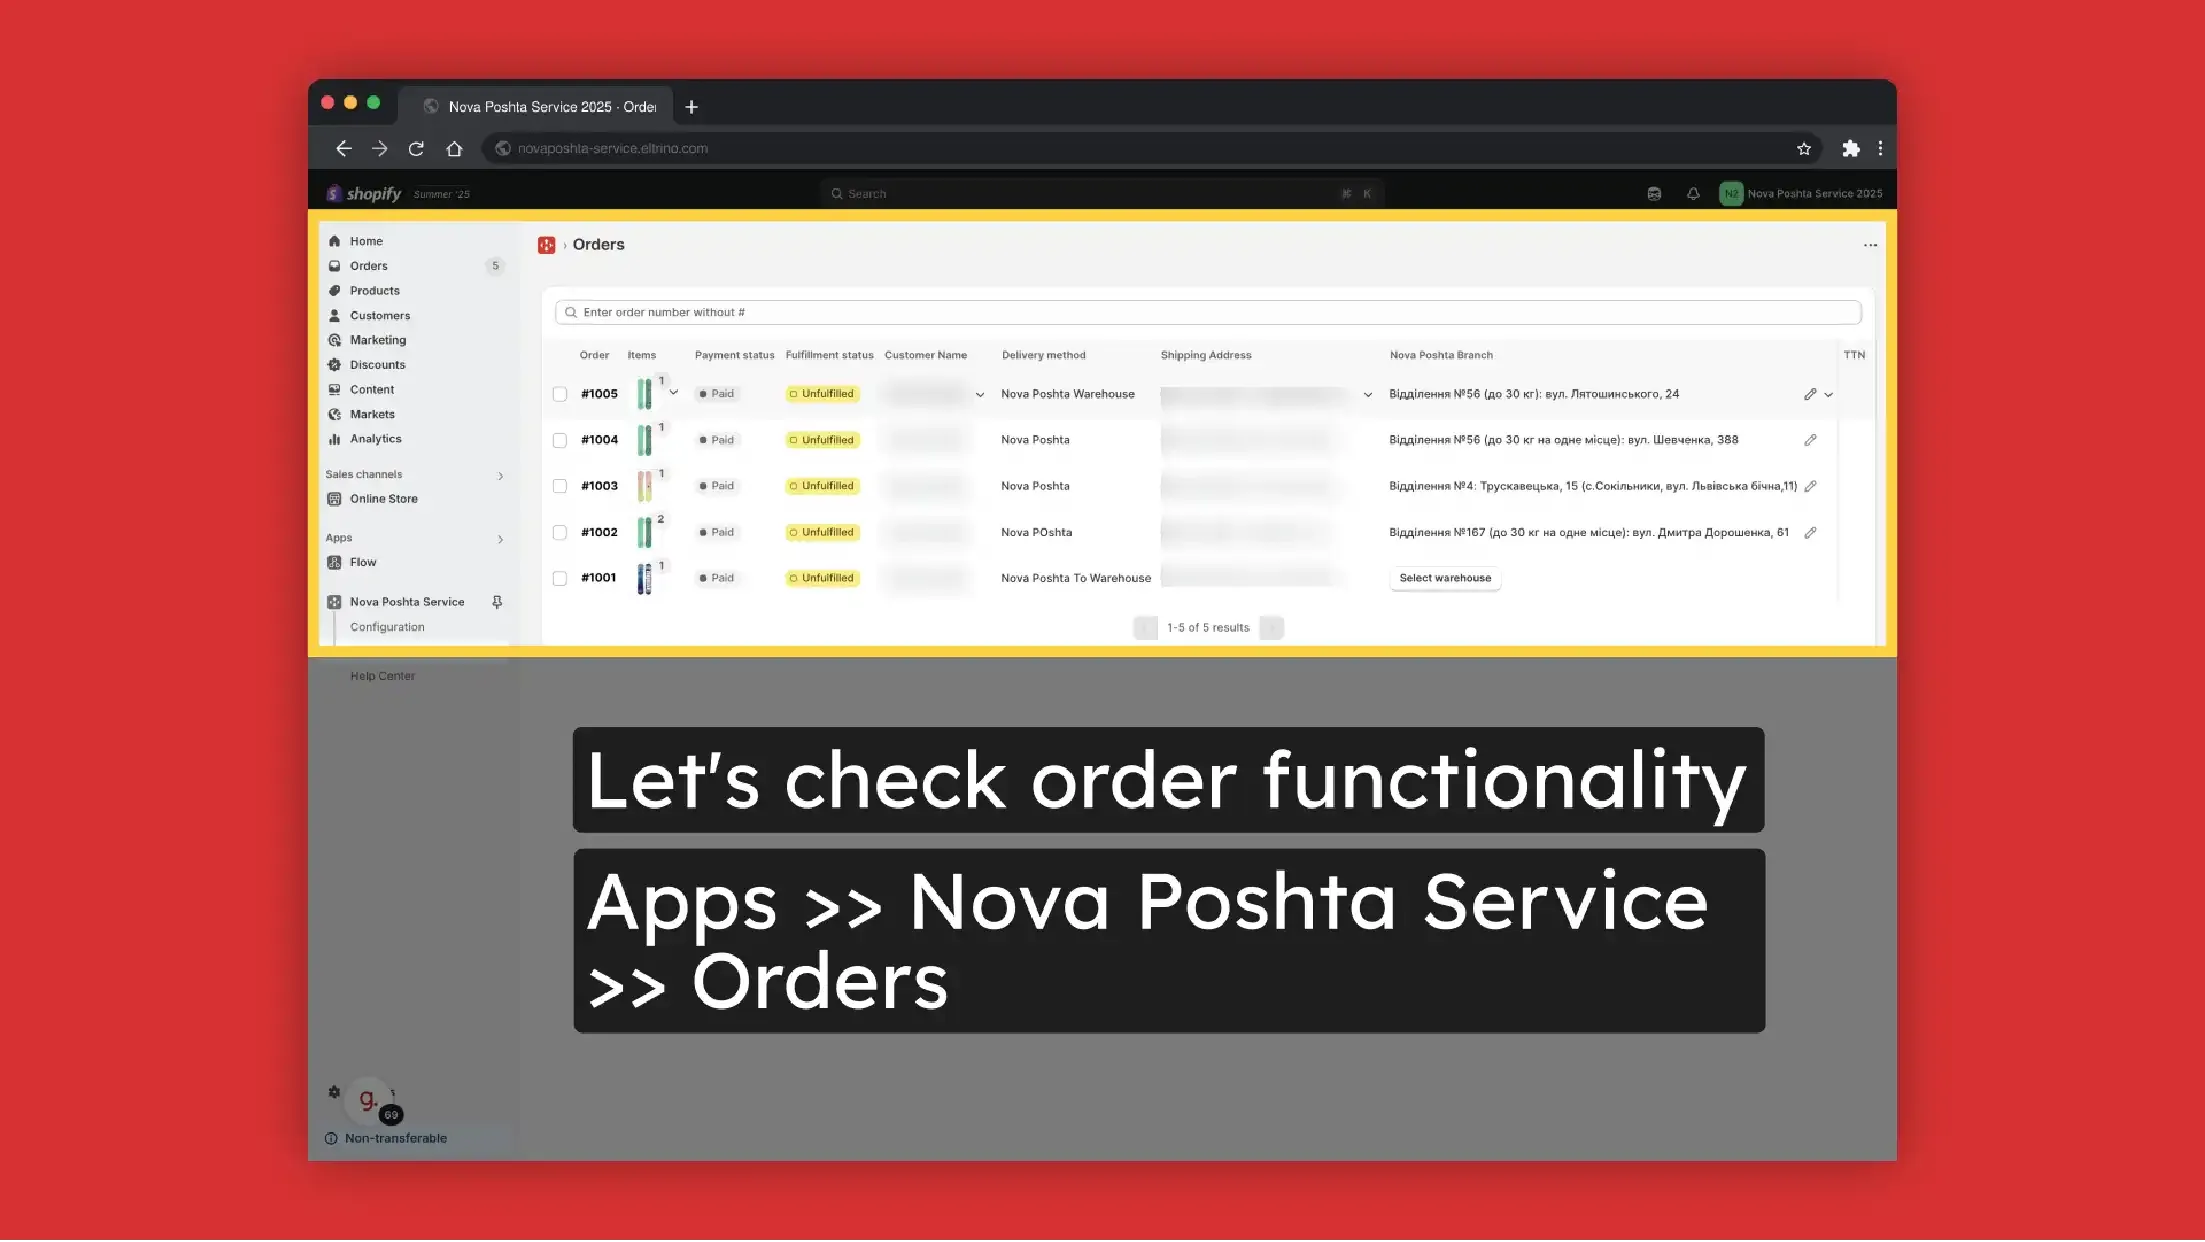
Products in order preview with images and amount
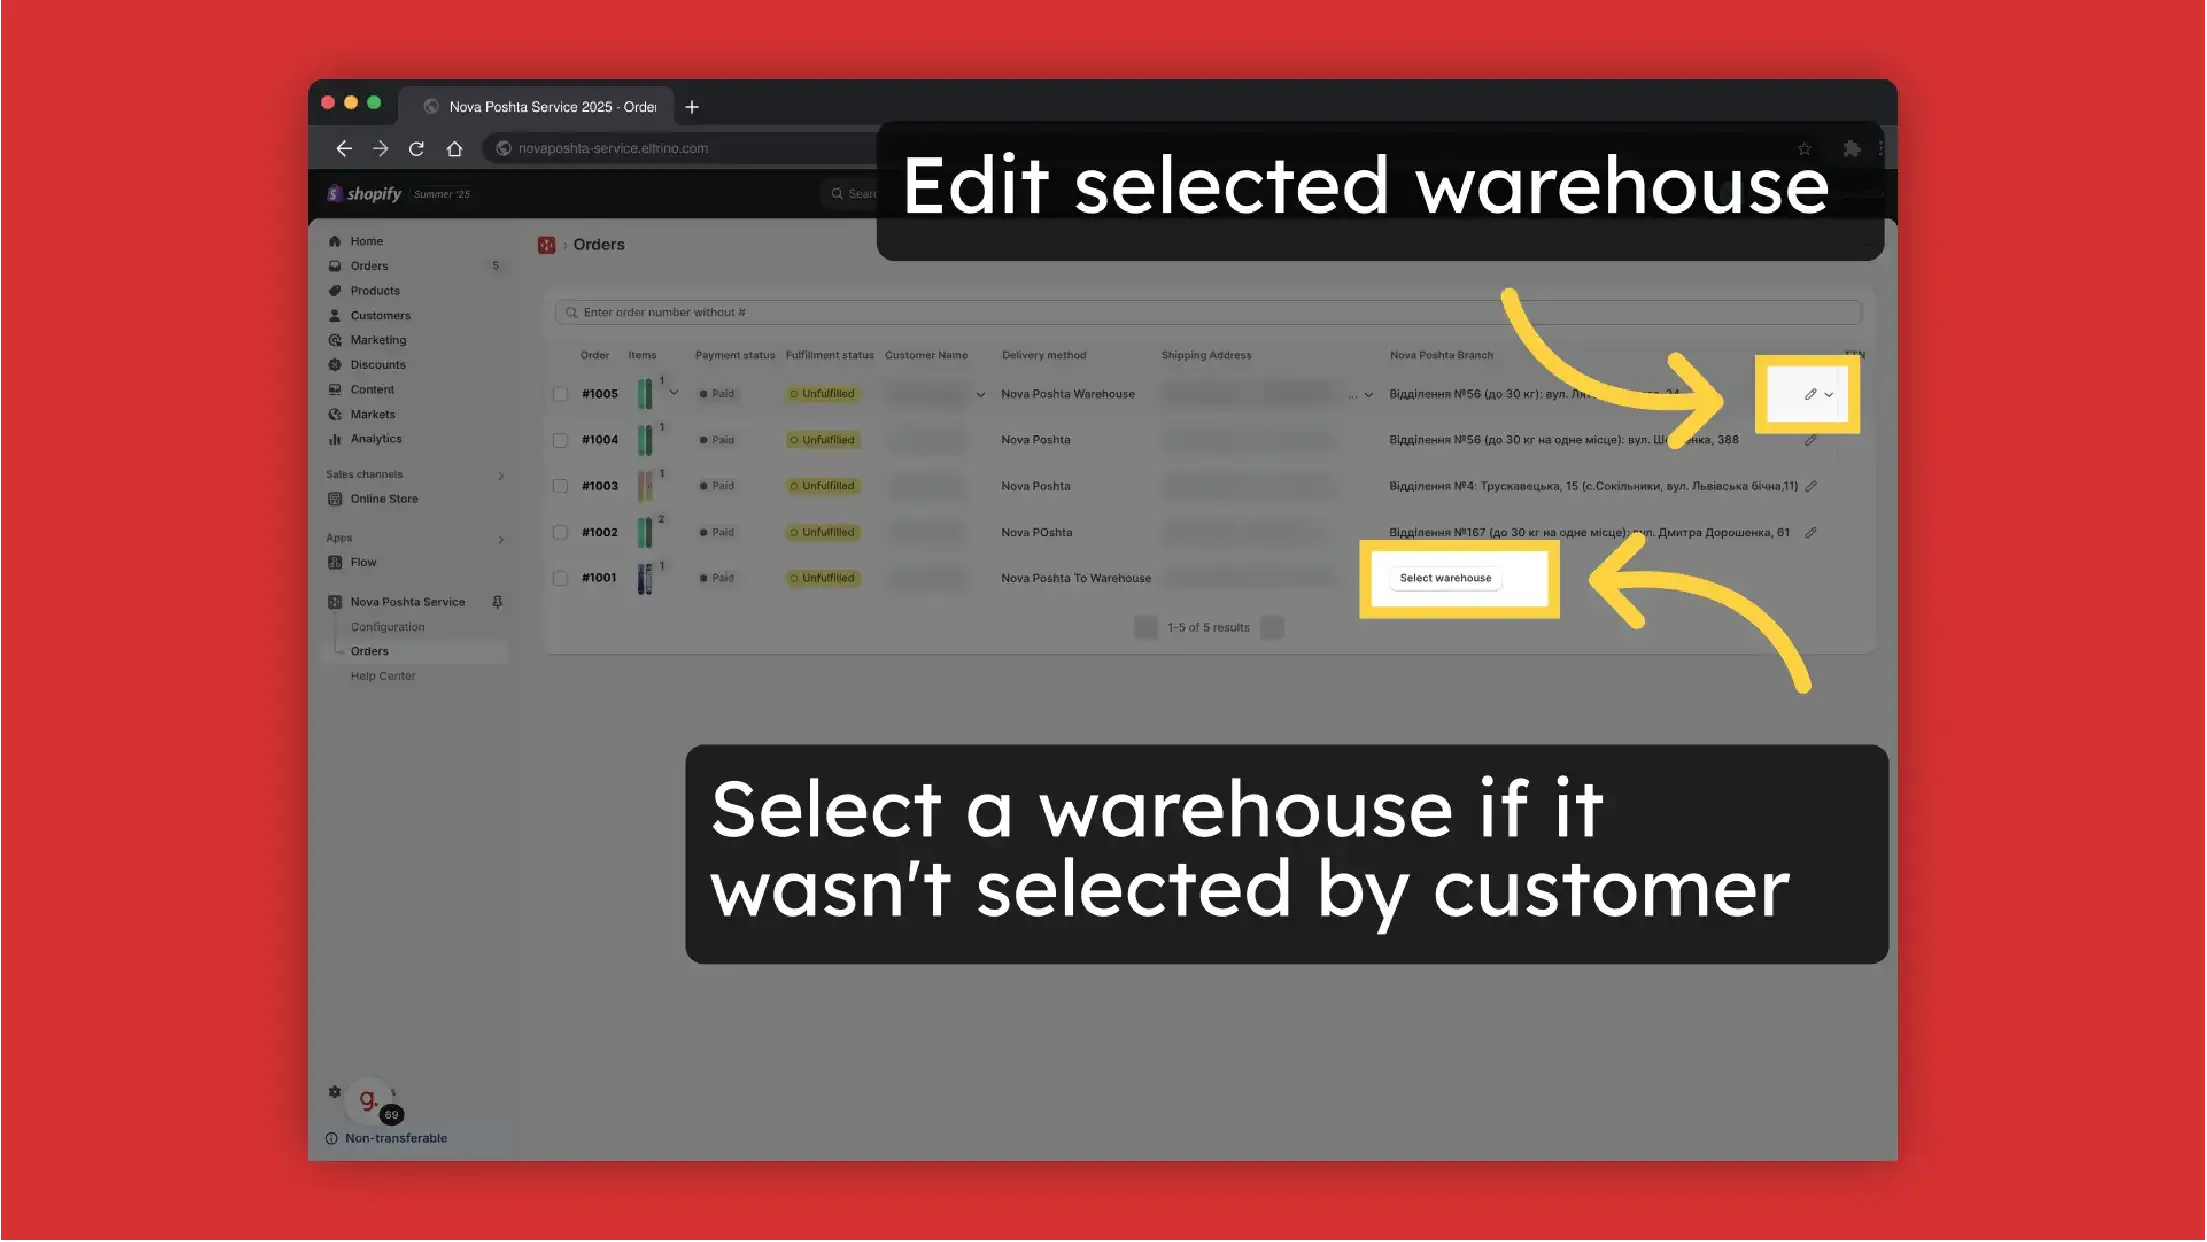
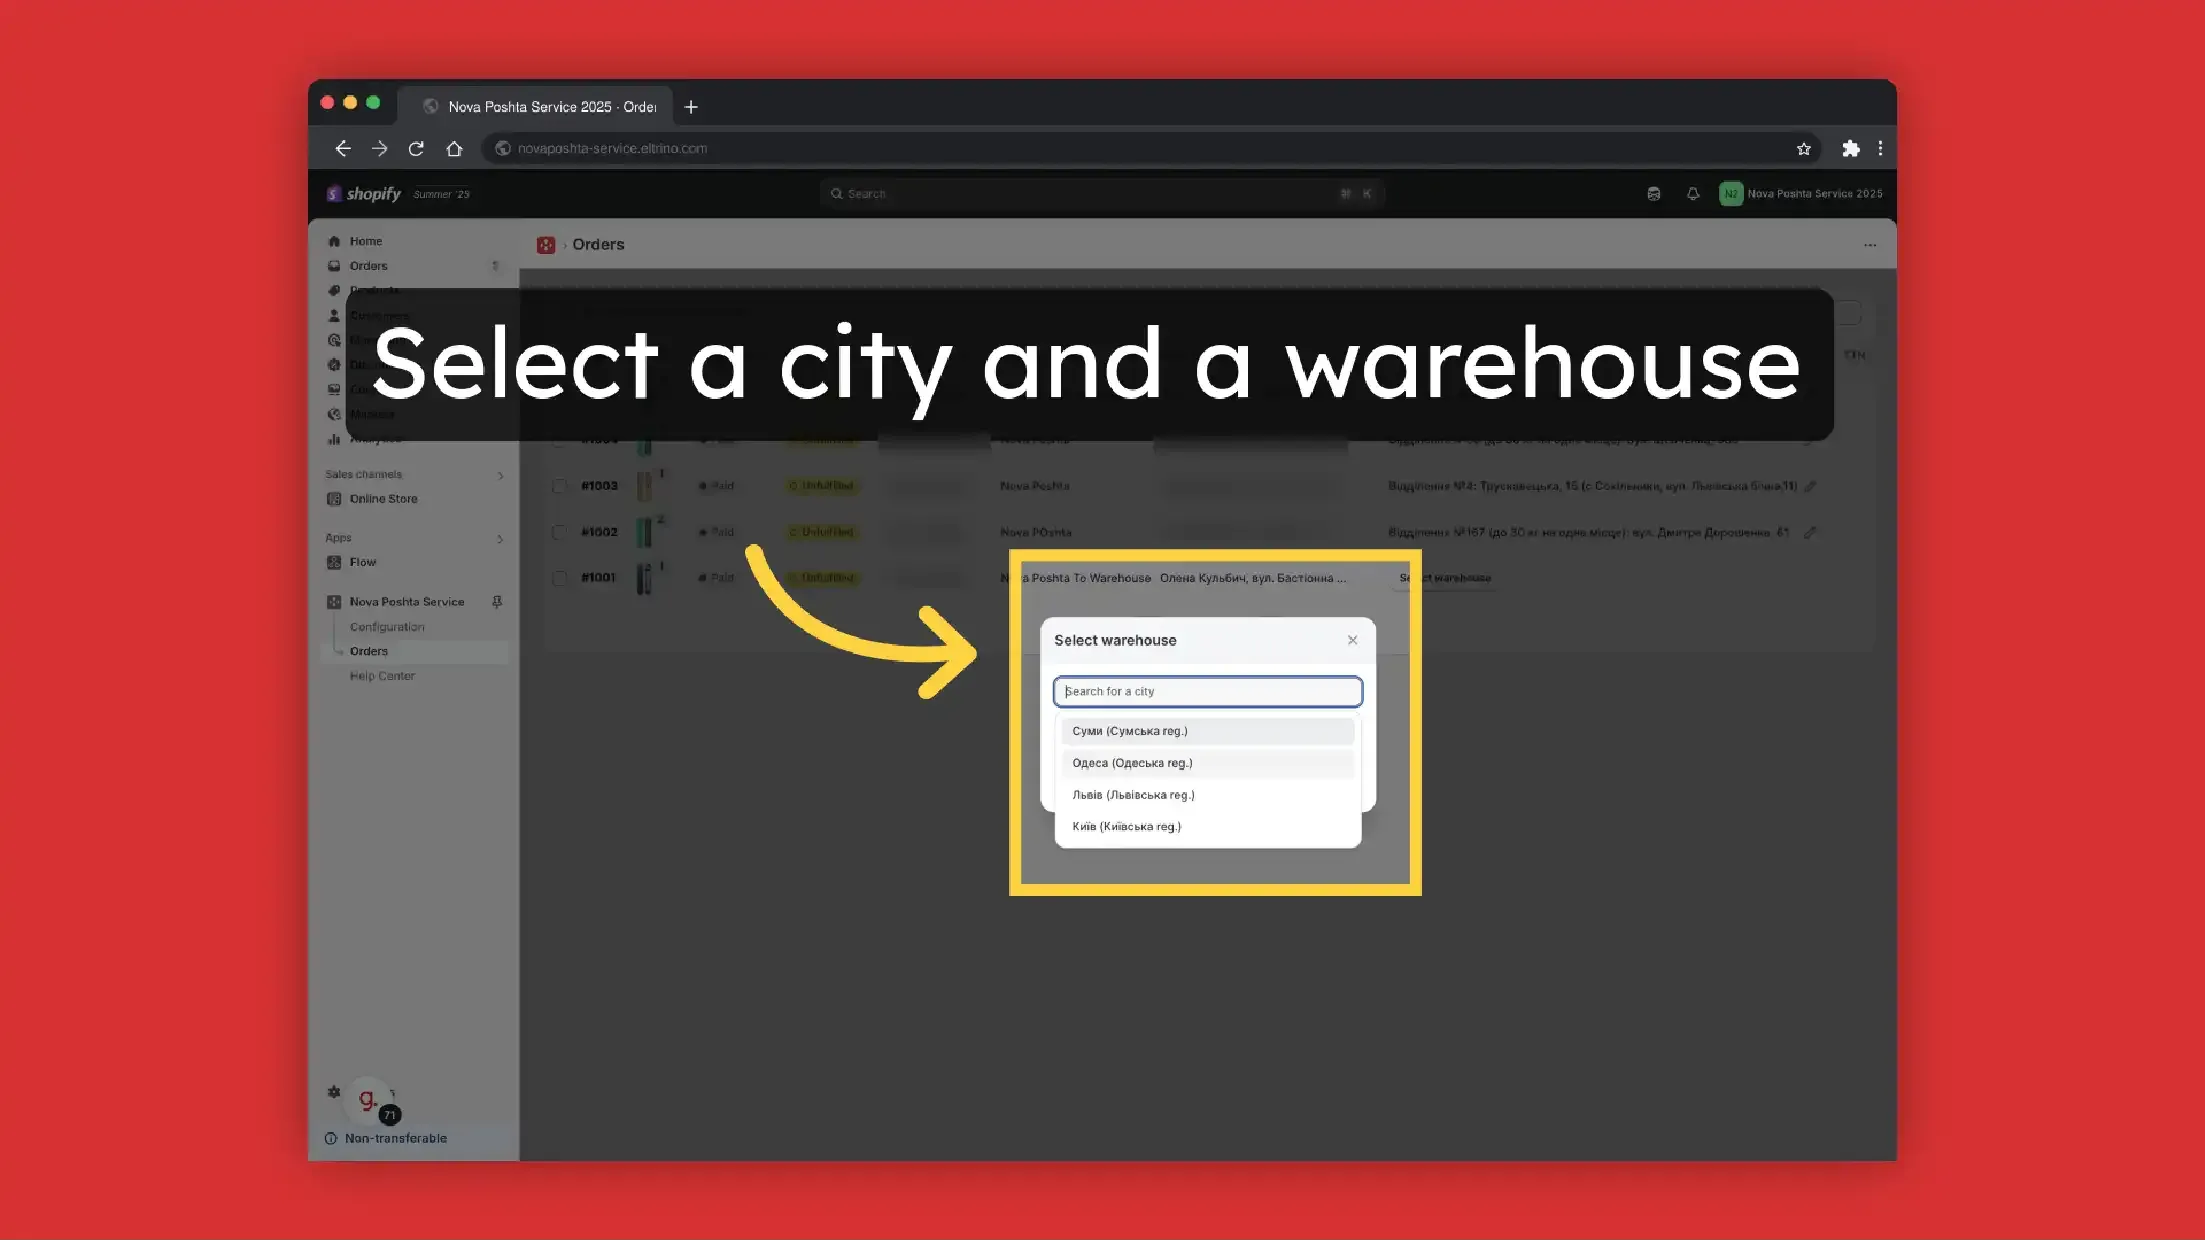
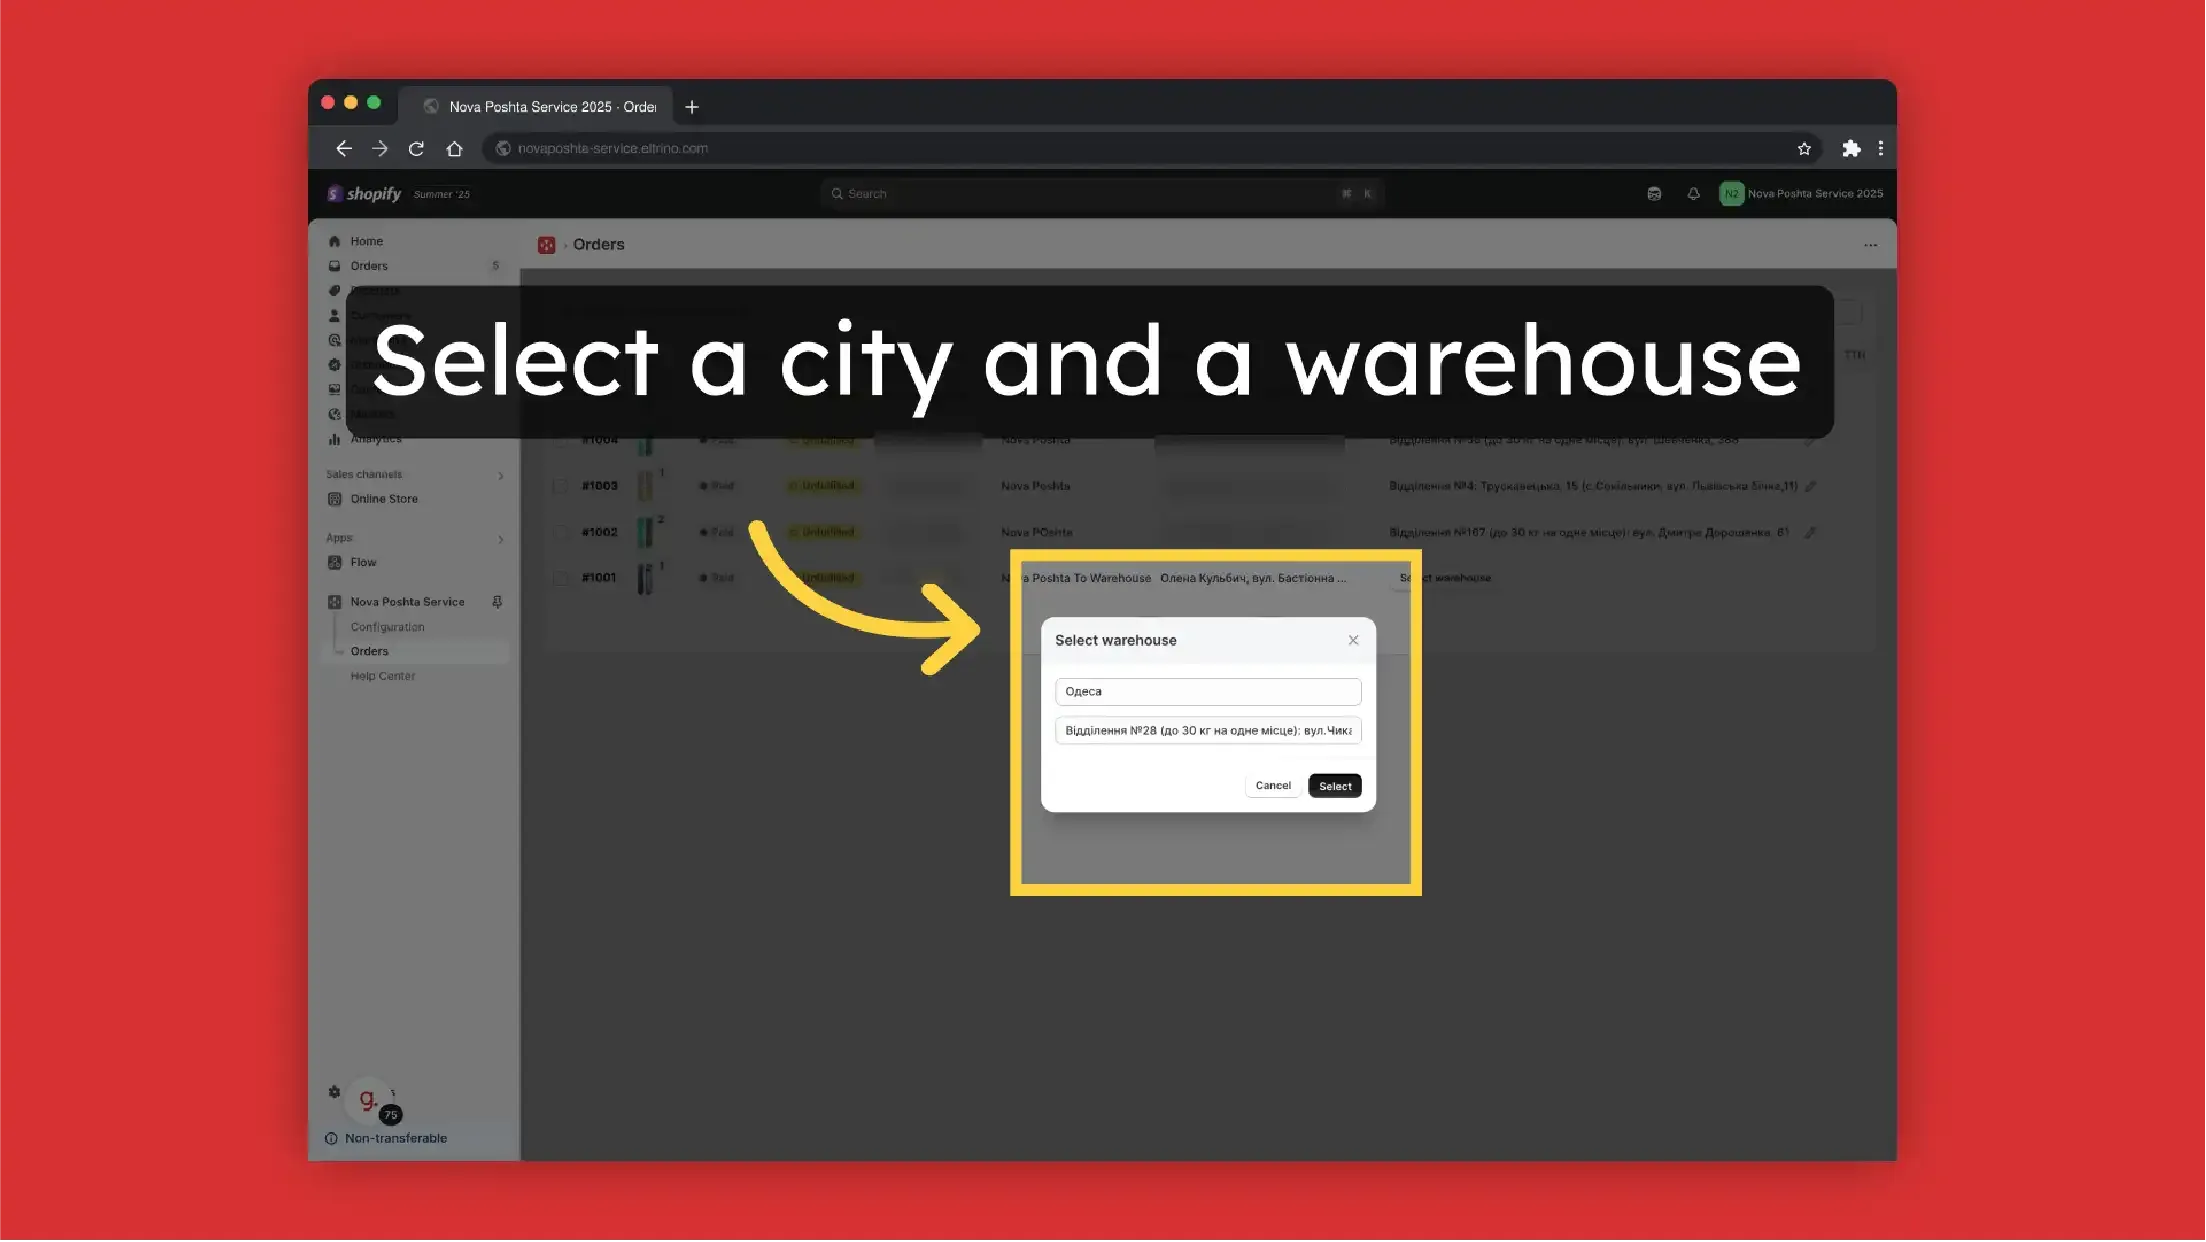
Select or edit selected Nova Poshta branch
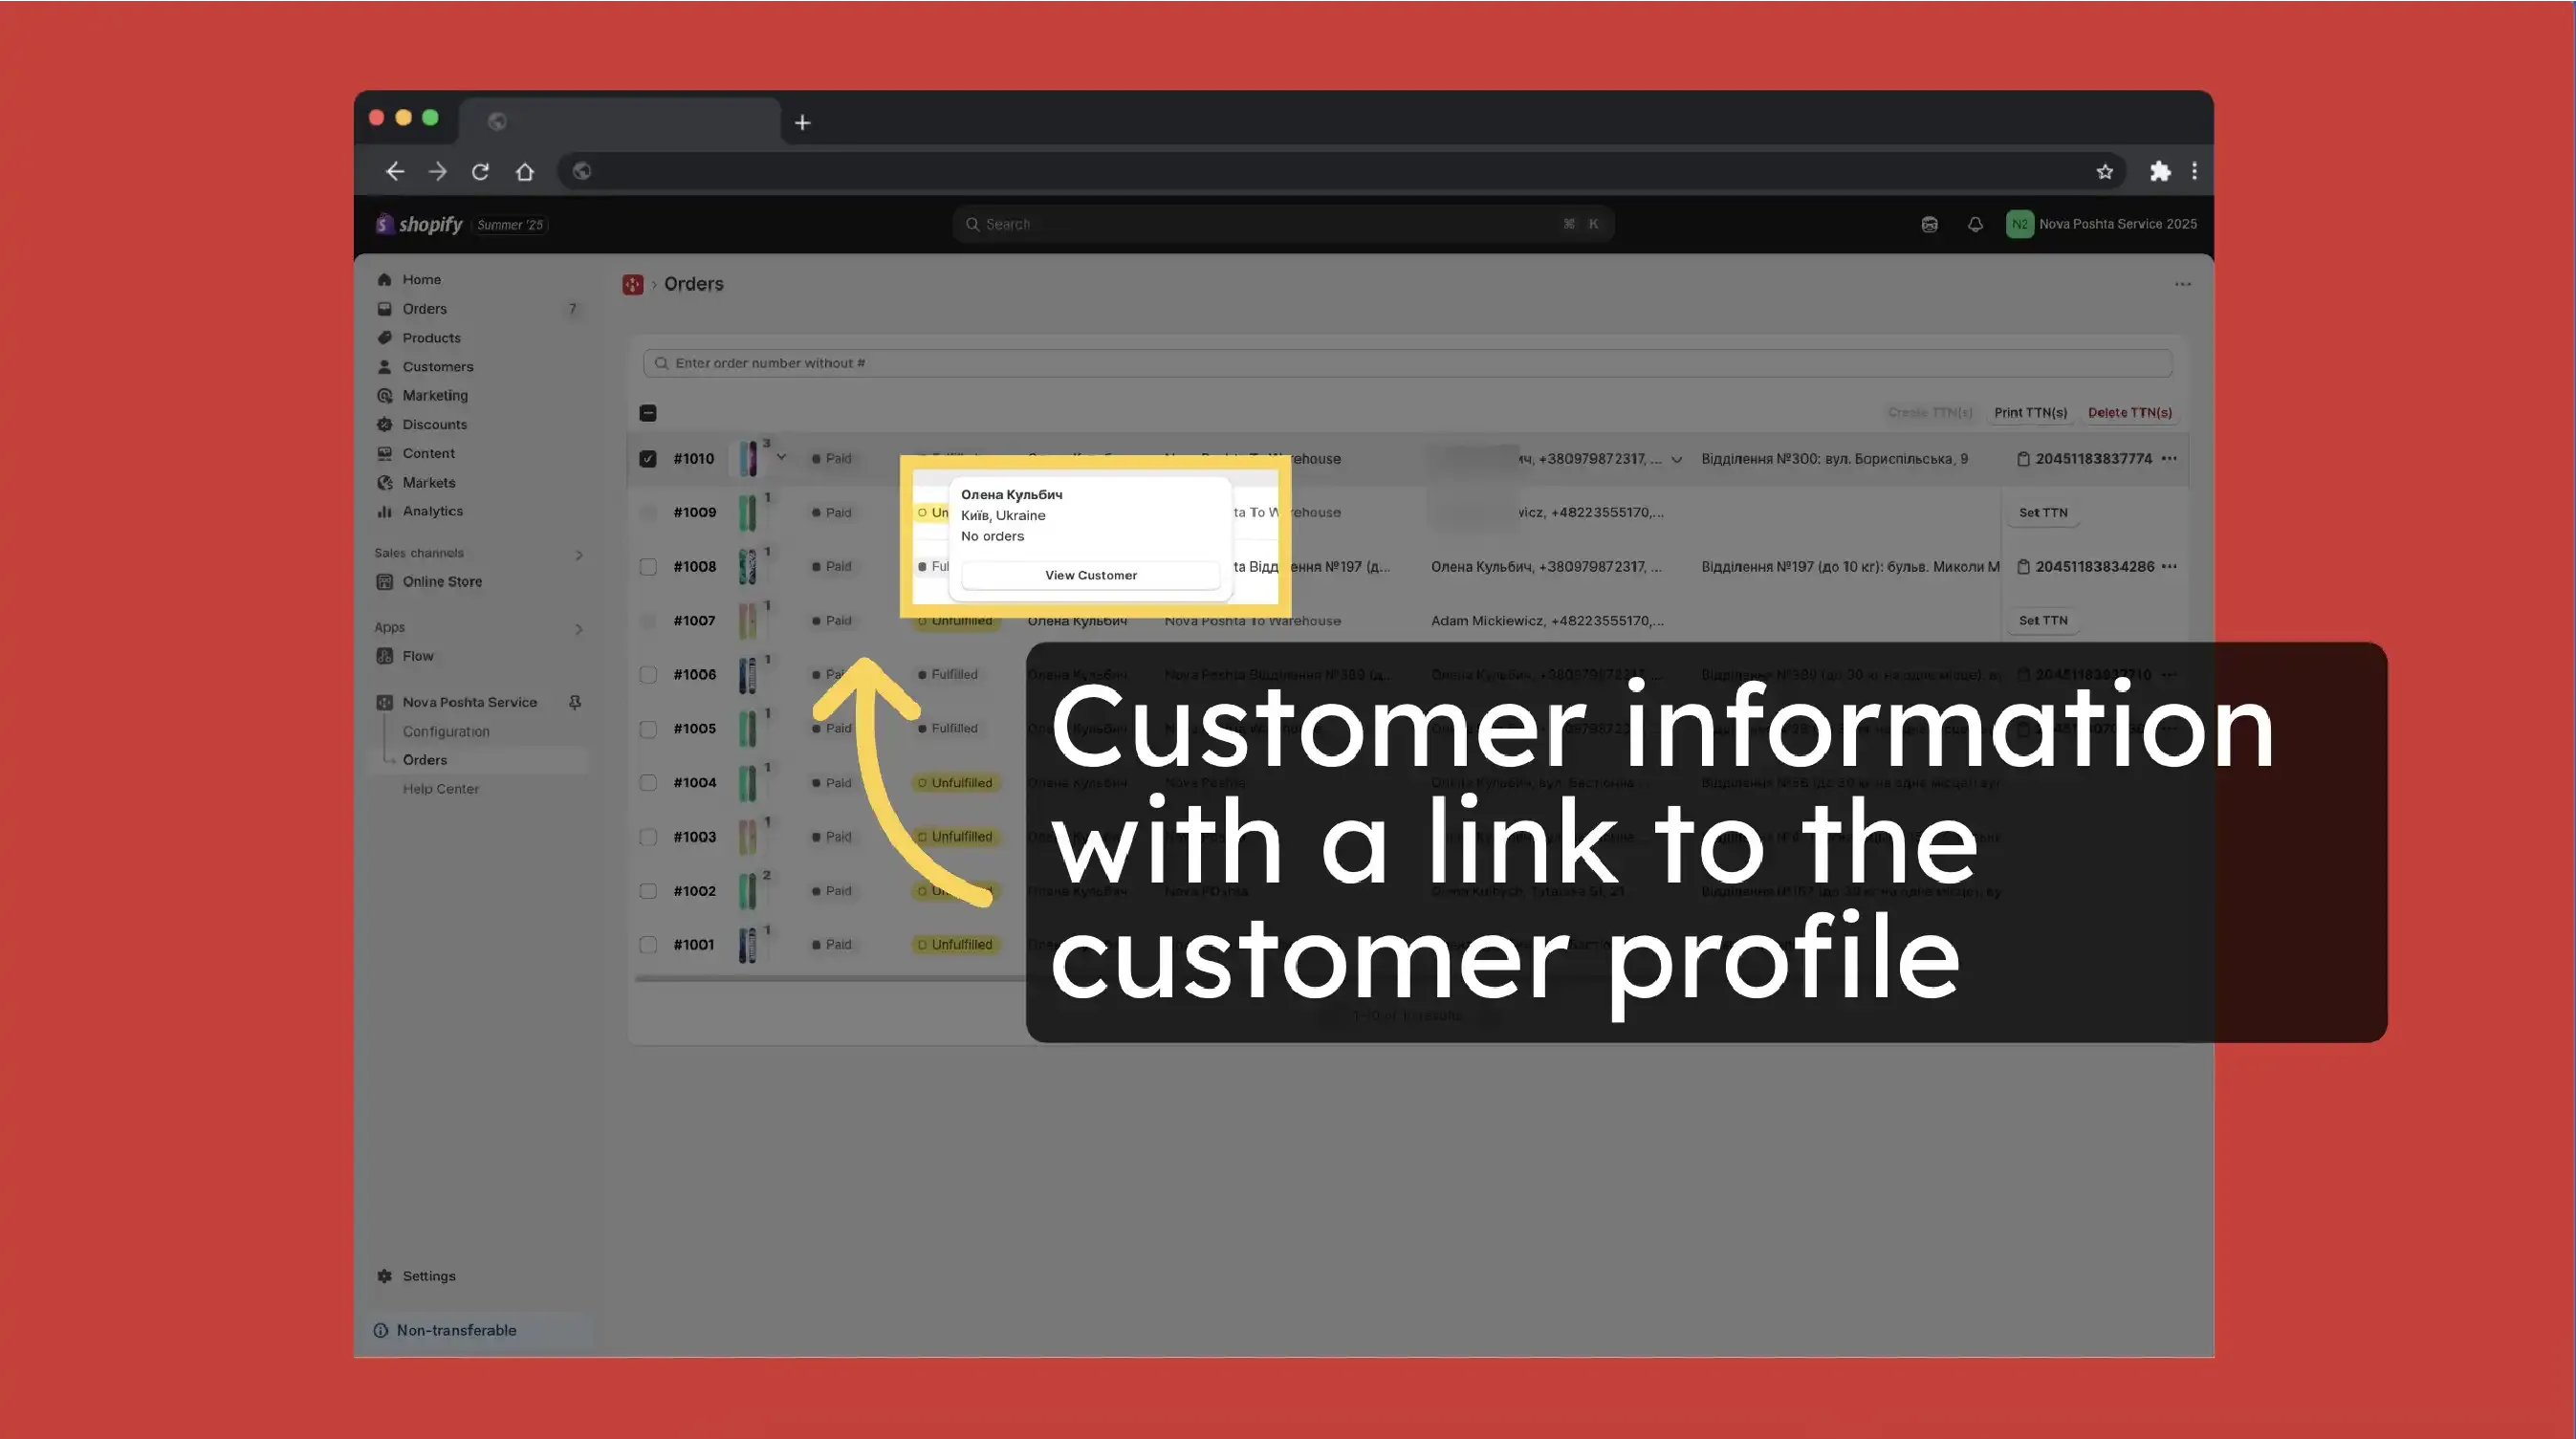
Customer information with a link to the customer profile in the Shopify
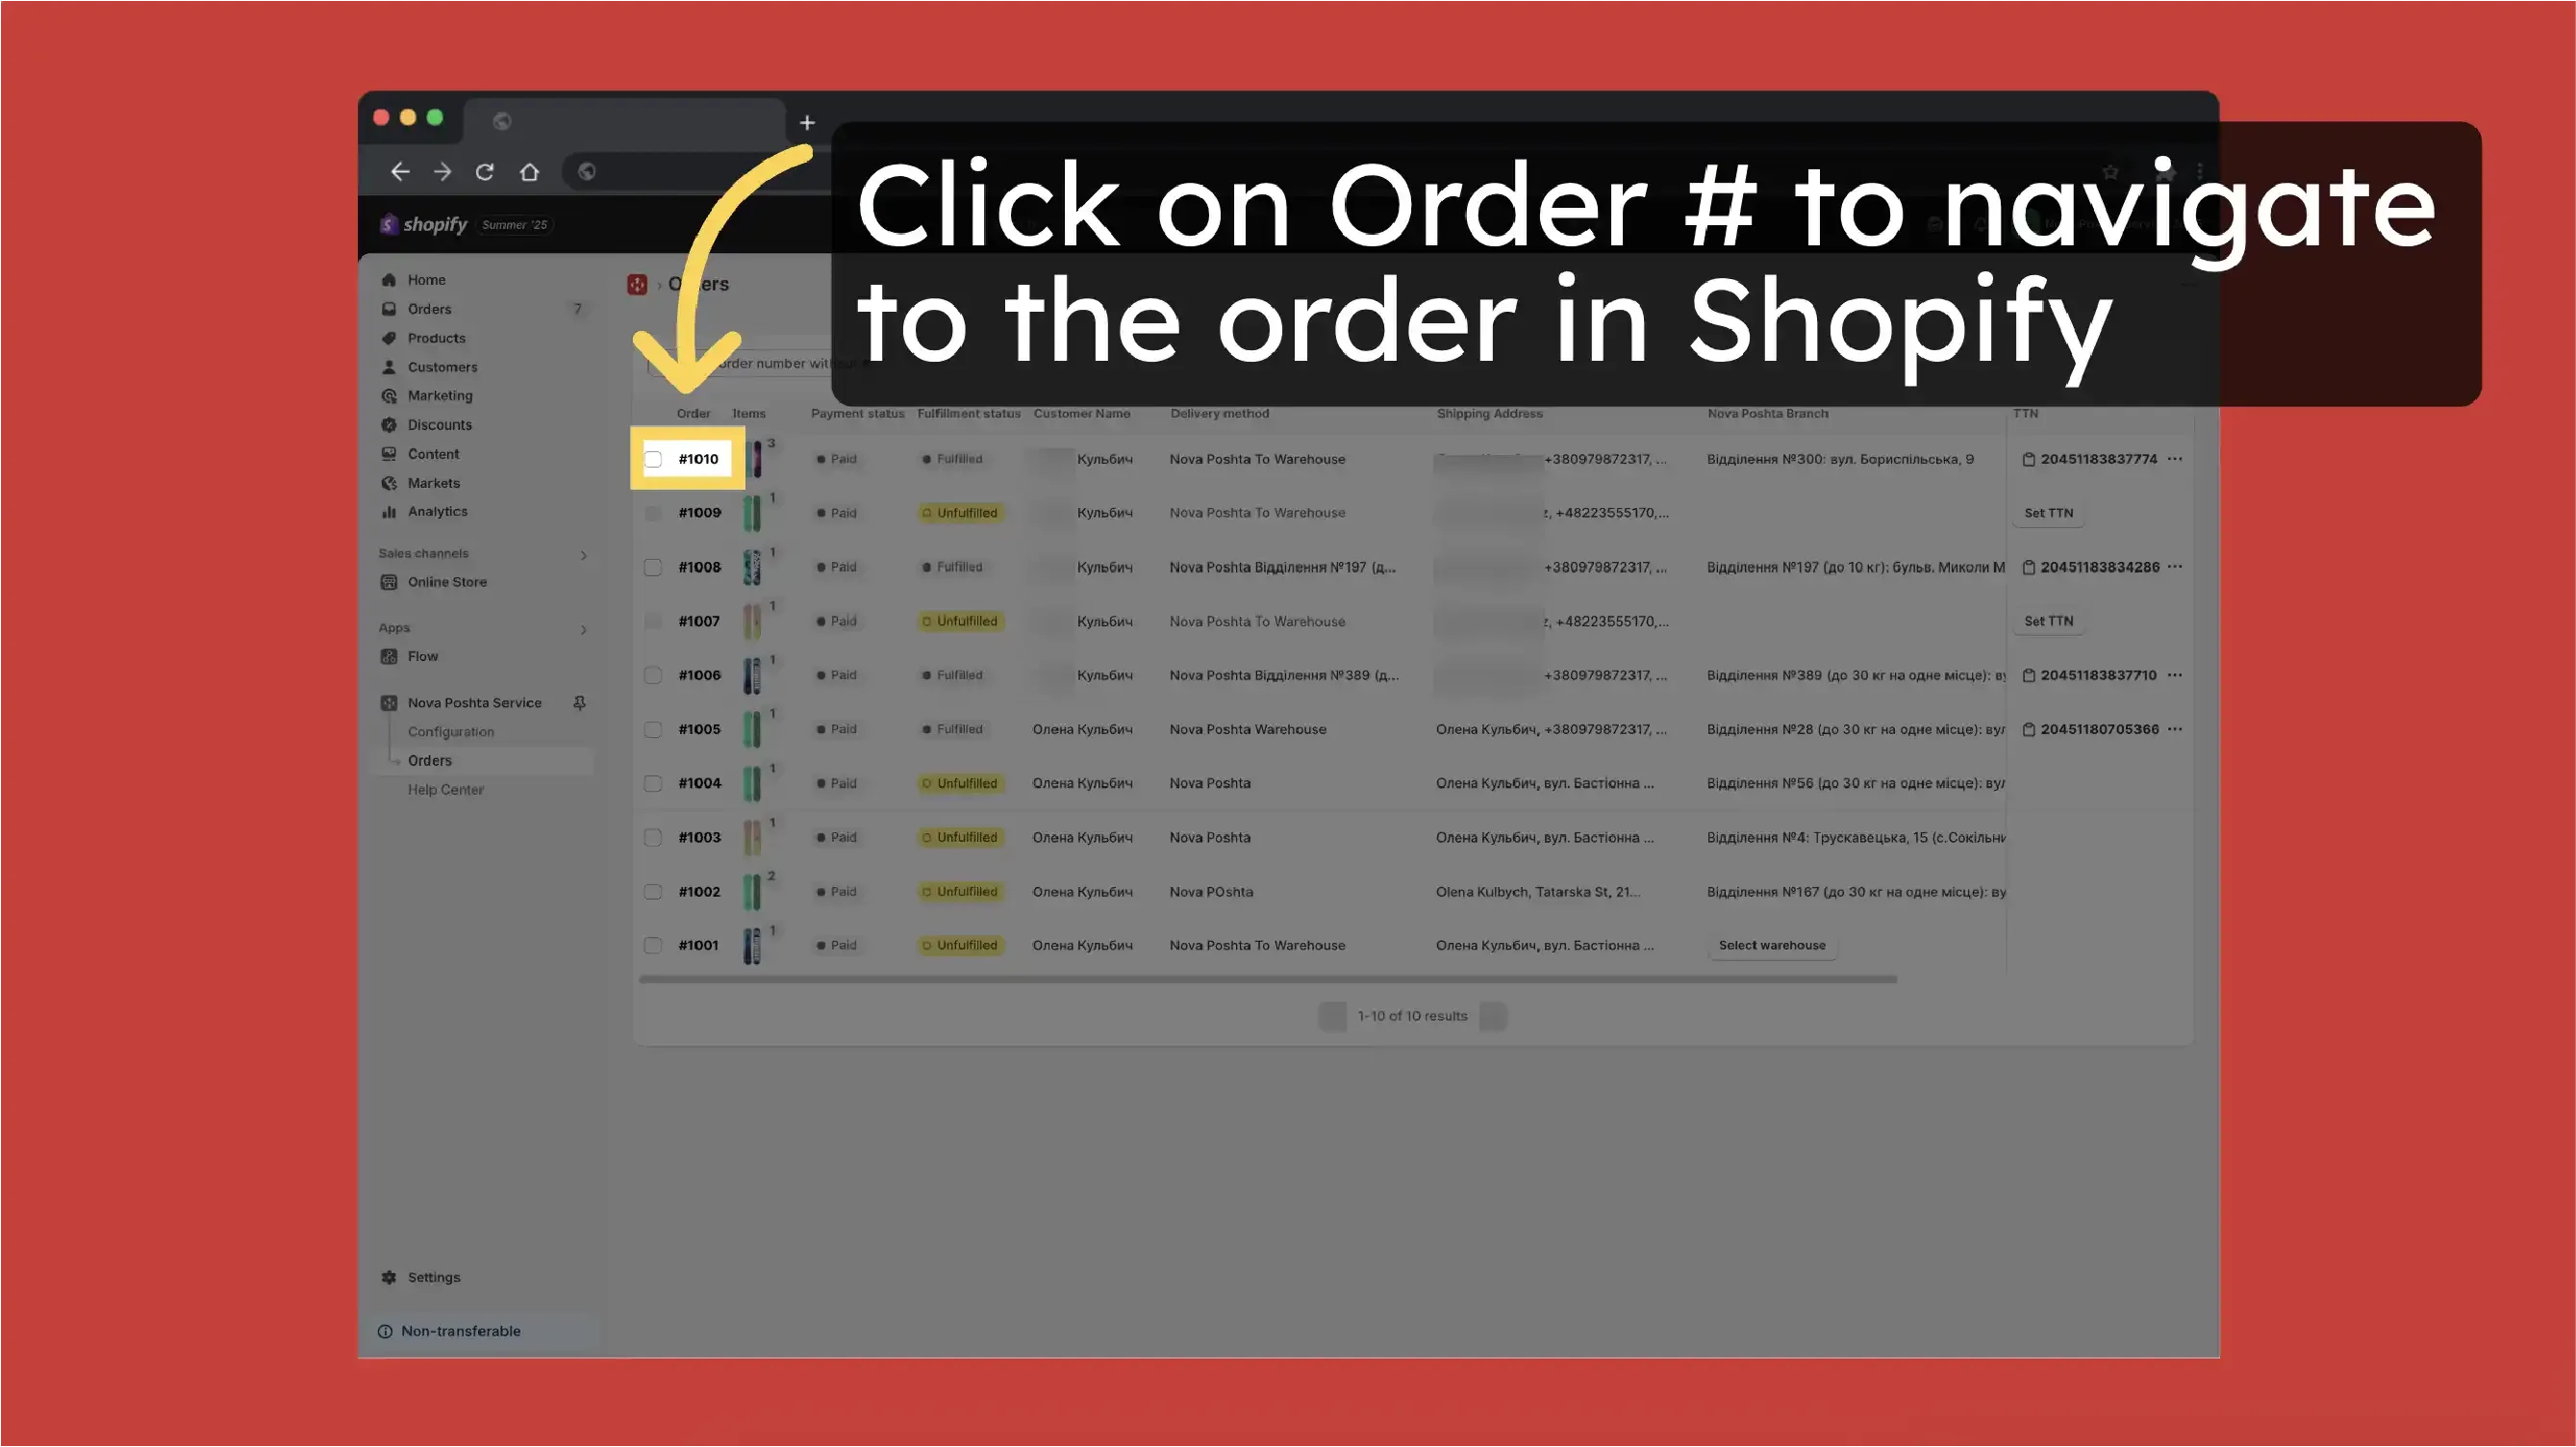
Click on Order # to navigate to the order in Shopify
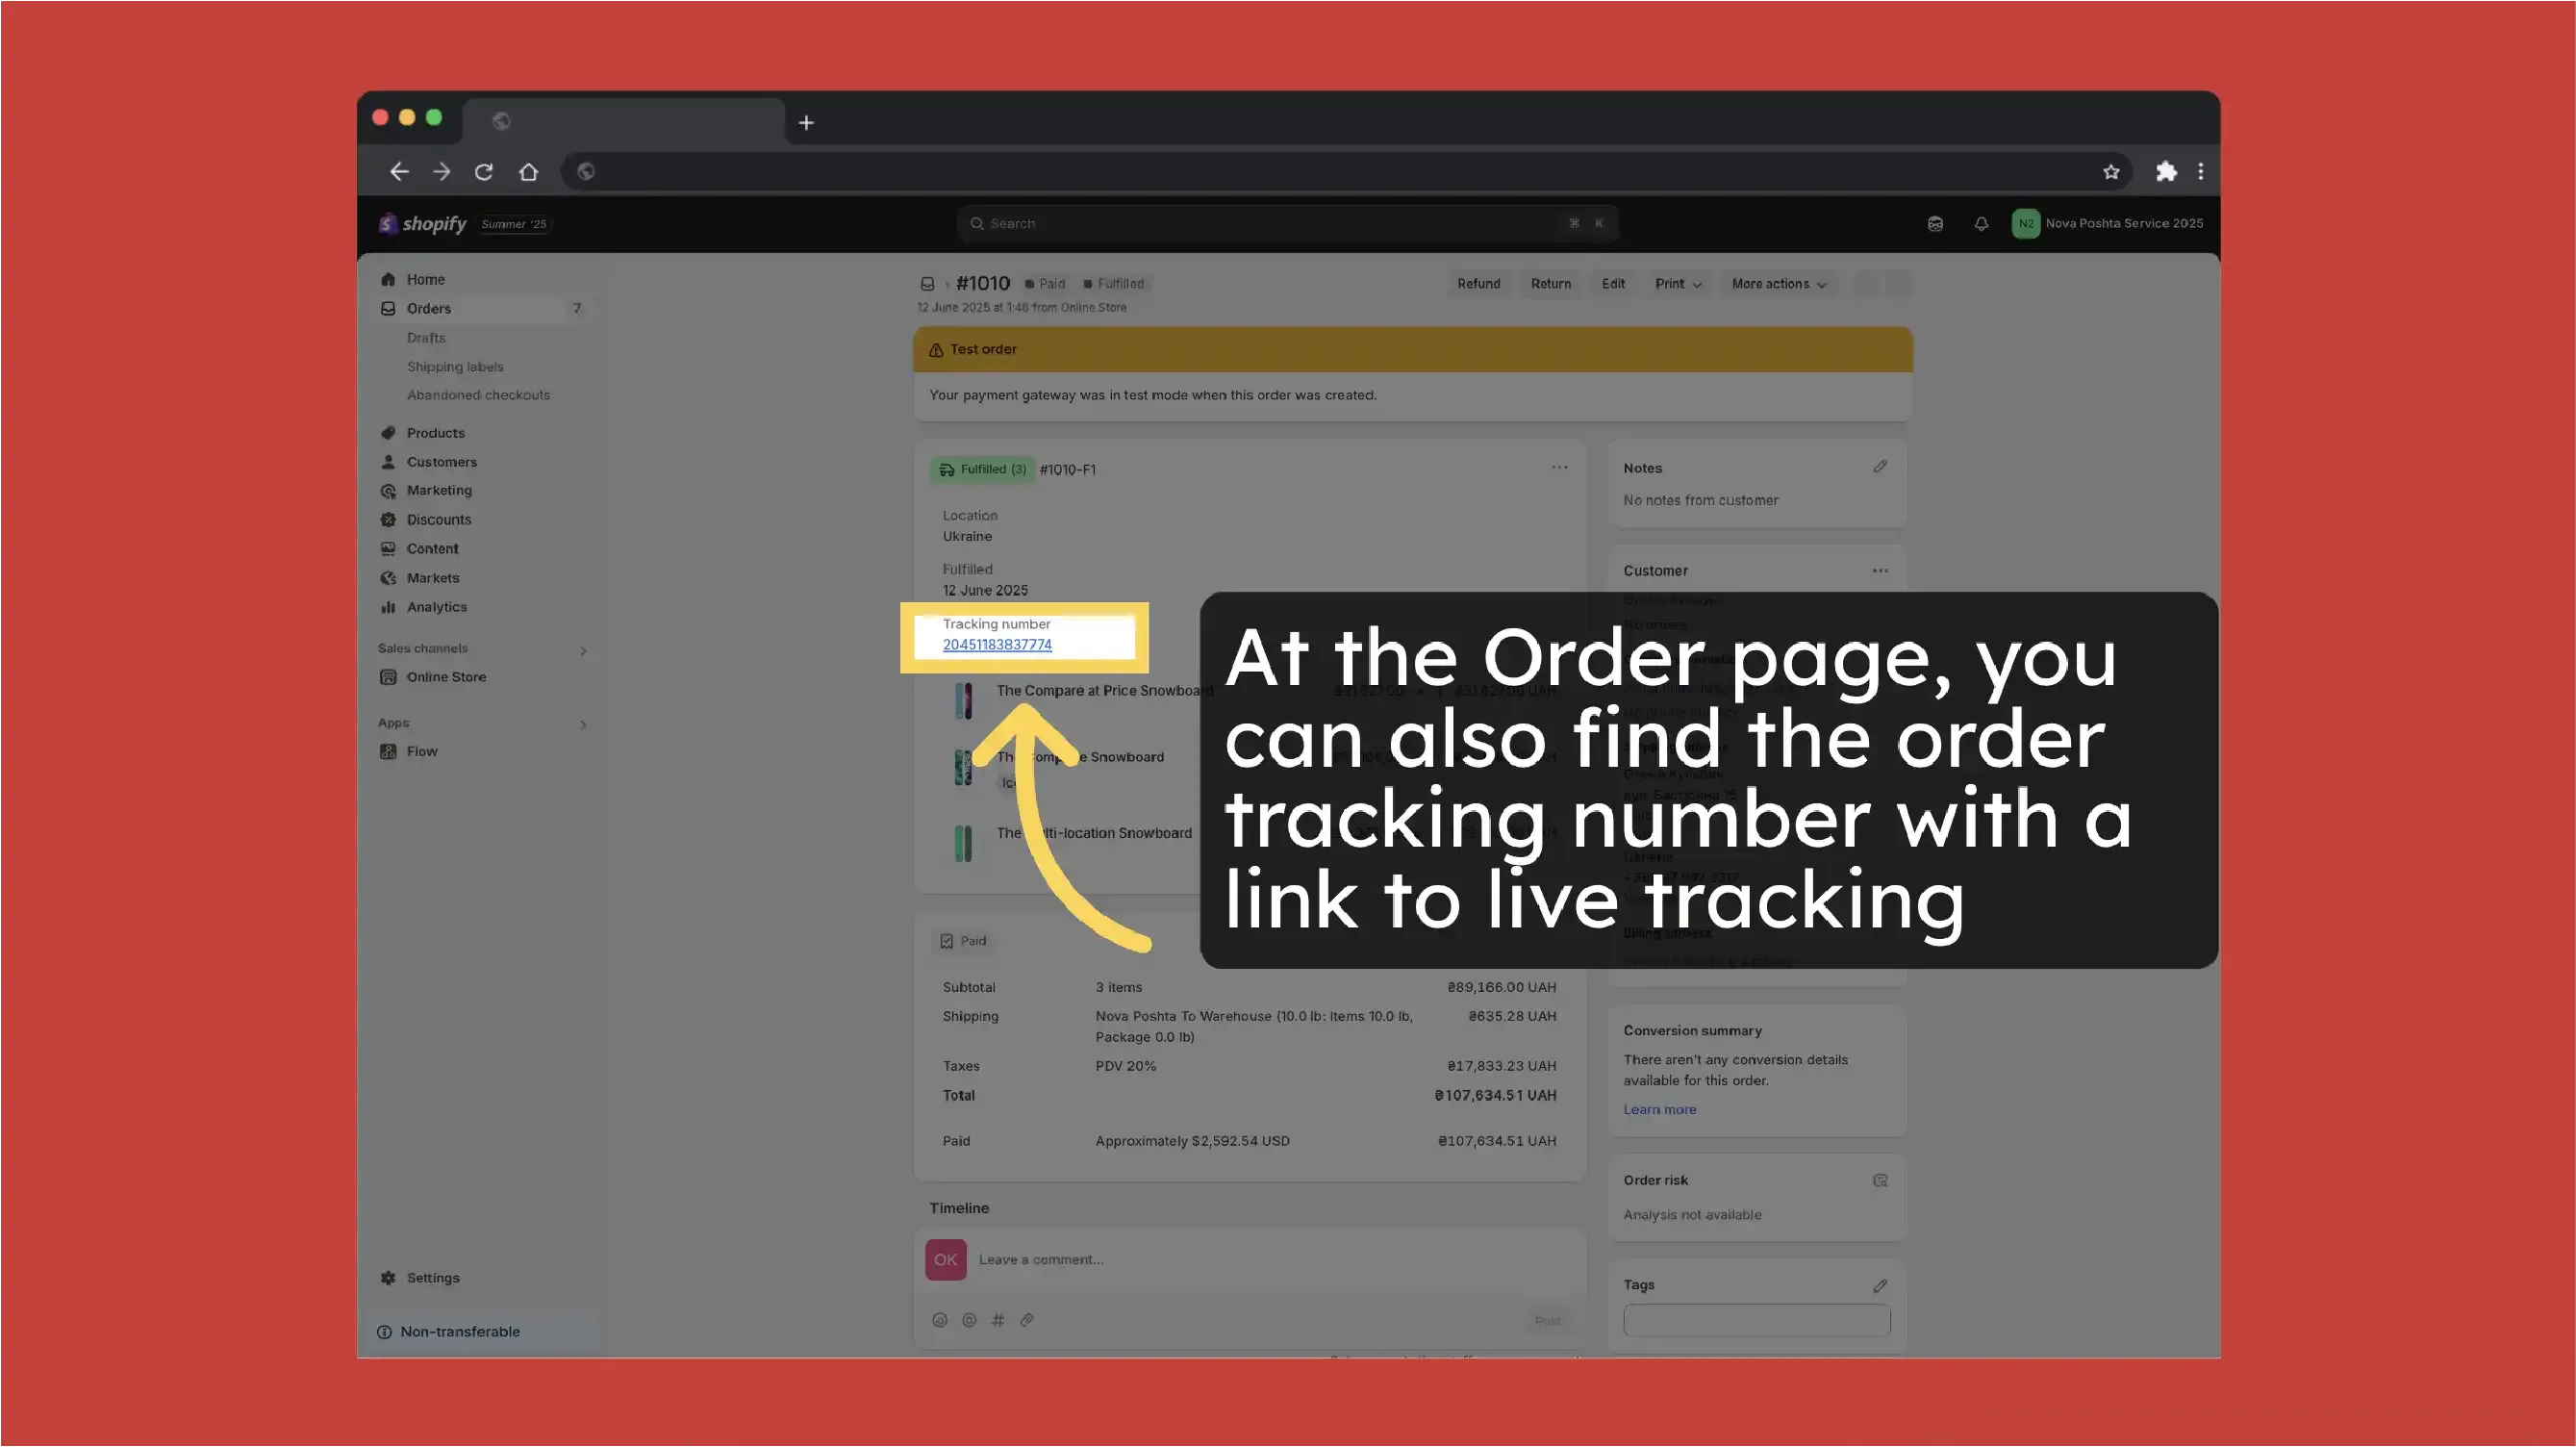
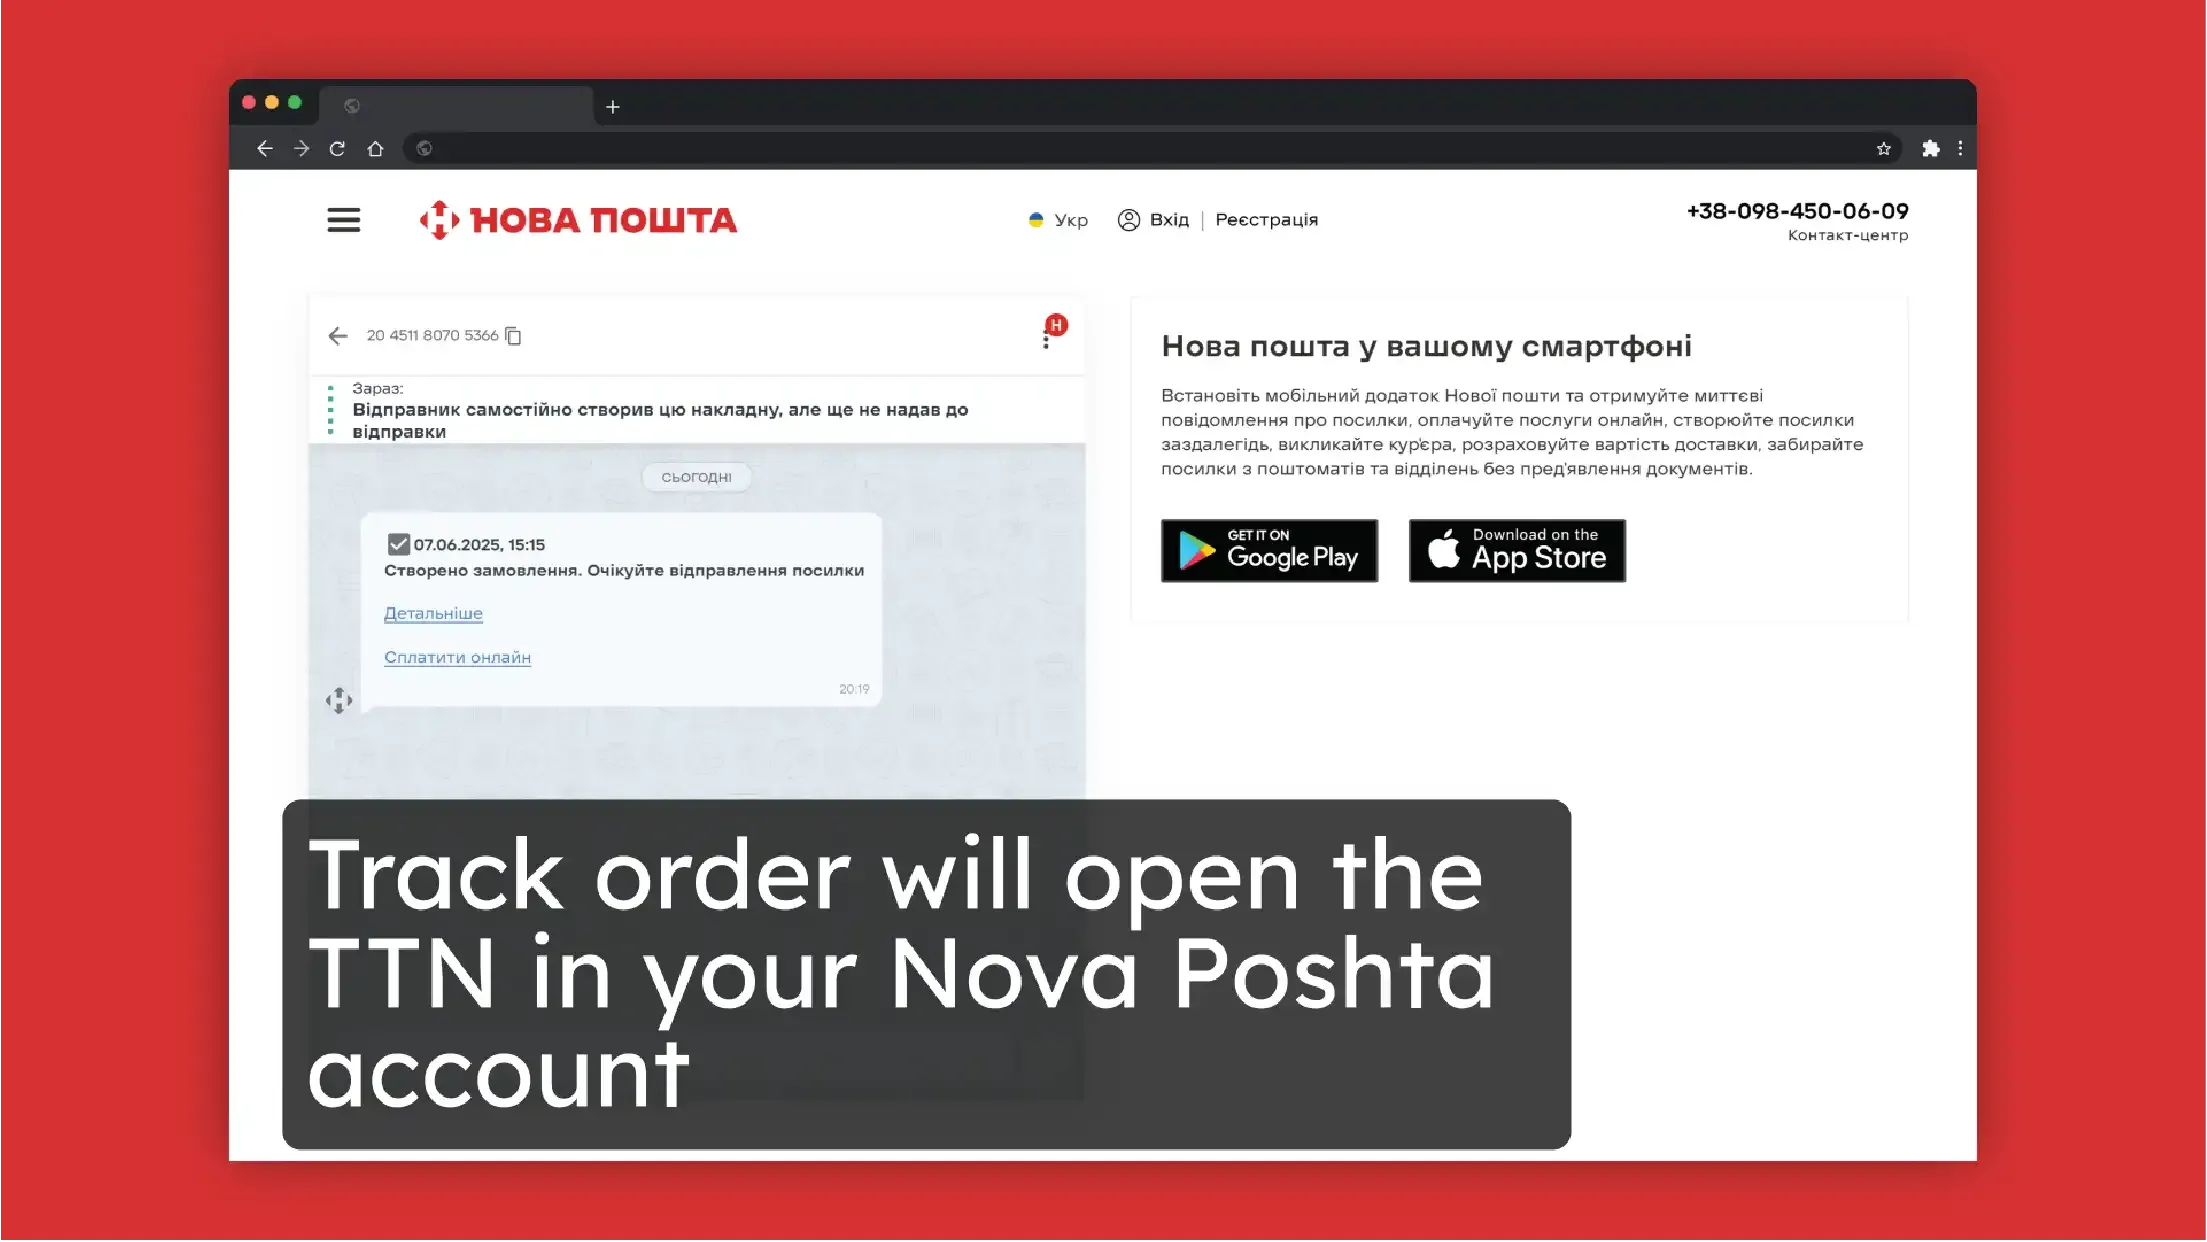
At the Order page, you can also find the order tracking number with a link to live tracking
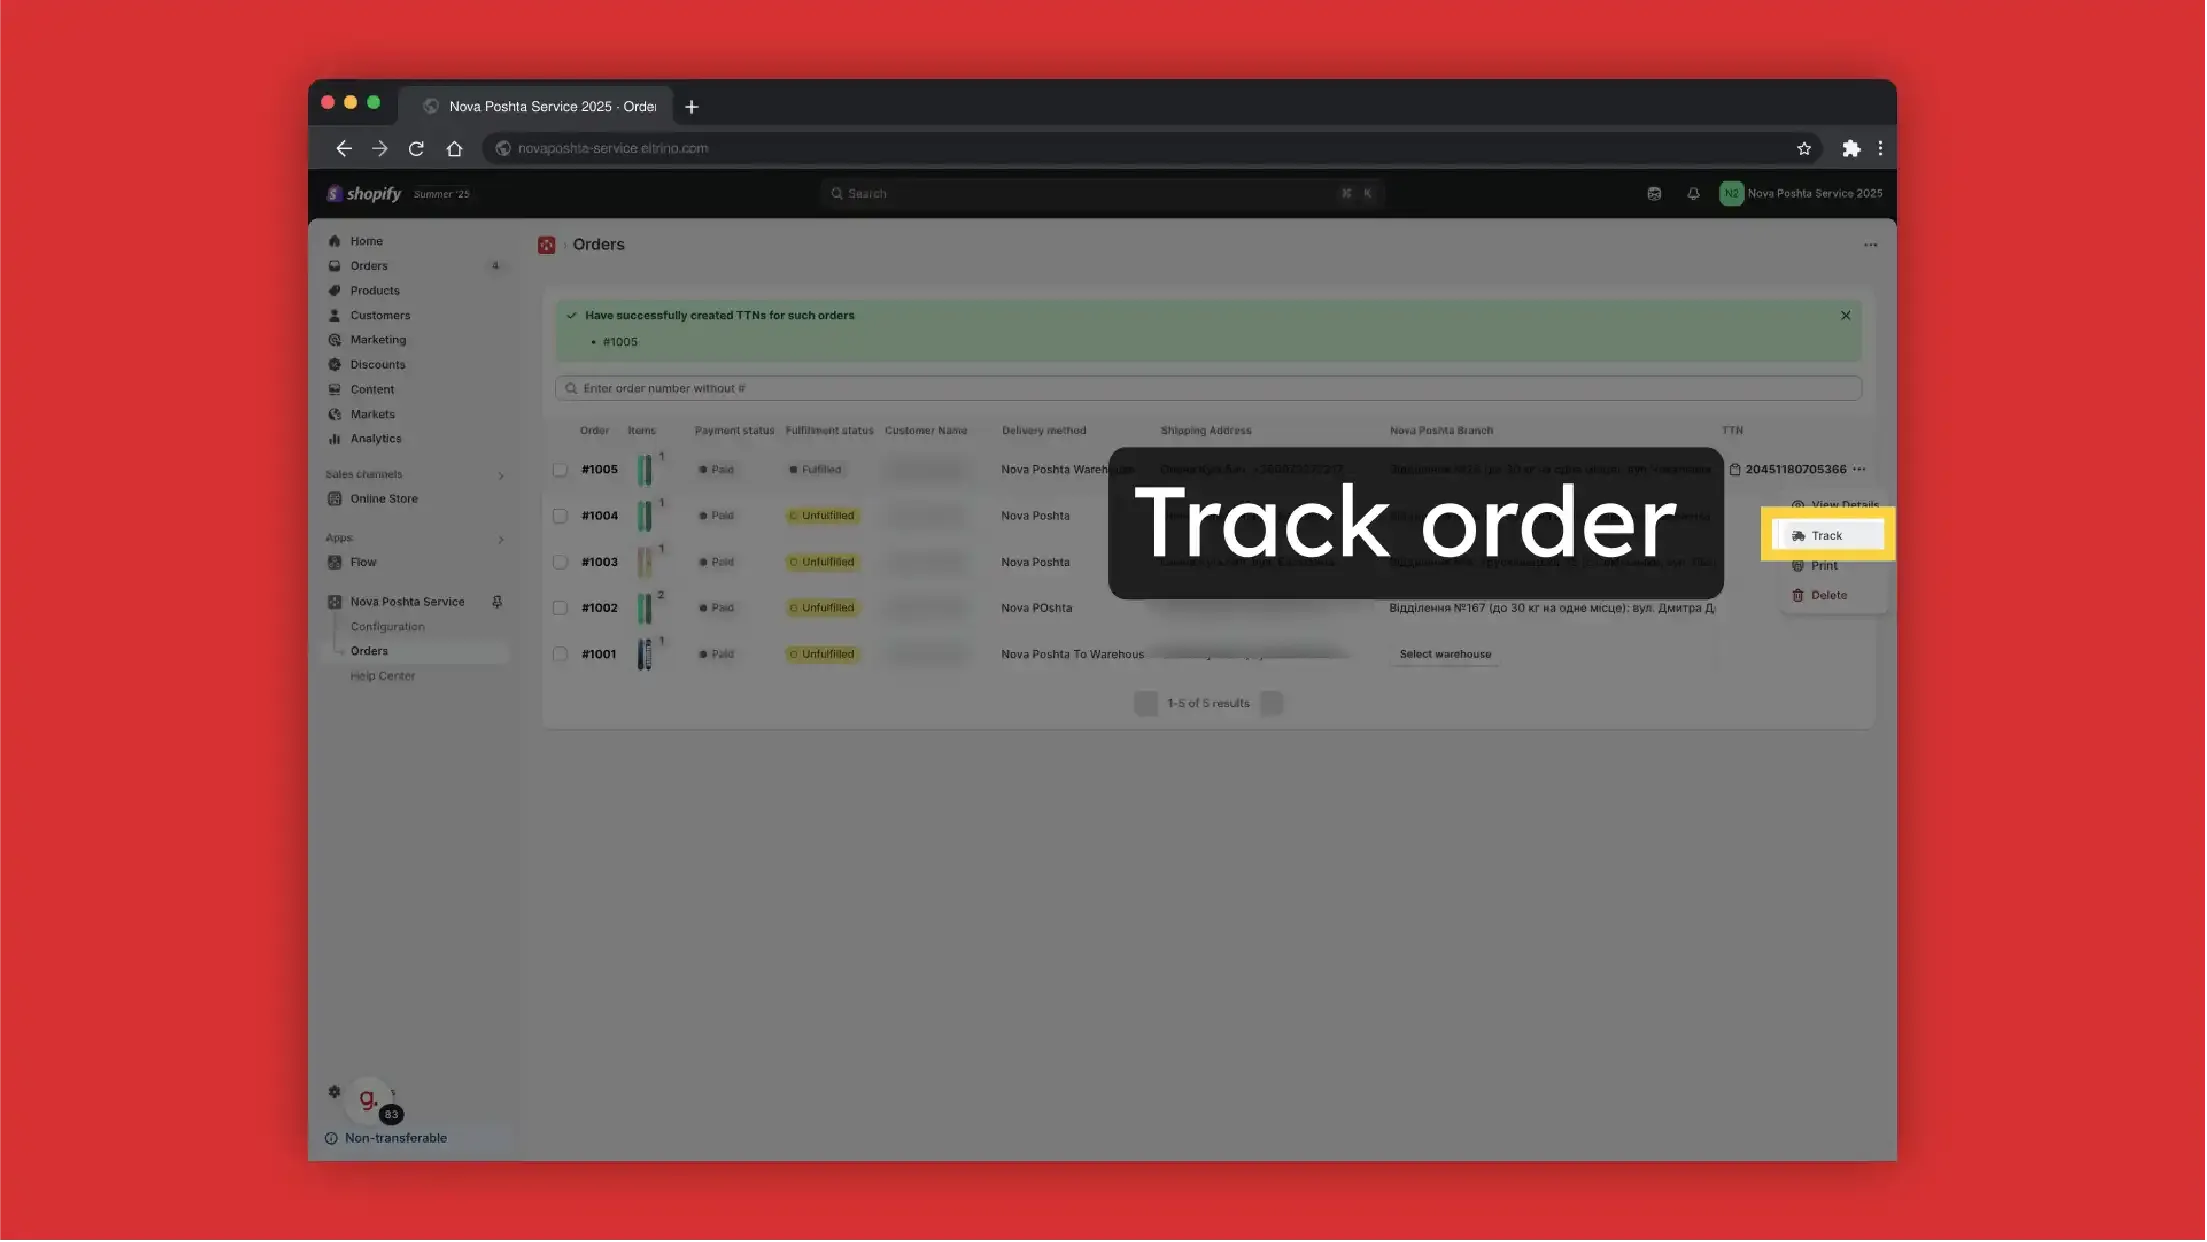
Track order
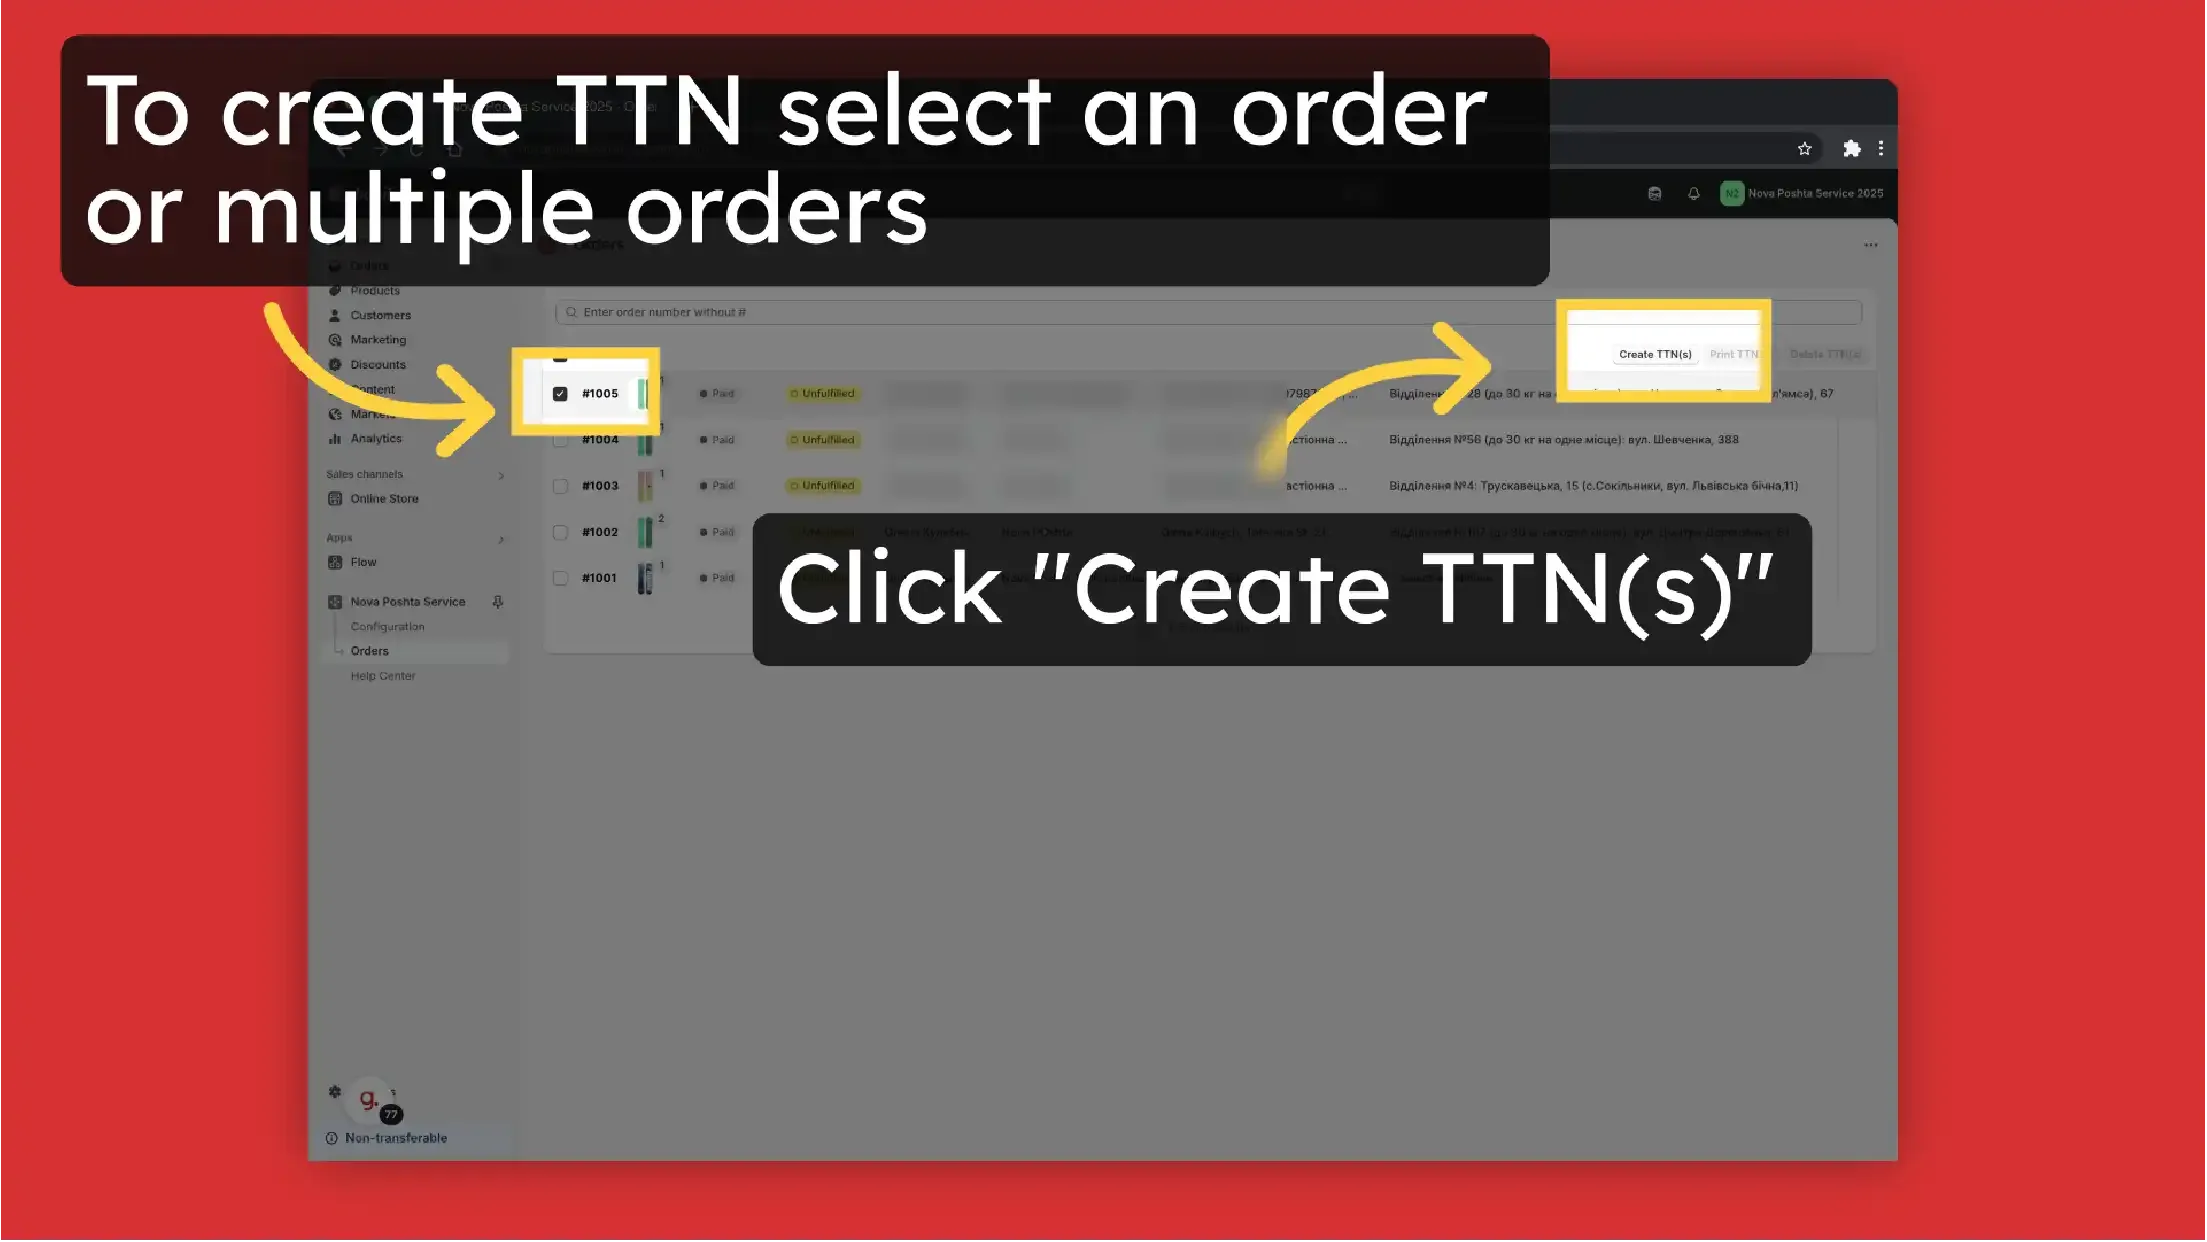
Create TTN manually or automatically
You can create TTN manually
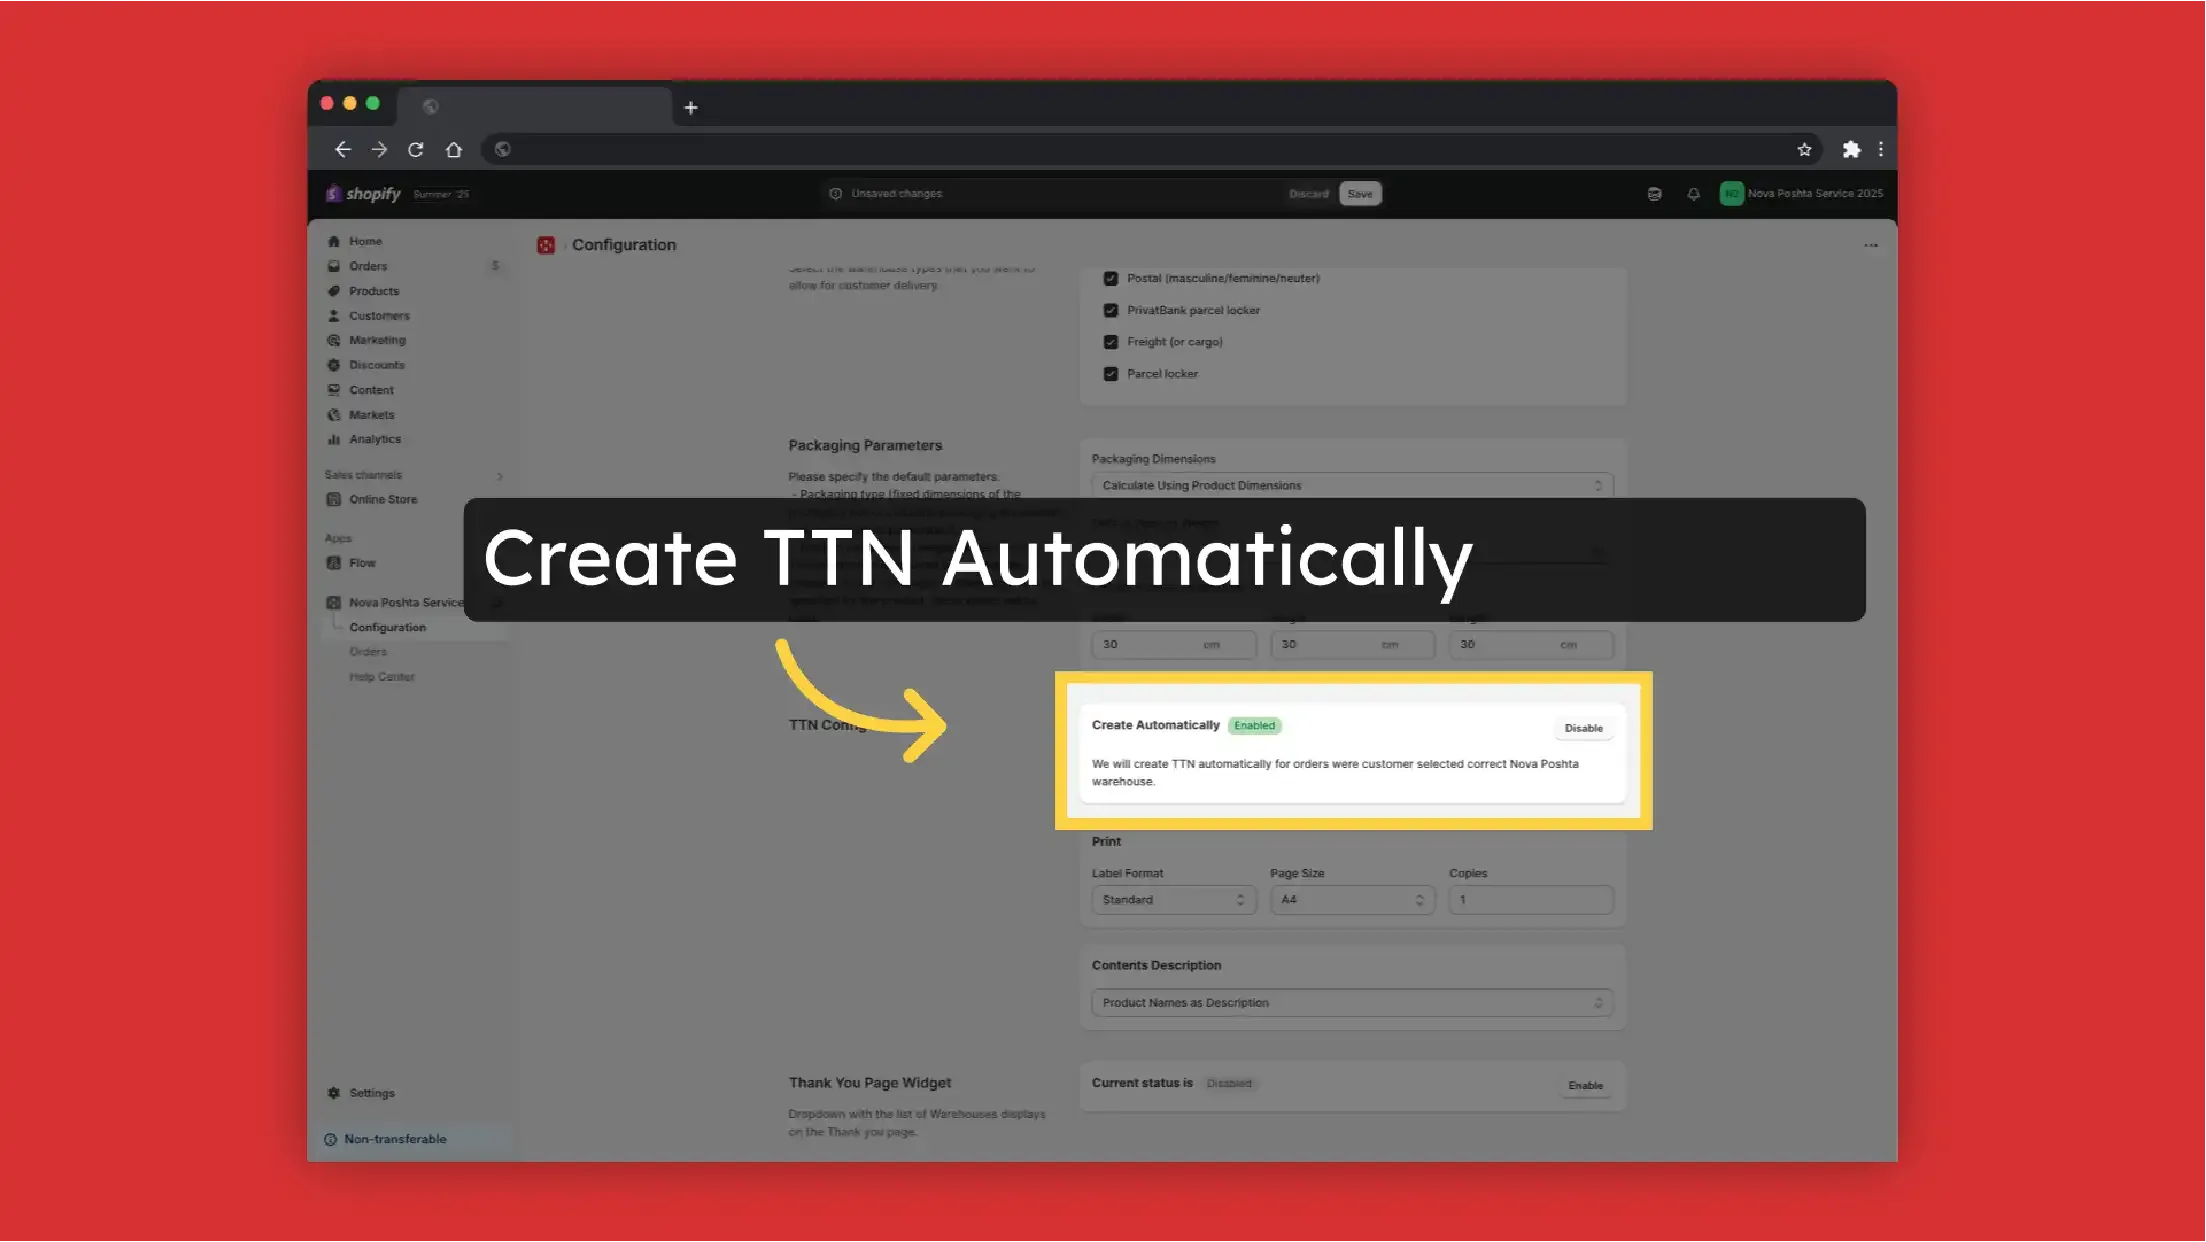
Or set up automatic TTN generation.
!Please note, if you set up sending from the address (not from the Nova Post warehouse), then every time the TTN generates it will call a courier.
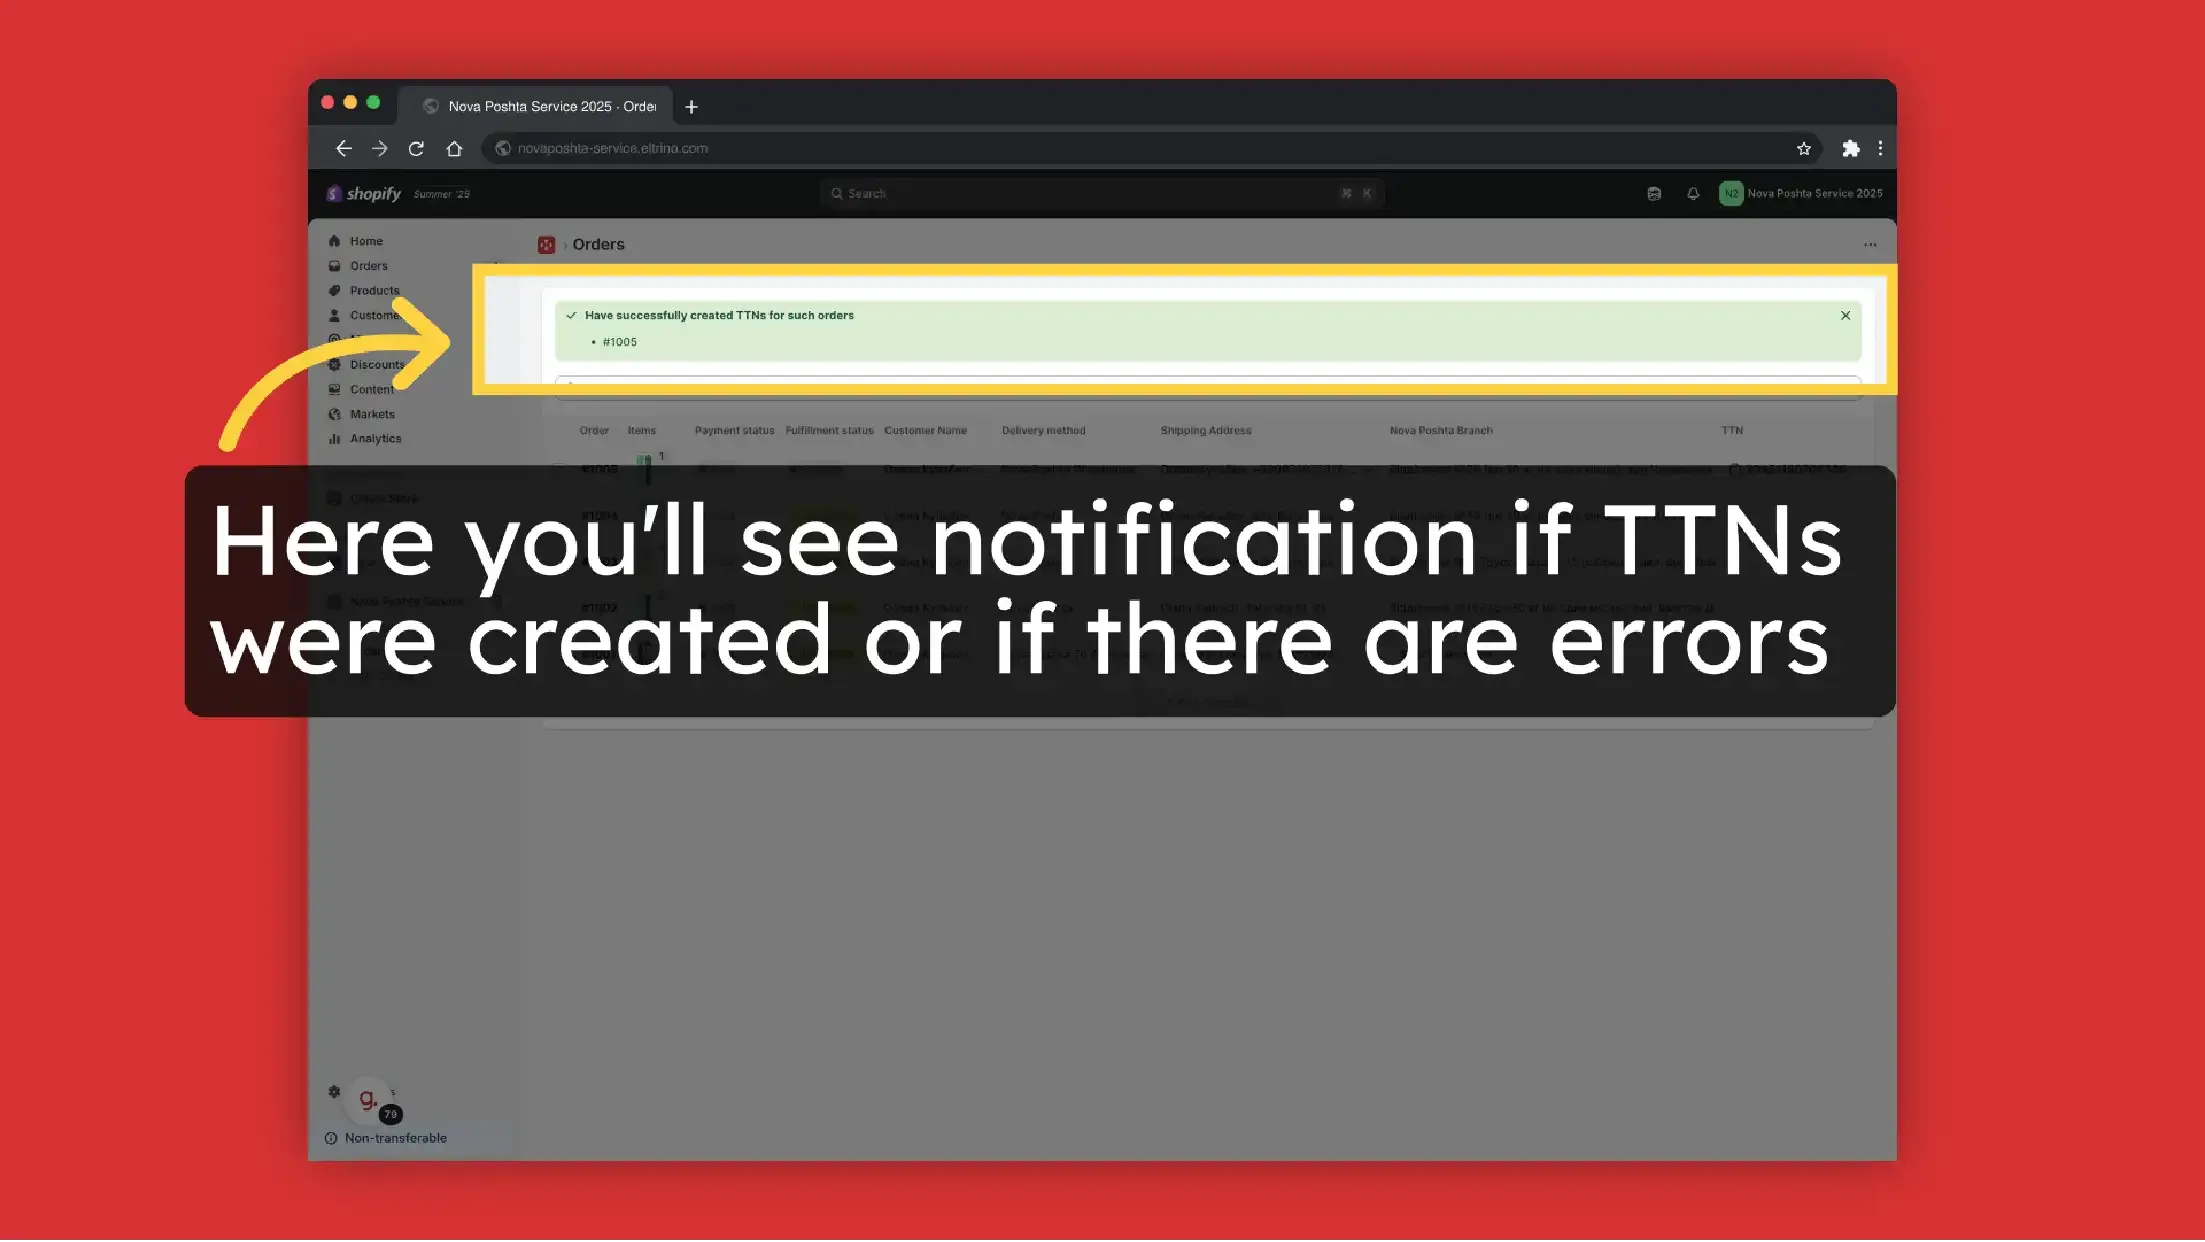
If there is an issue during TTN generation, you will see a notification with explanation here.
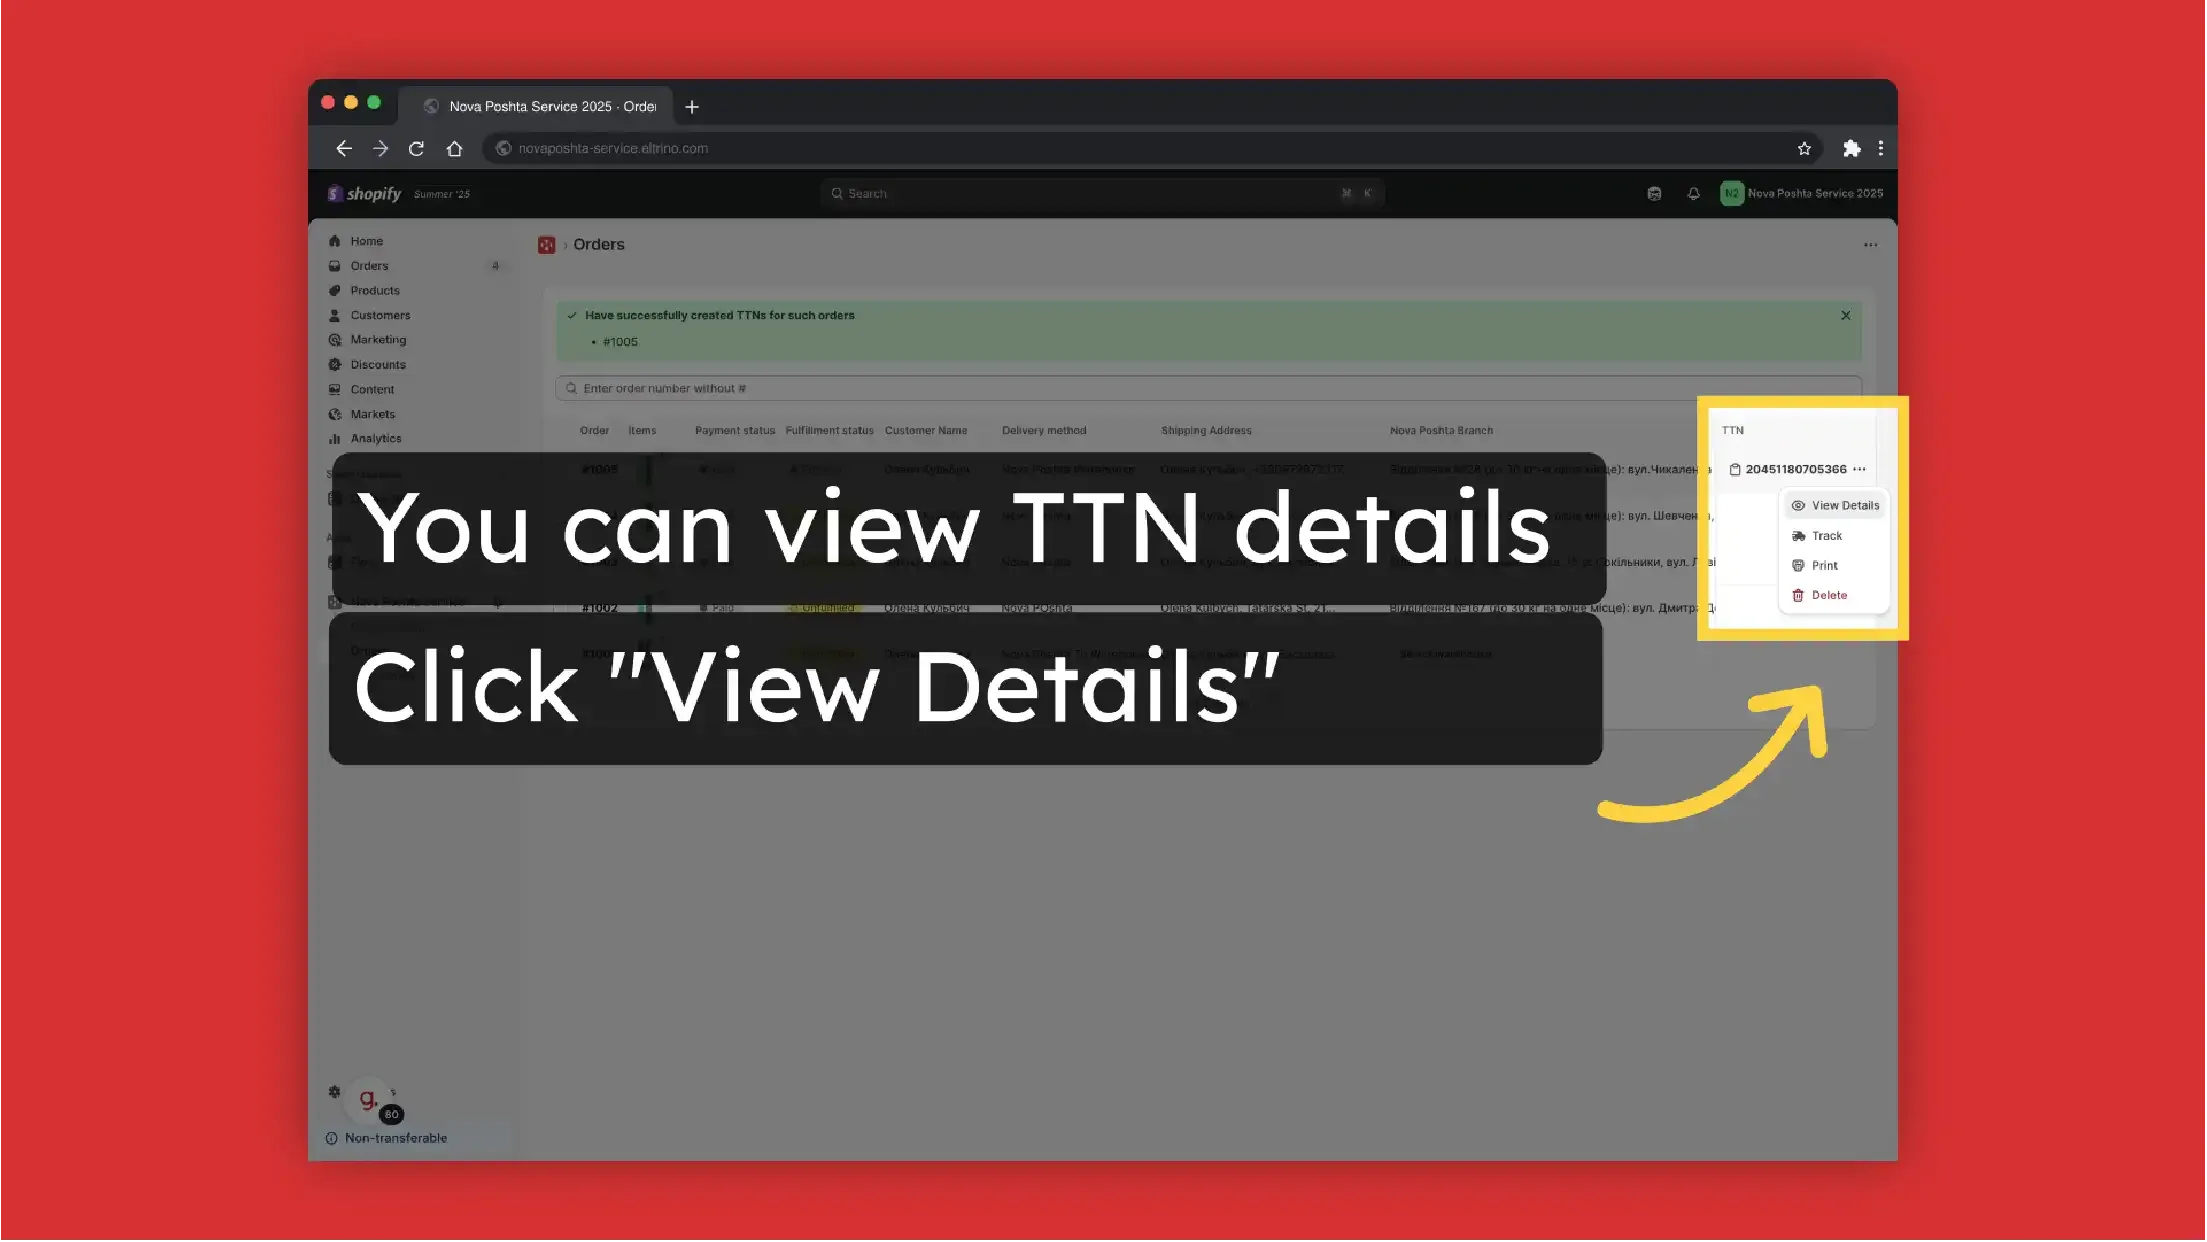
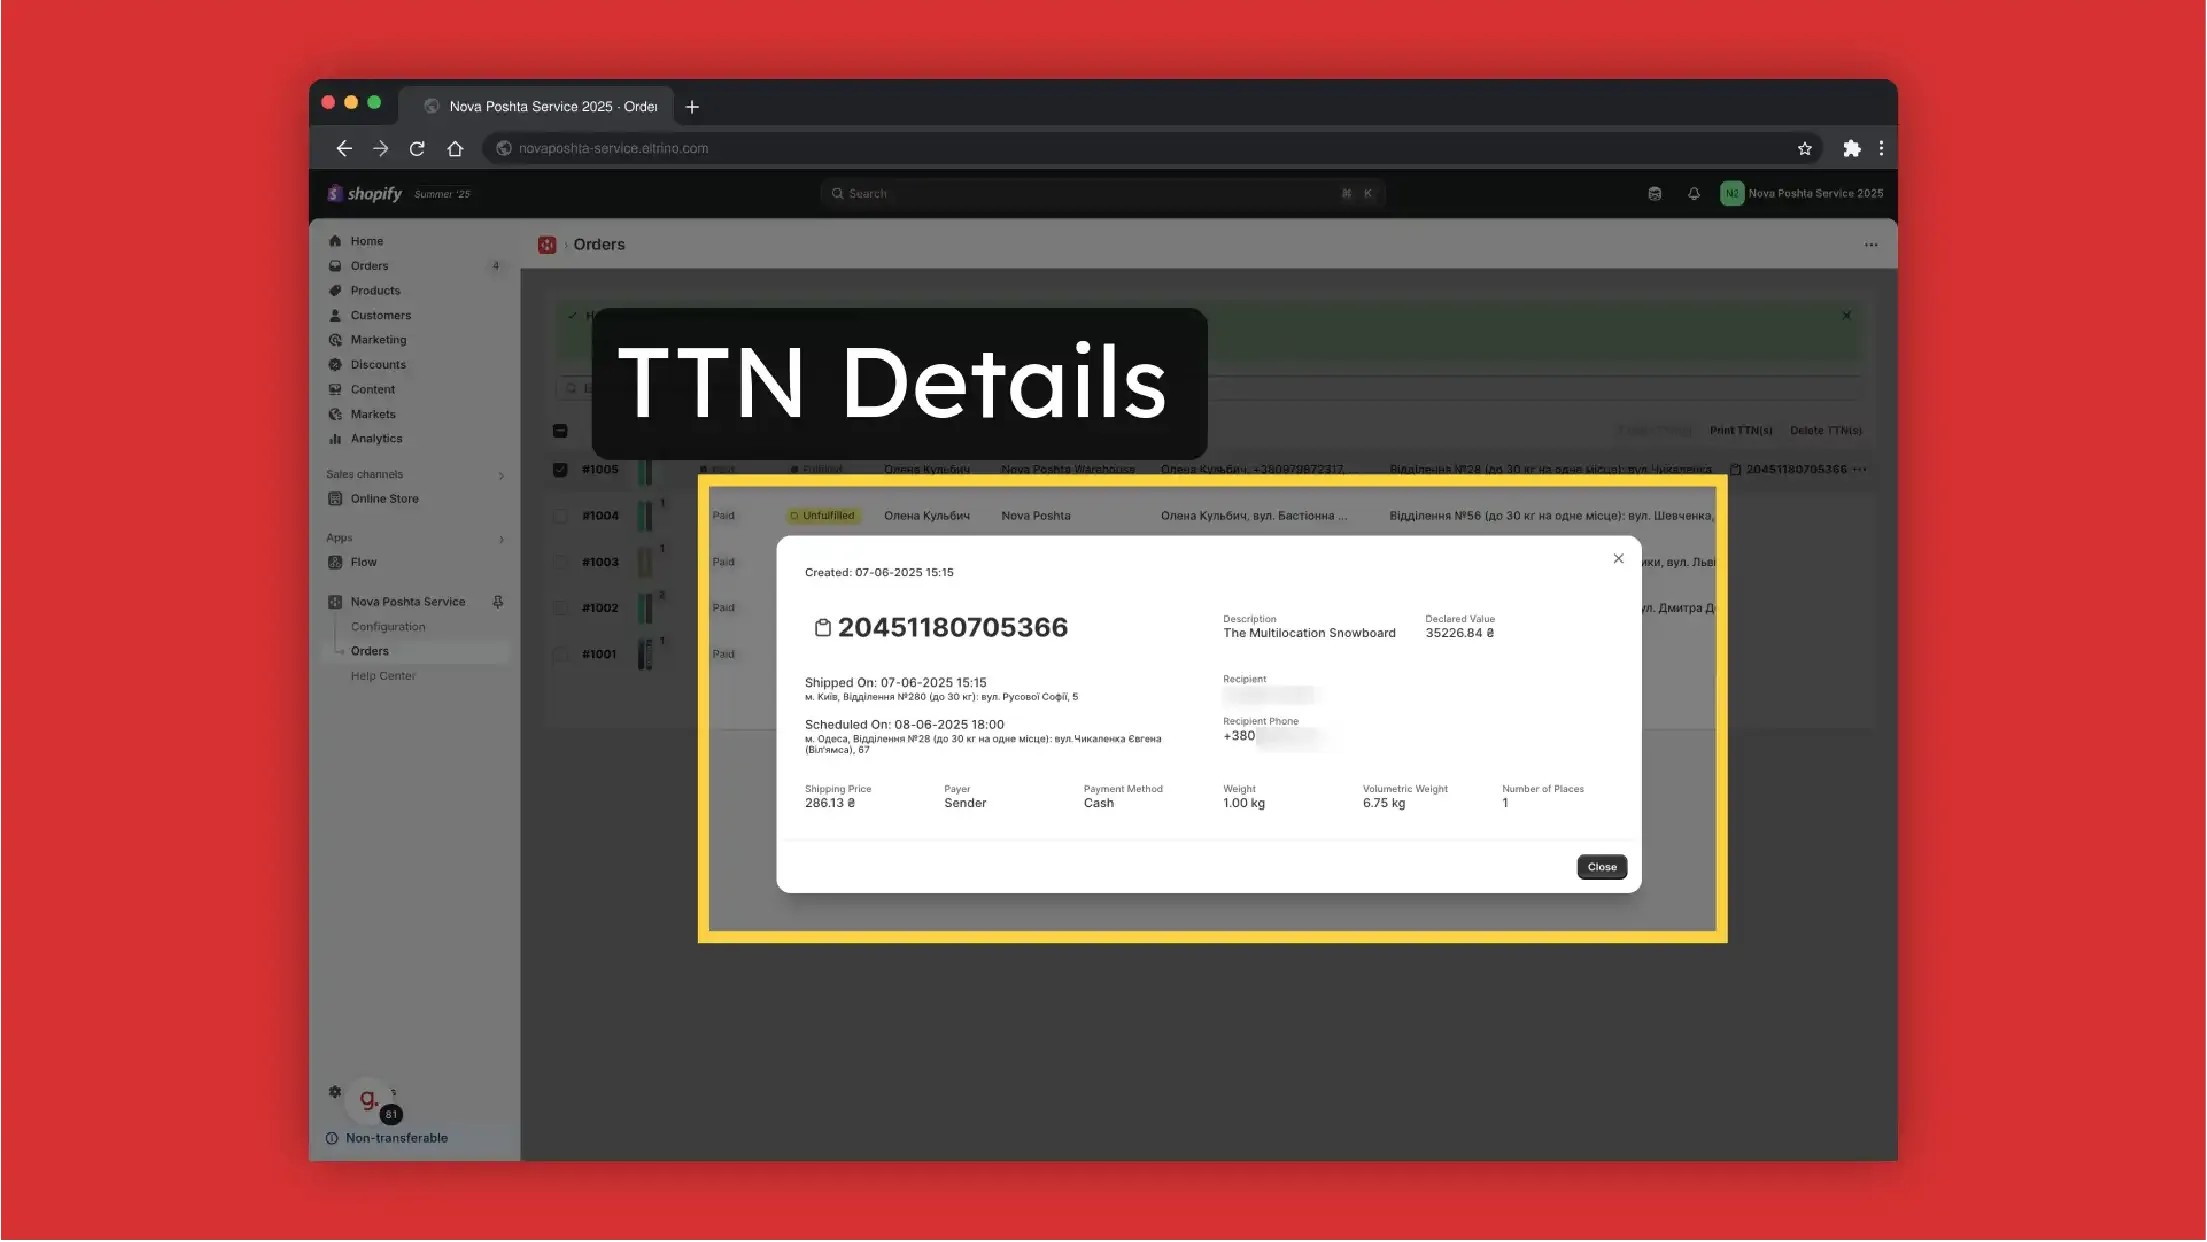
View TTN details
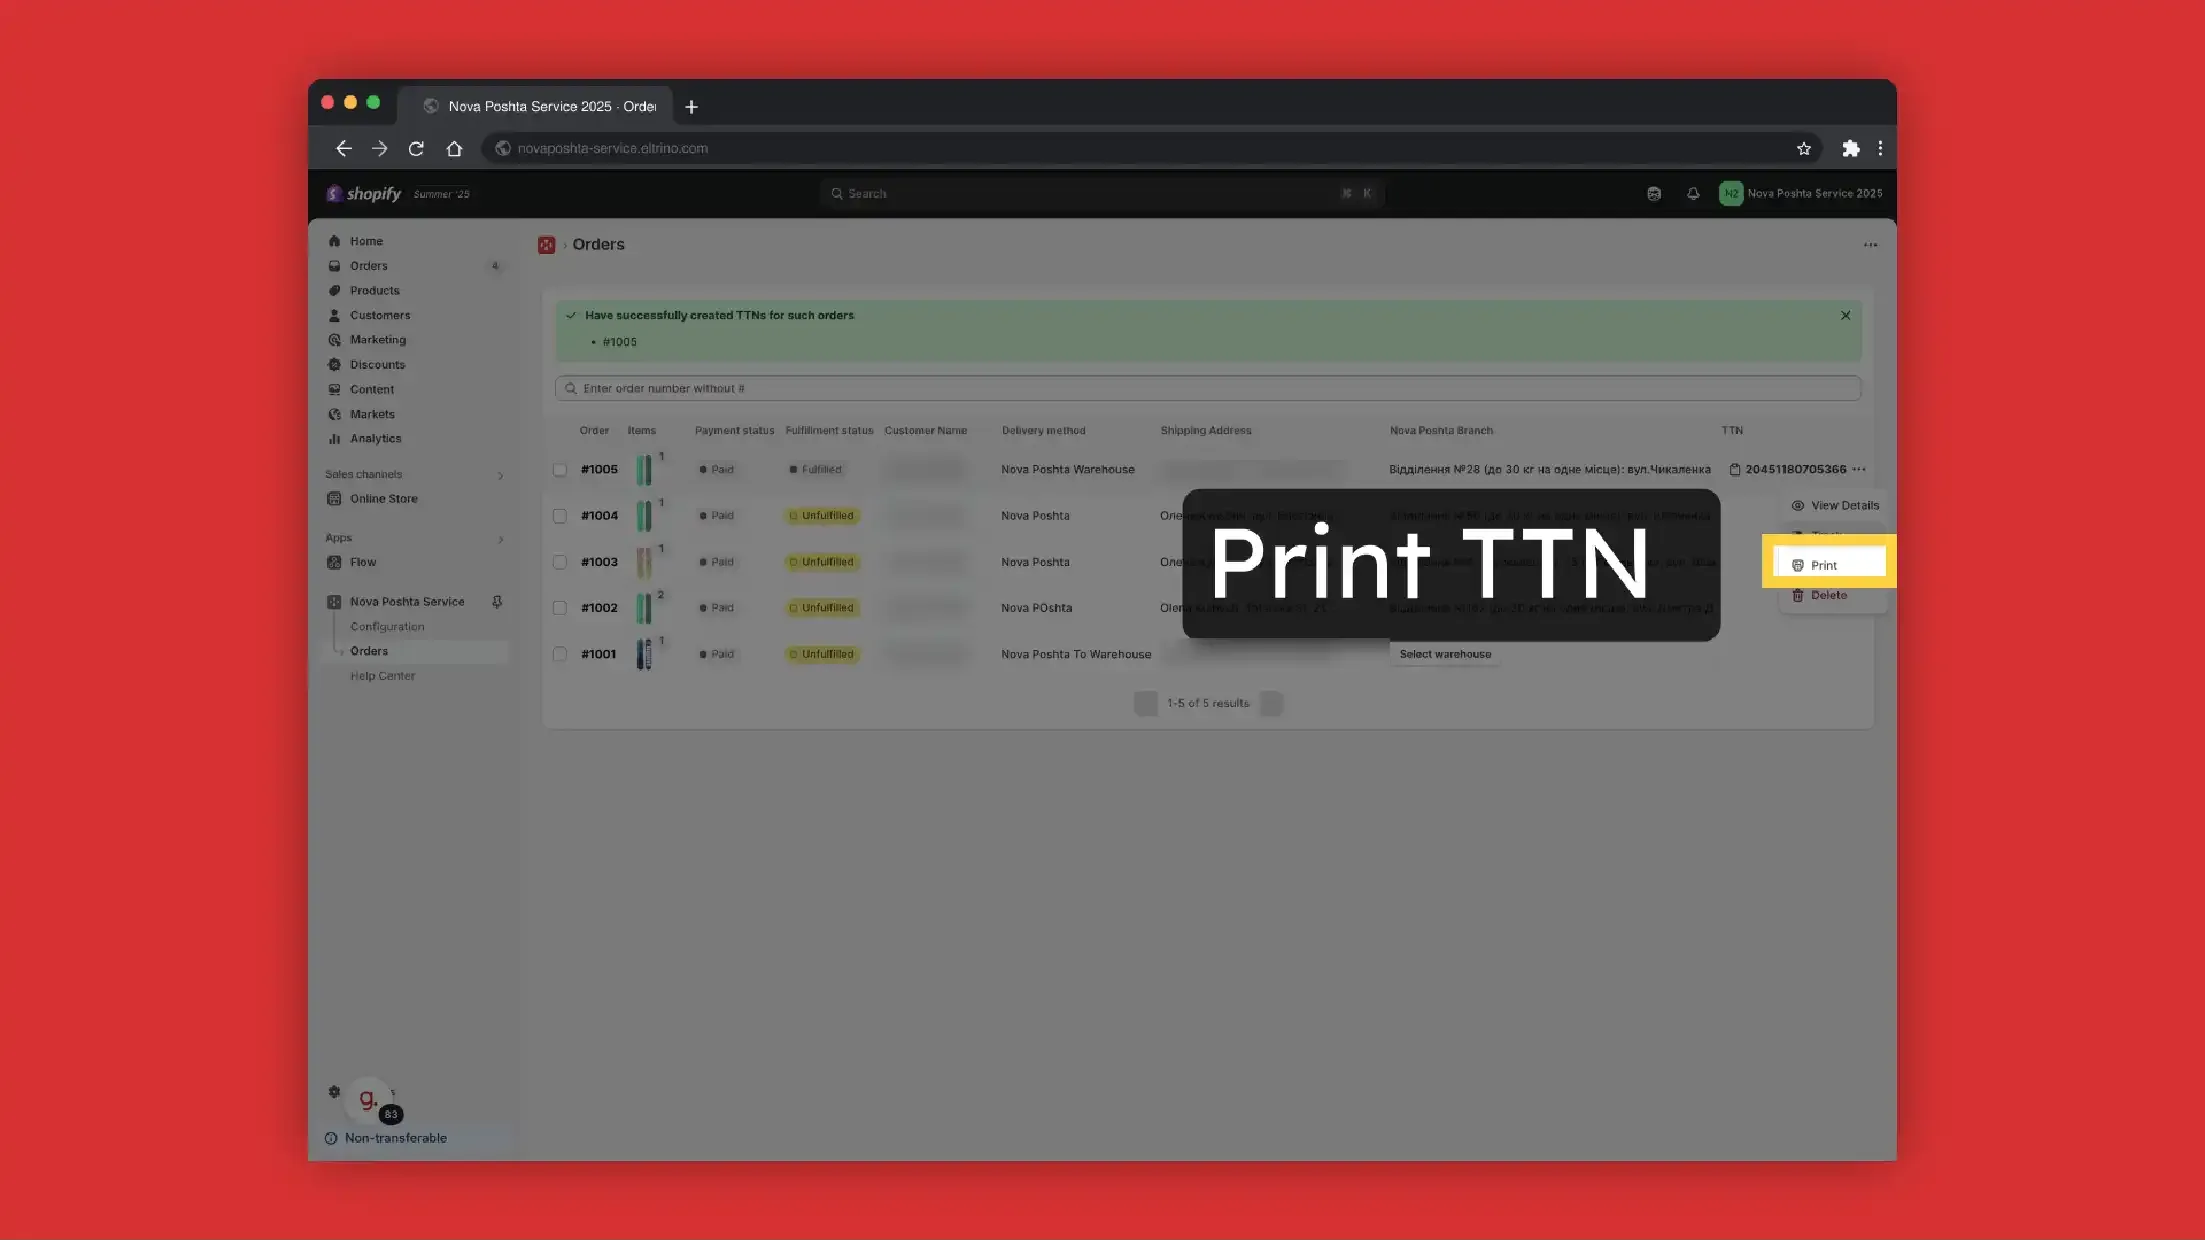
Print TTN
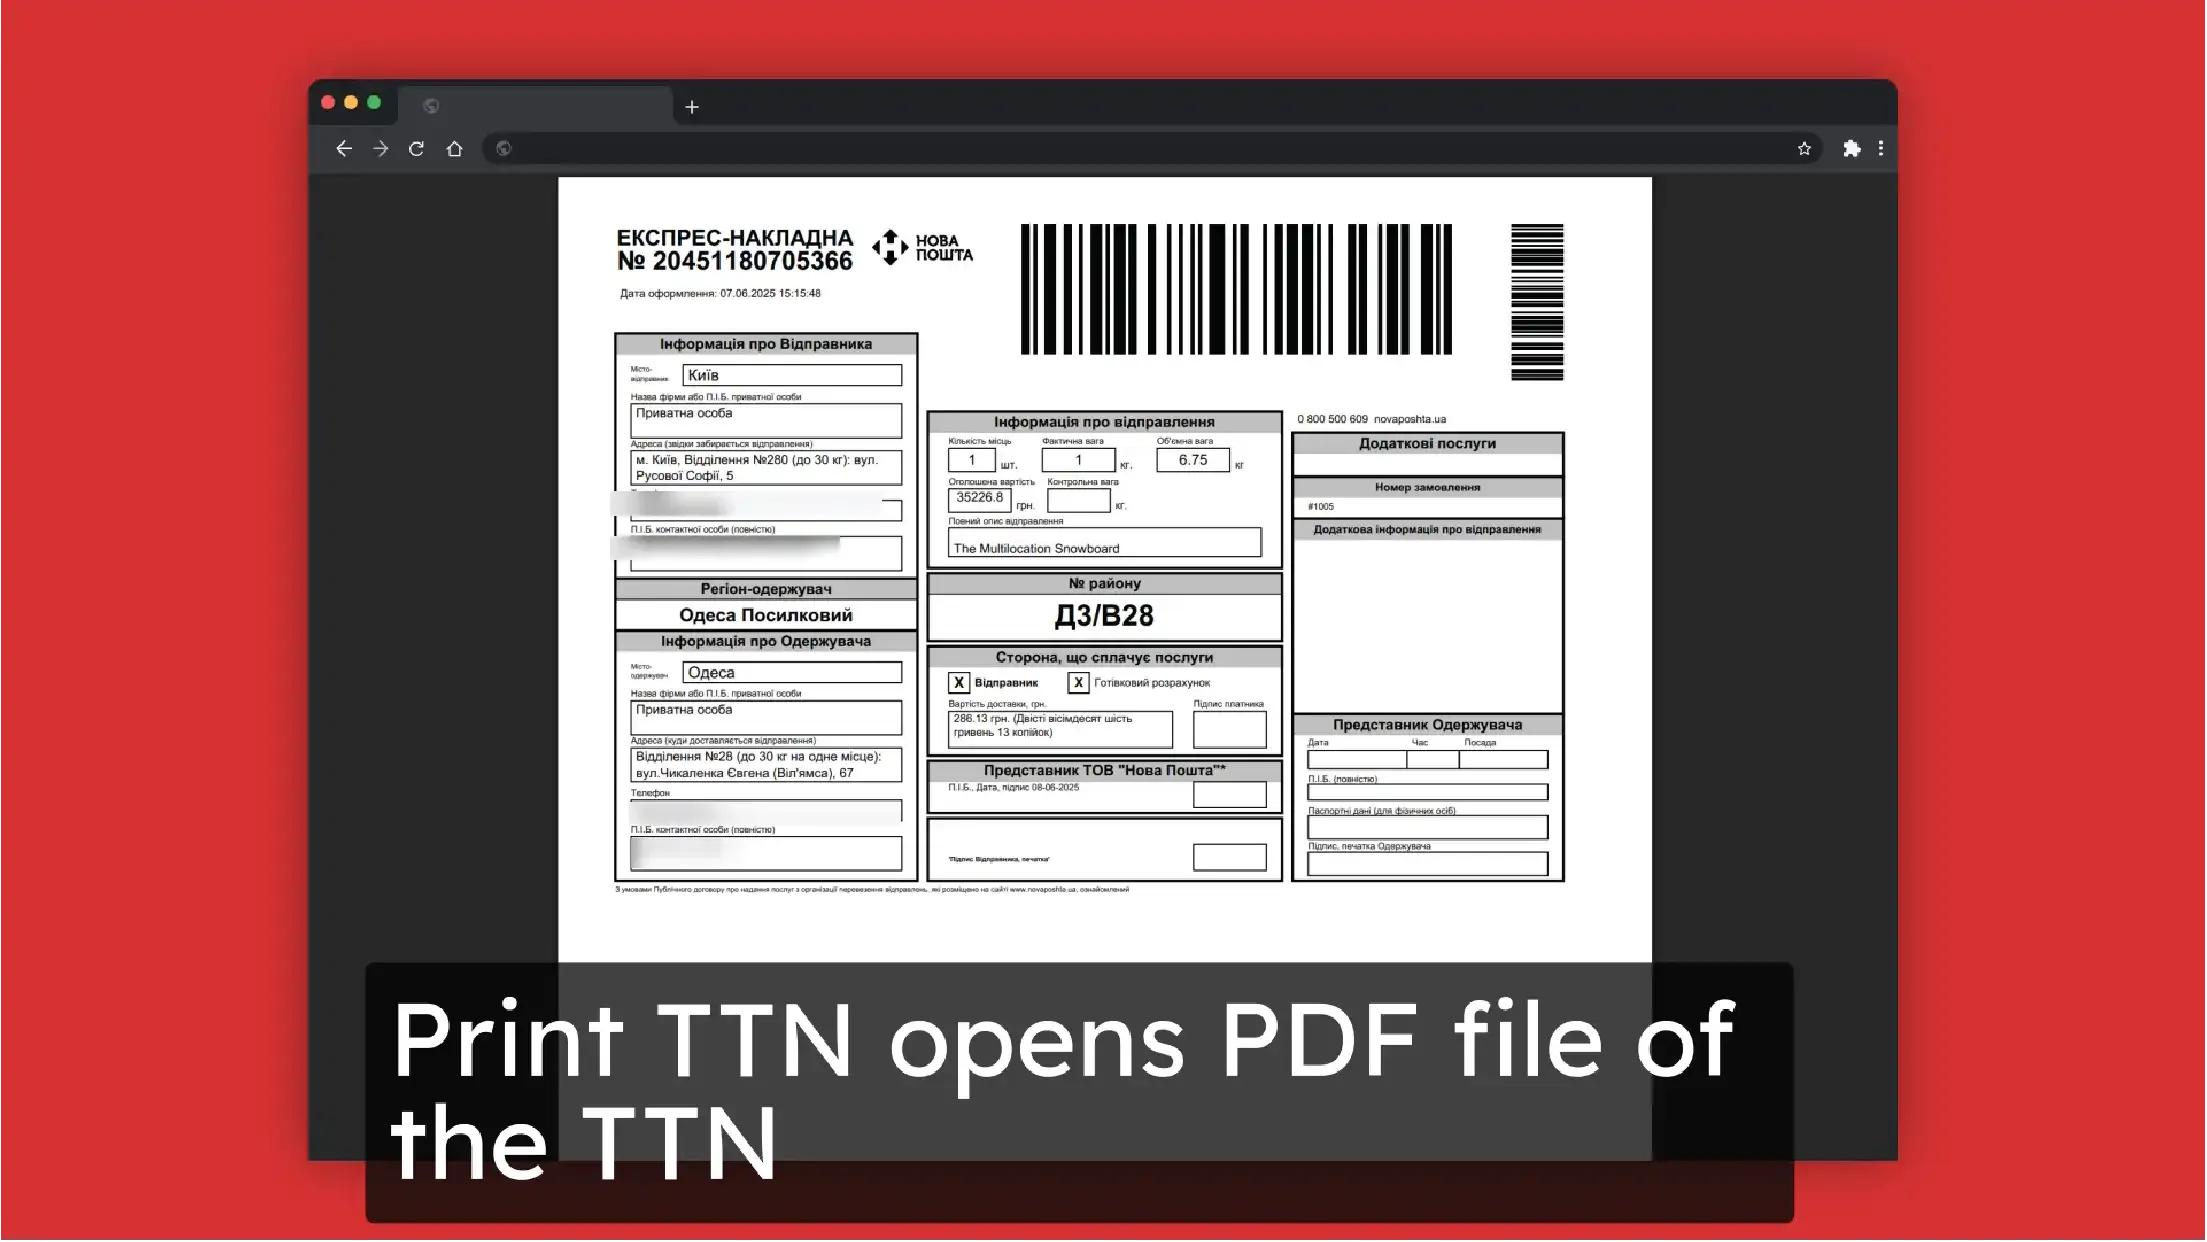
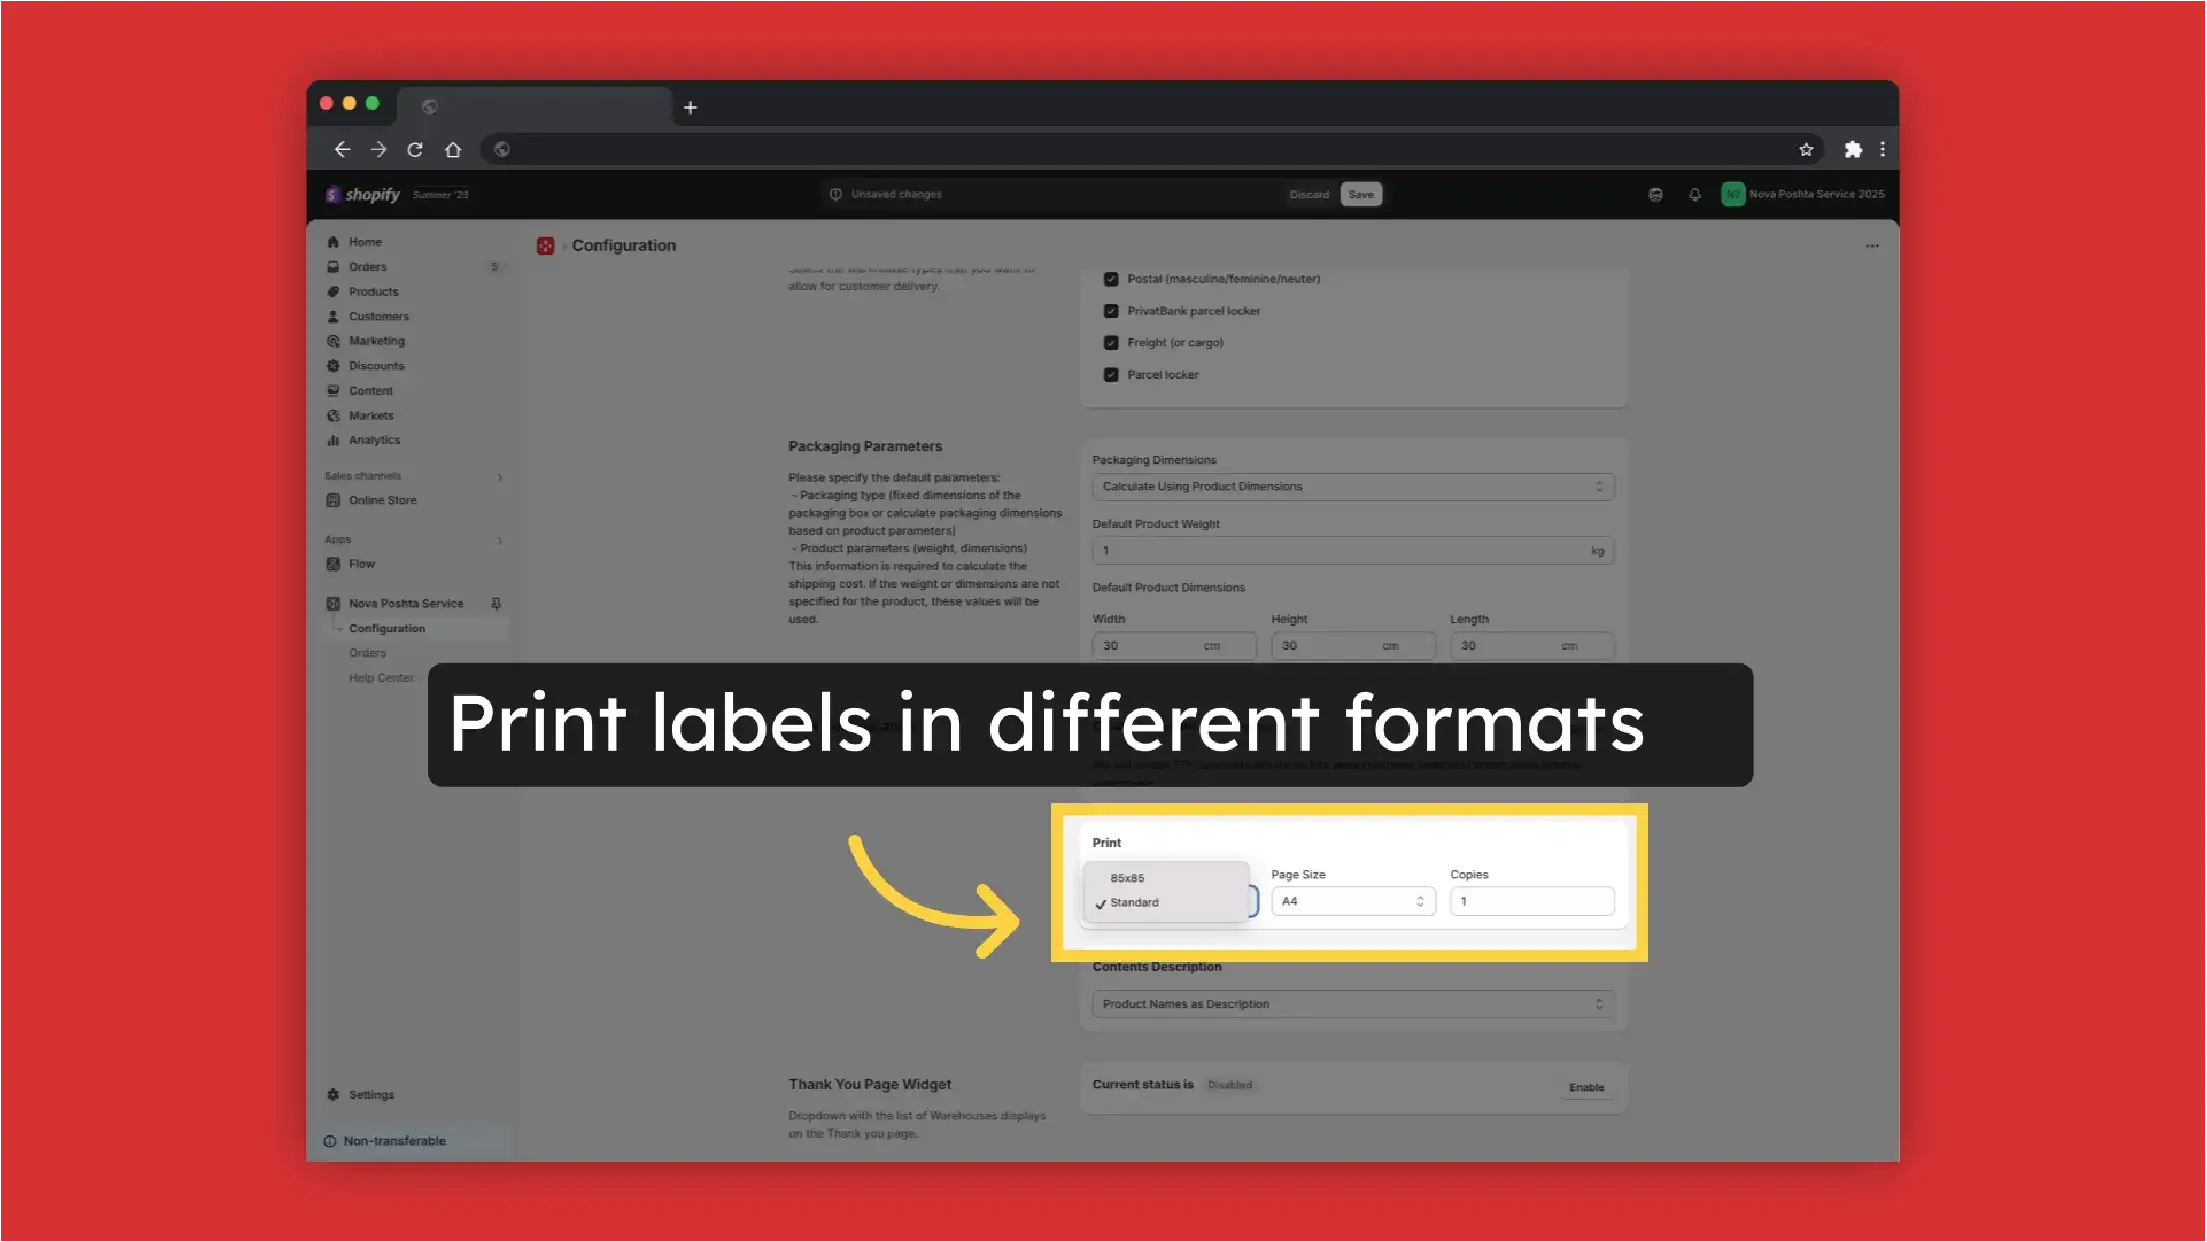
You also can print labels in different formats.
Go to Configuration >> TTN Configuration >> Print and select the format that works for you
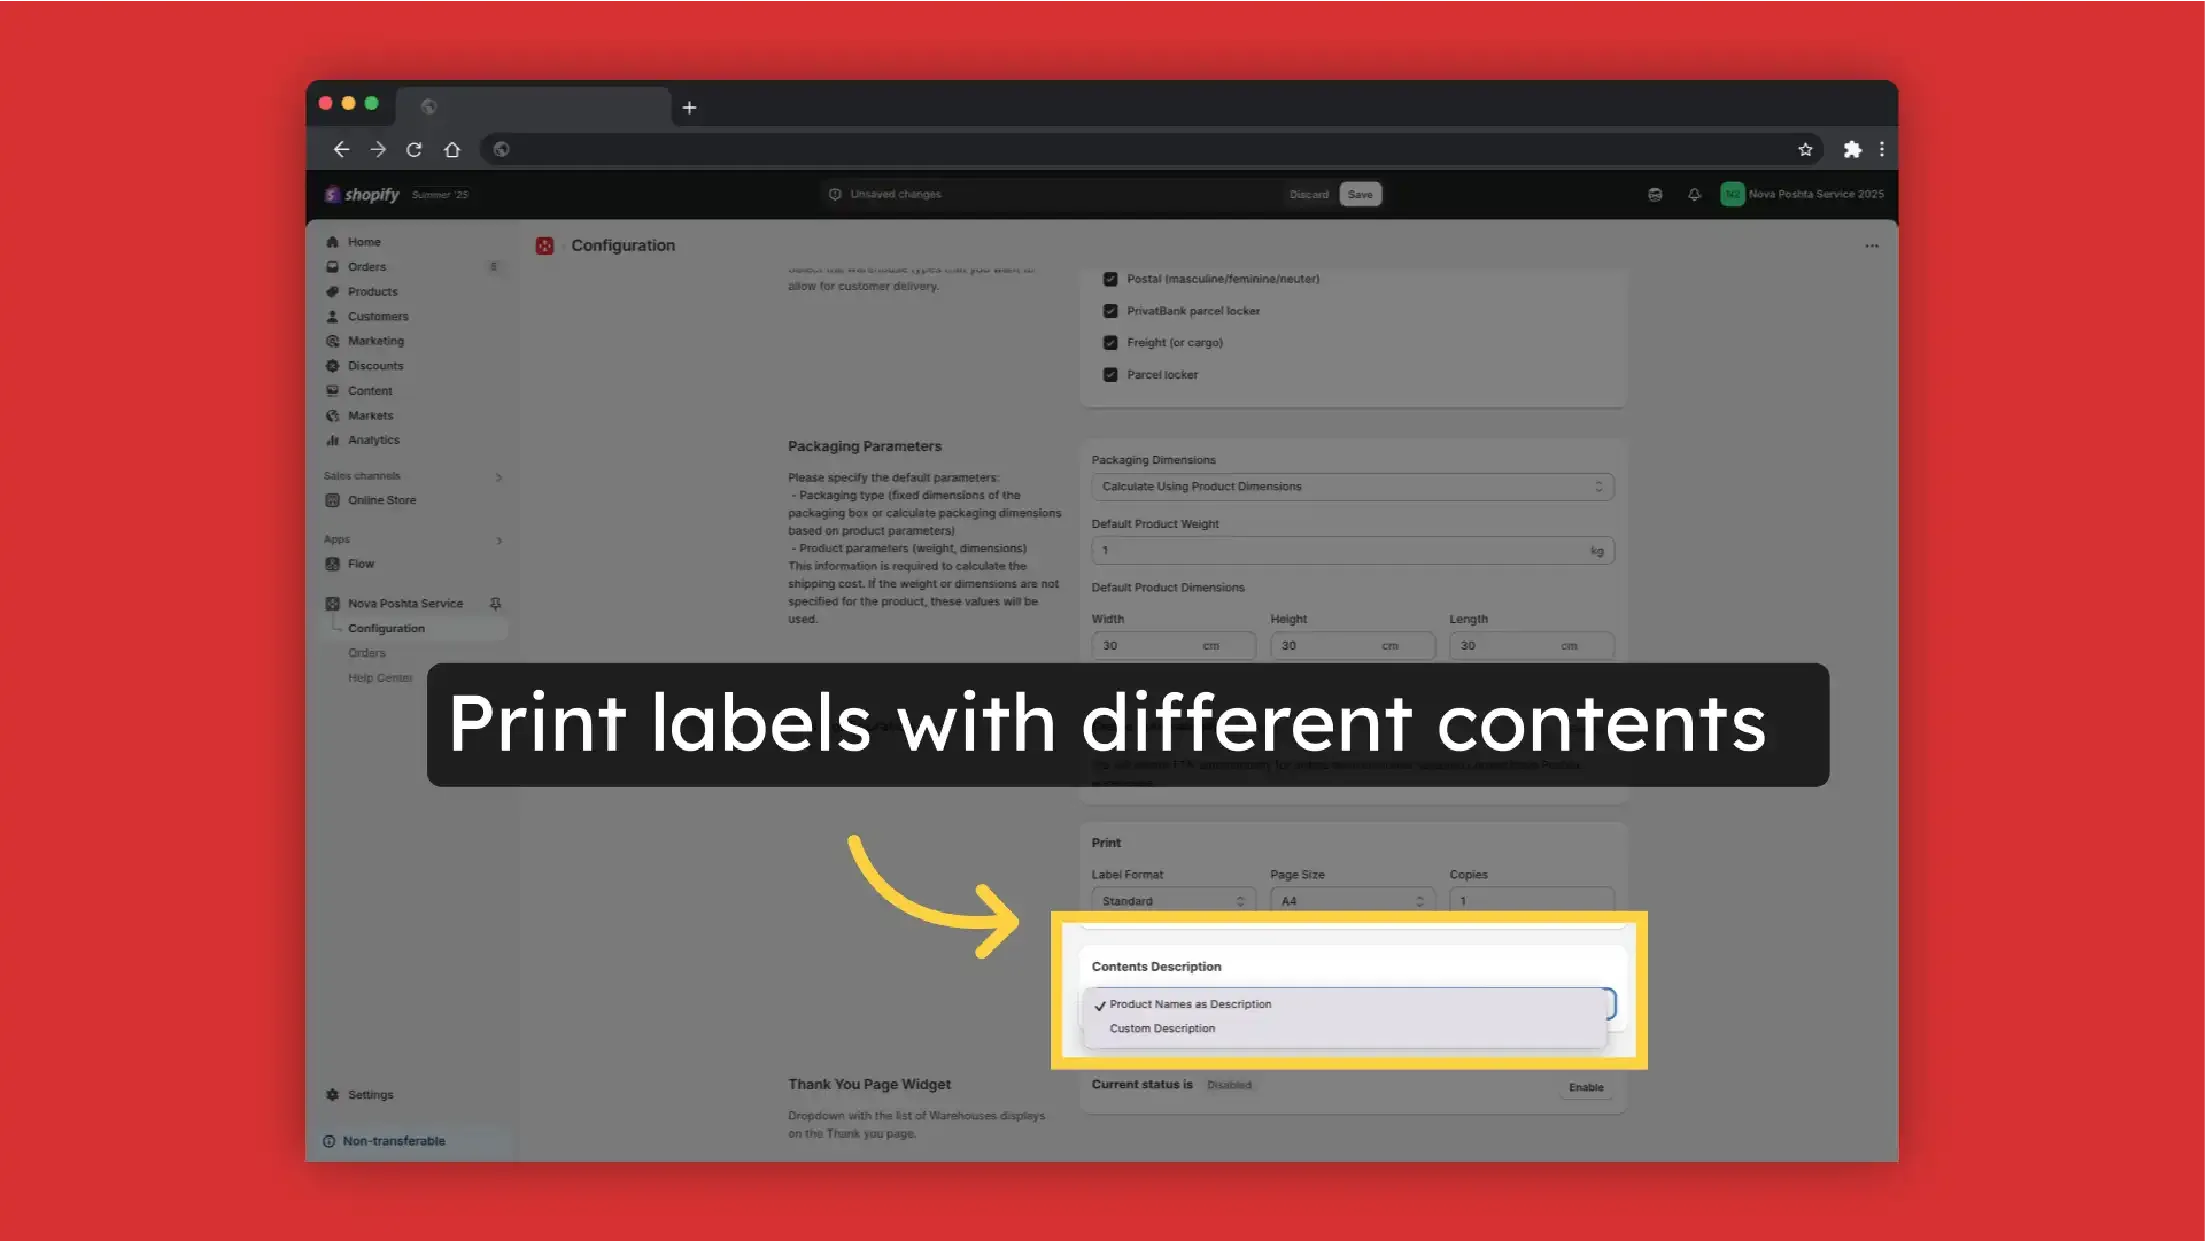
And with different contents
Configuration >> TTN Configuration >> Contents Description >> Product Names as description or add custom description
Set up the app with calculation of shipping cost (CCS activation required)
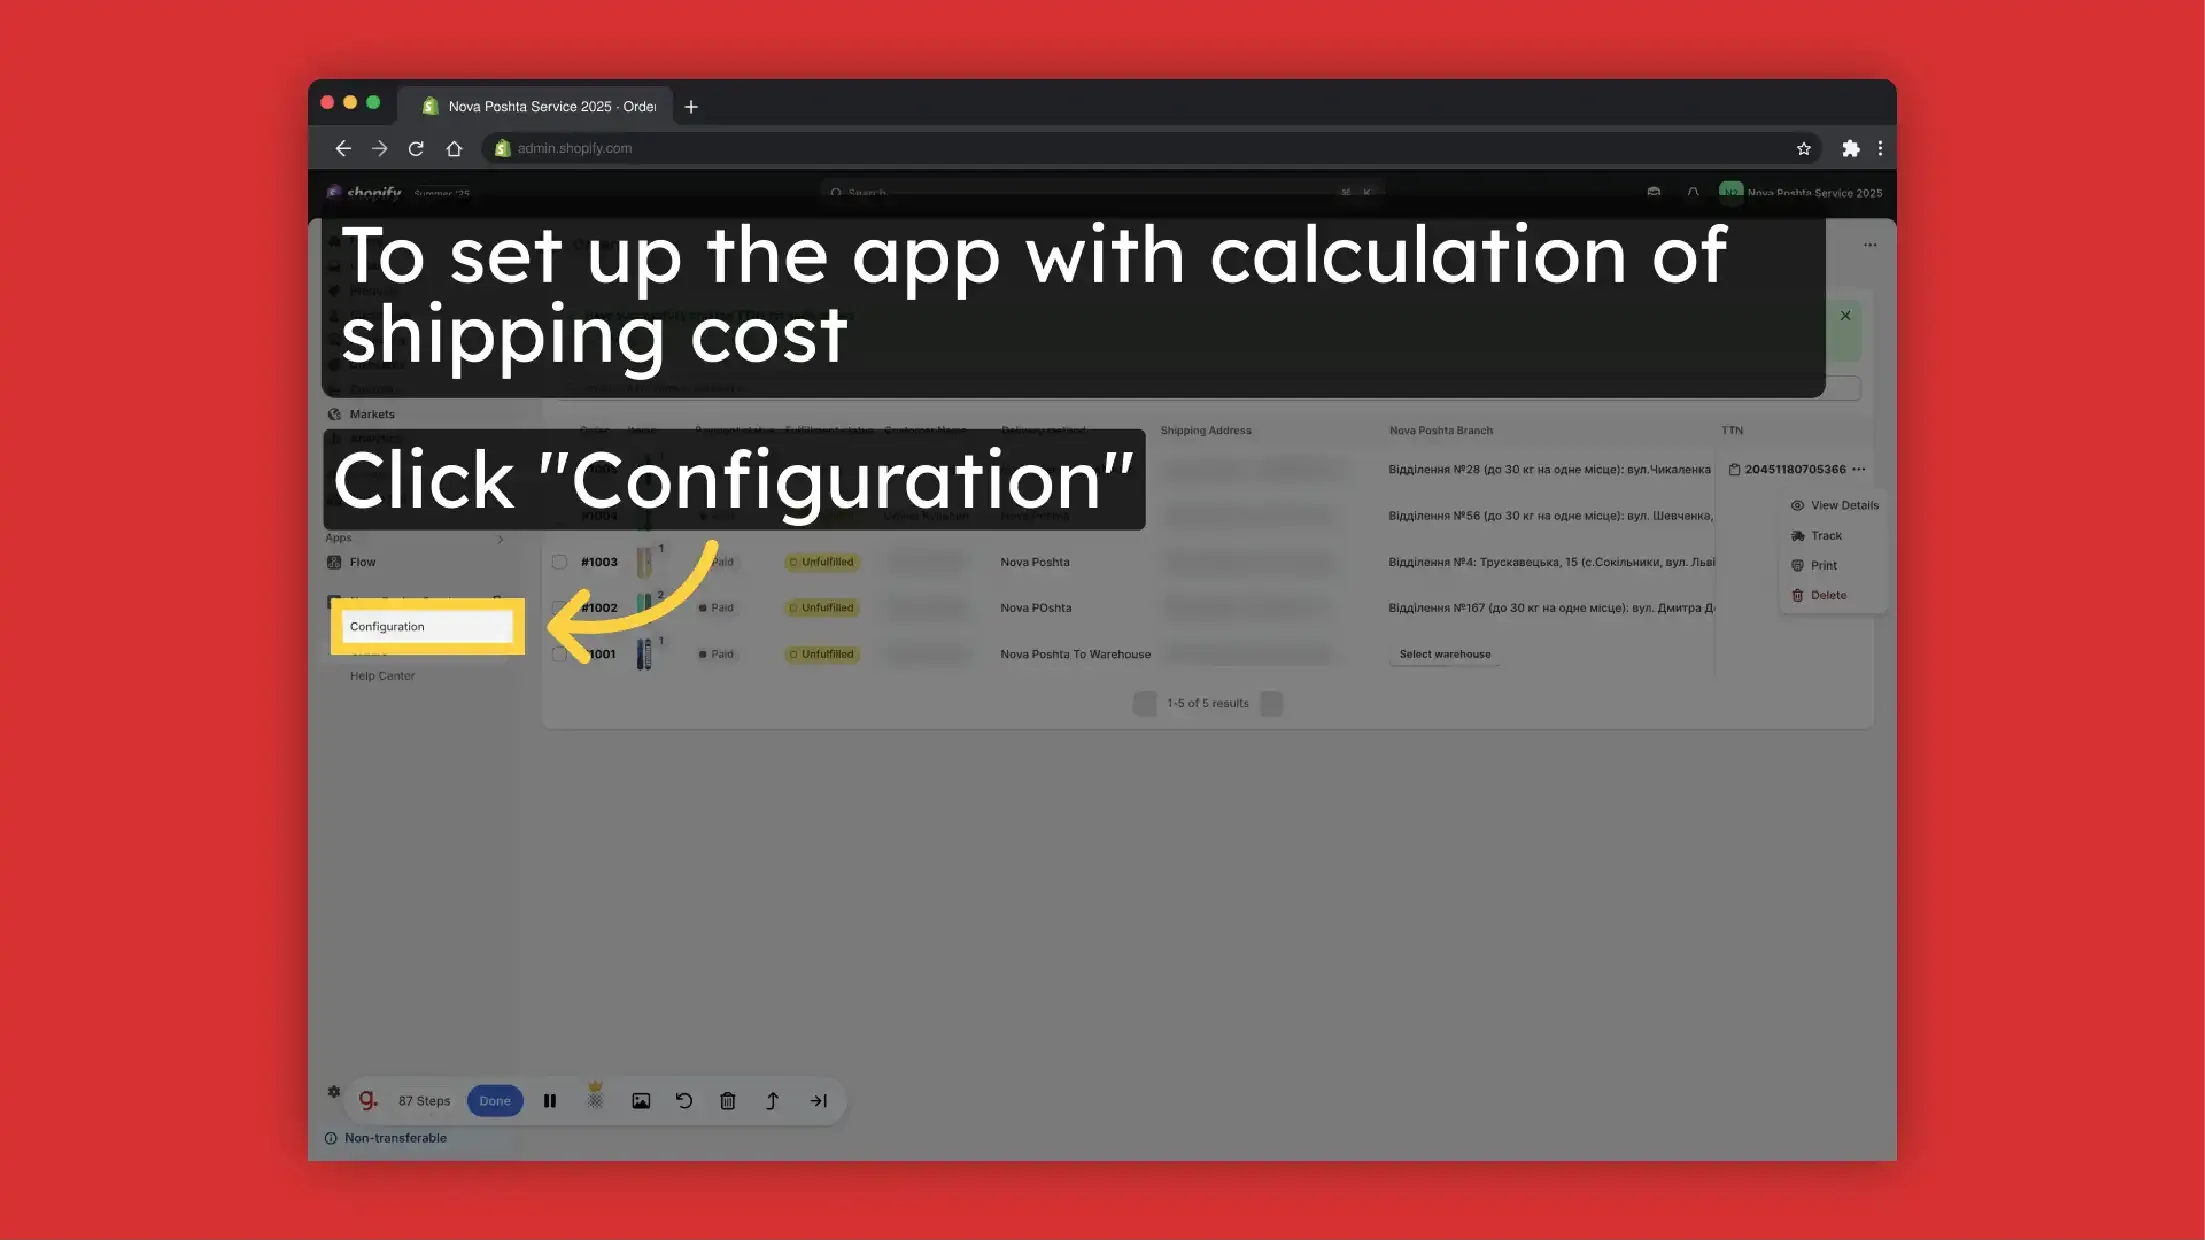
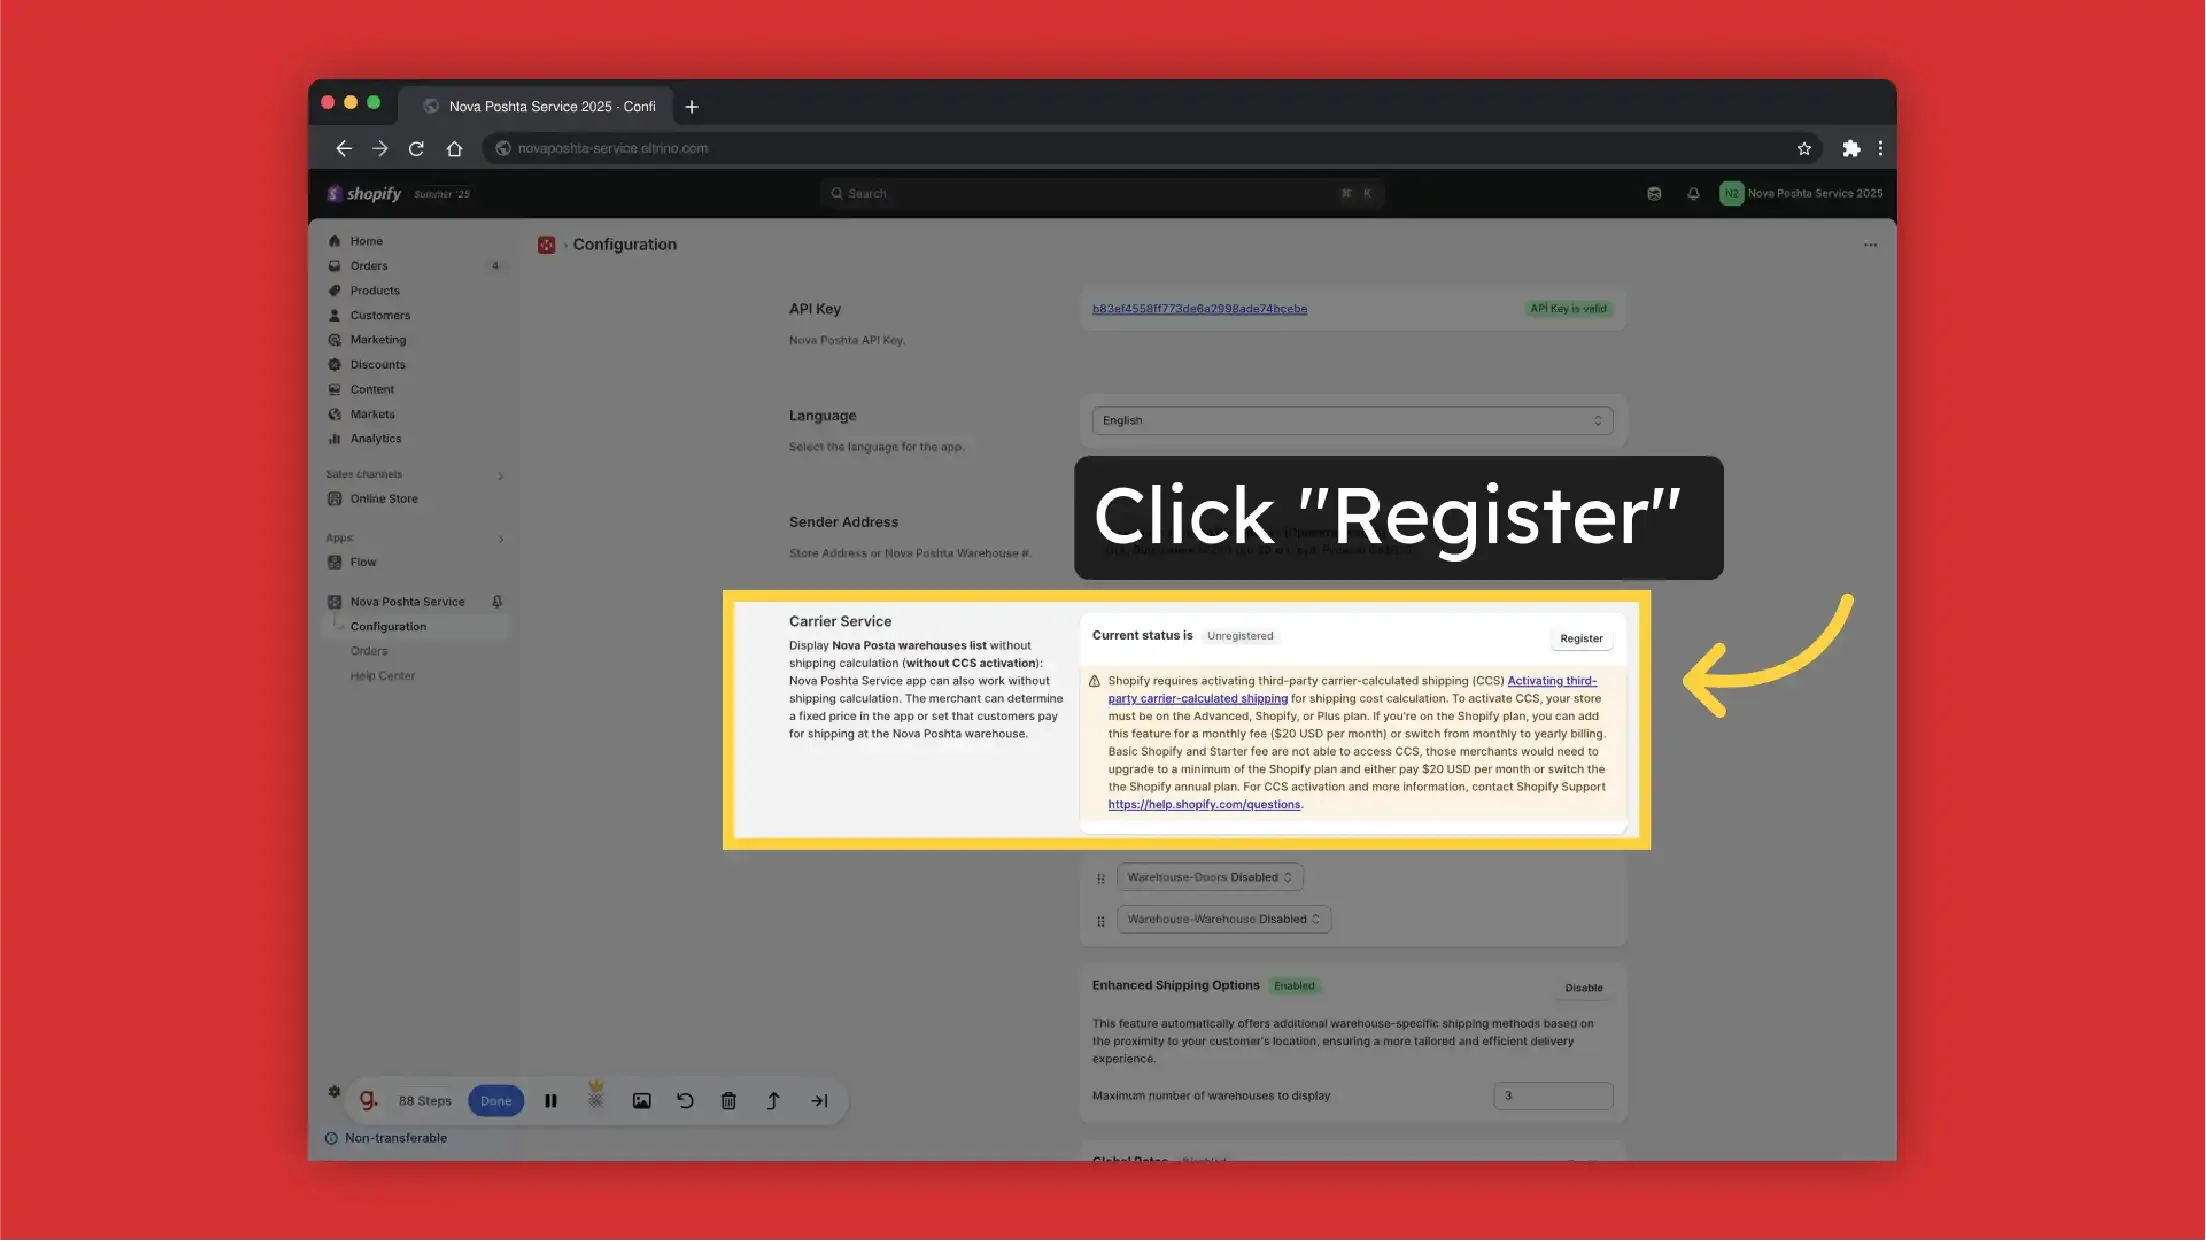
To enable shipping calculation, press Register for Carrier Service.
Note! Shopify requires activating third-party carrier-calculated shipping (CCS) for shipping cost calculation. To activate CCS, your store must meet the following plan requirements:
Included by default:
- Advanced Shopify plan
- Shopify Plus plan
Available with additional options: Grow plan: Add CCS by paying $20 USD per month OR switching from monthly to yearly billing
Not available:
- Basic Shopify plan
- Shopify Starter plan
Merchants on Basic or Starter plans must upgrade to at least the Grow plan and either pay the $20 USD monthly fee or switch to annual billing to access CCS.
For CCS activation and more information, contact Shopify Support.
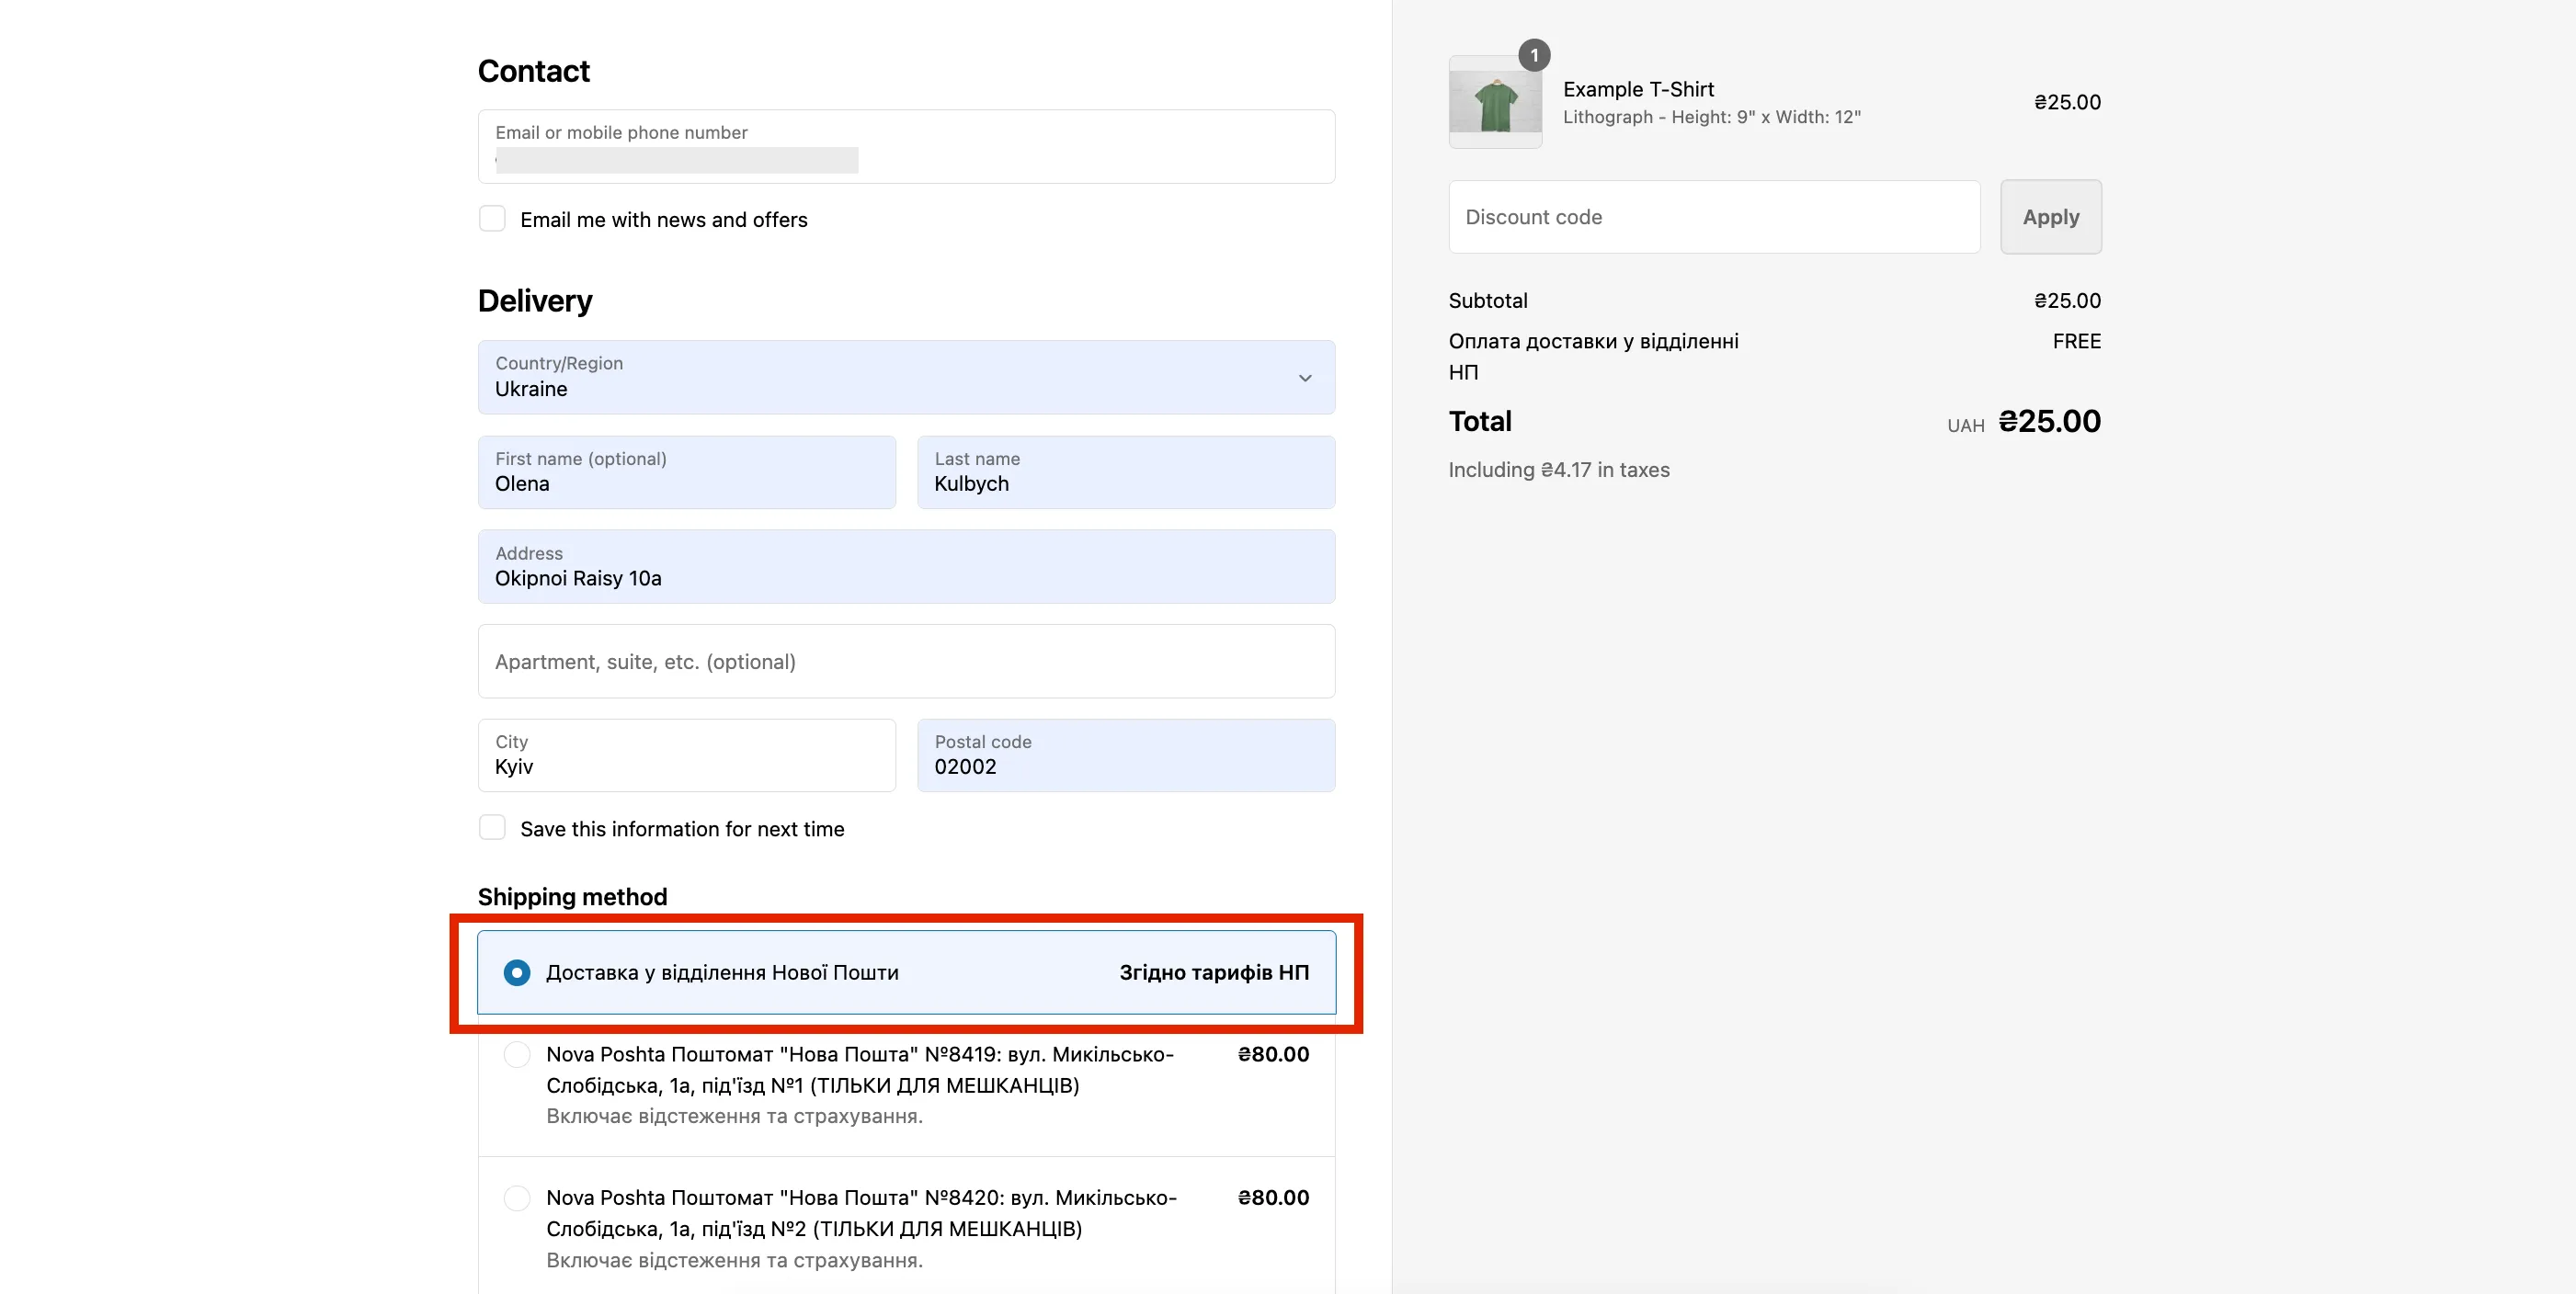
Nova Poshta Service app can also work without shipping calculation (without CCS activation). Dropdown with Nova Poshta branches on the page after payment without activating Carrier Calculated Shipping (CCS). Under this condition, the application does not calculate the shipping cost, but uses a fixed shipping price that you set. The function of the automatic generation of TTN is preserved. See how to set up.
-
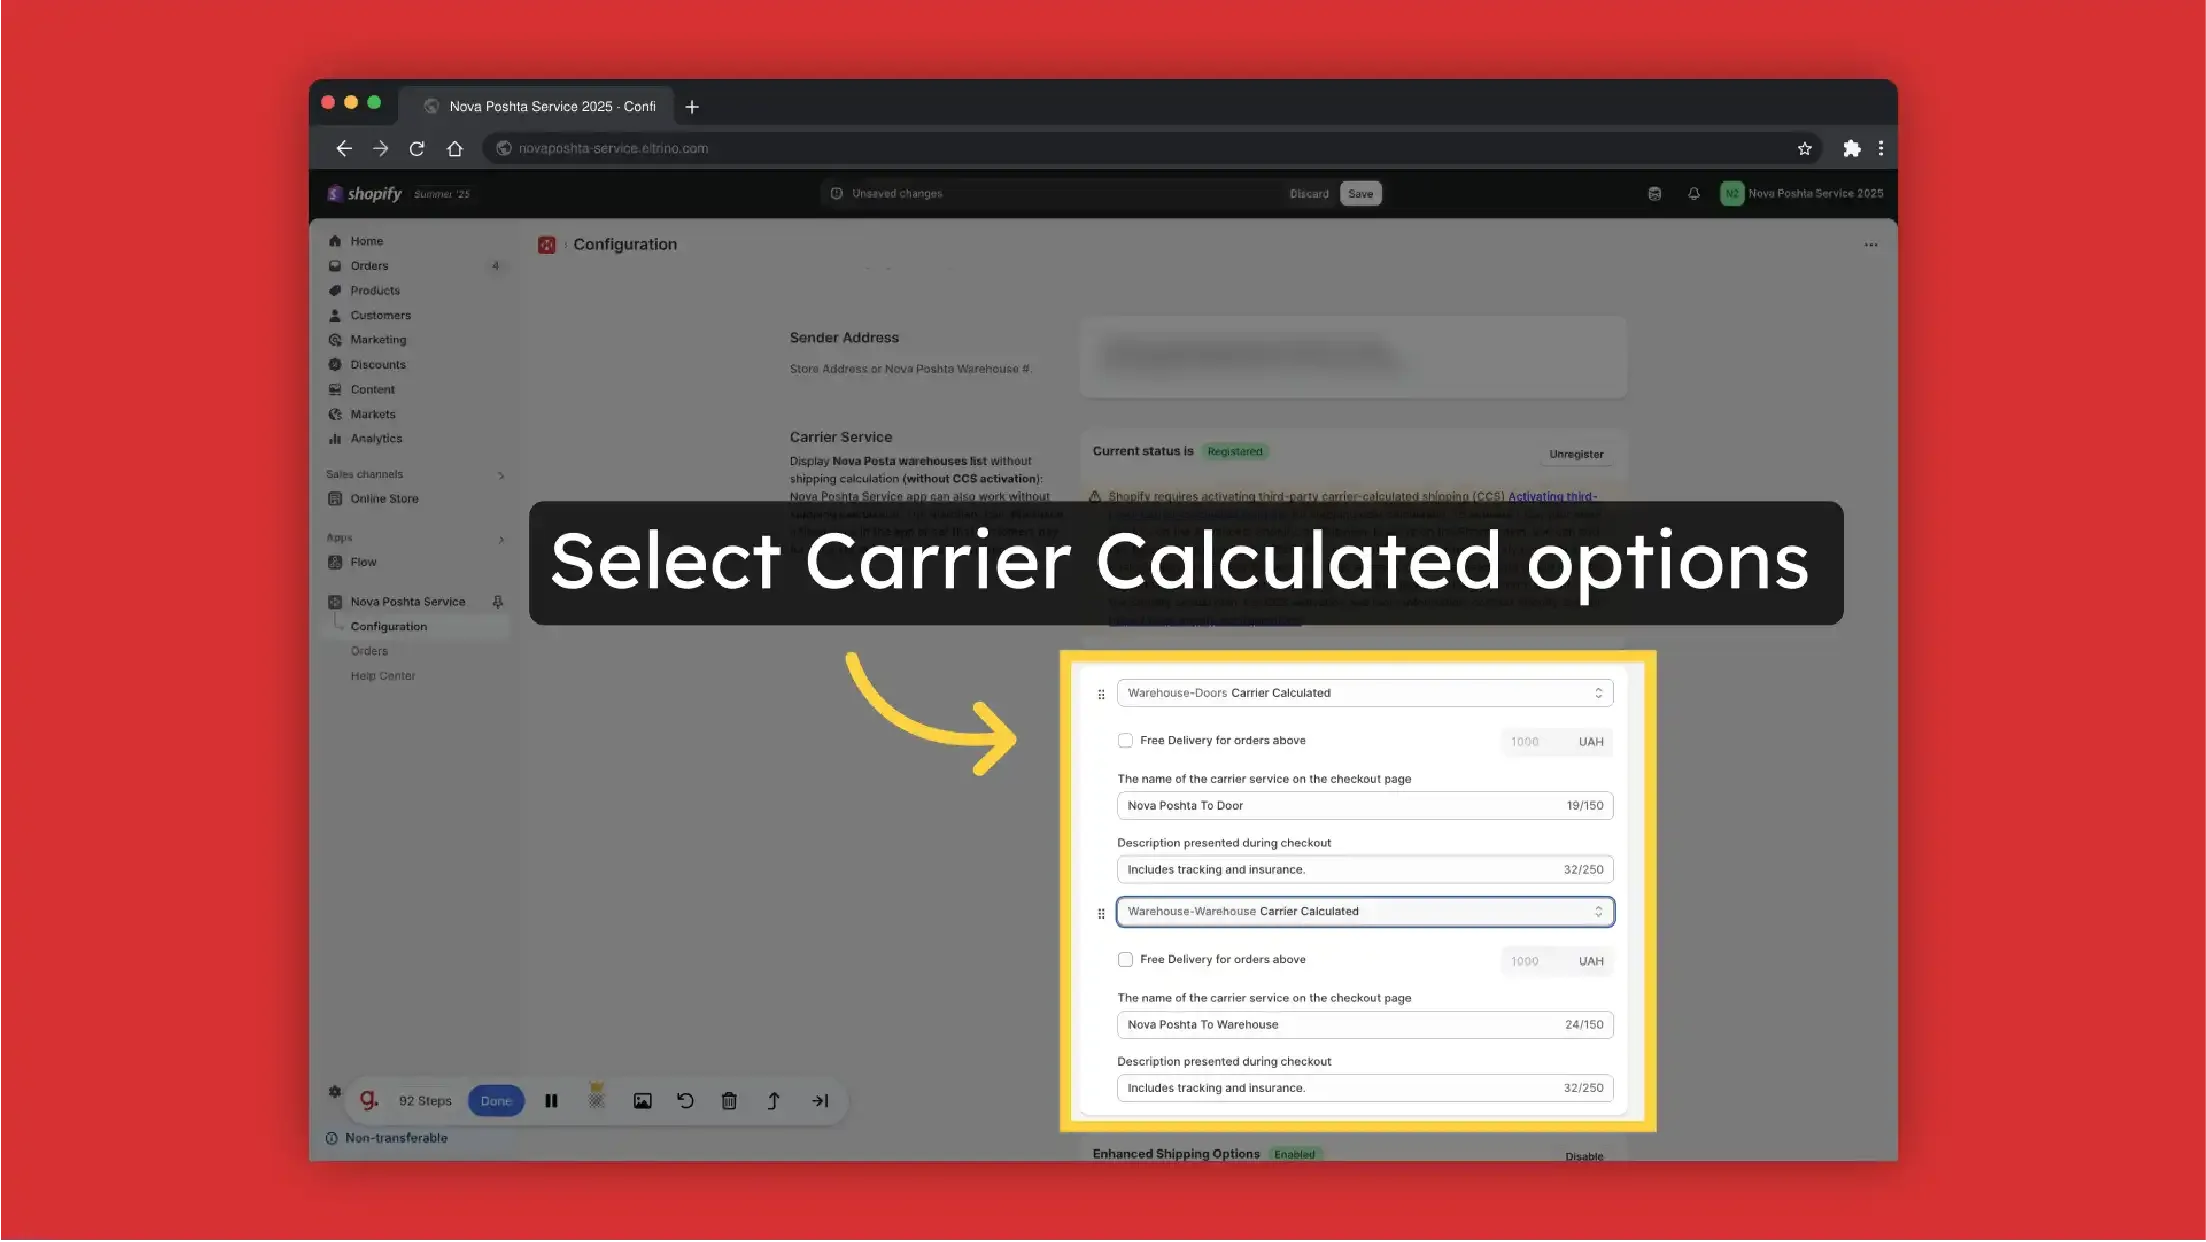
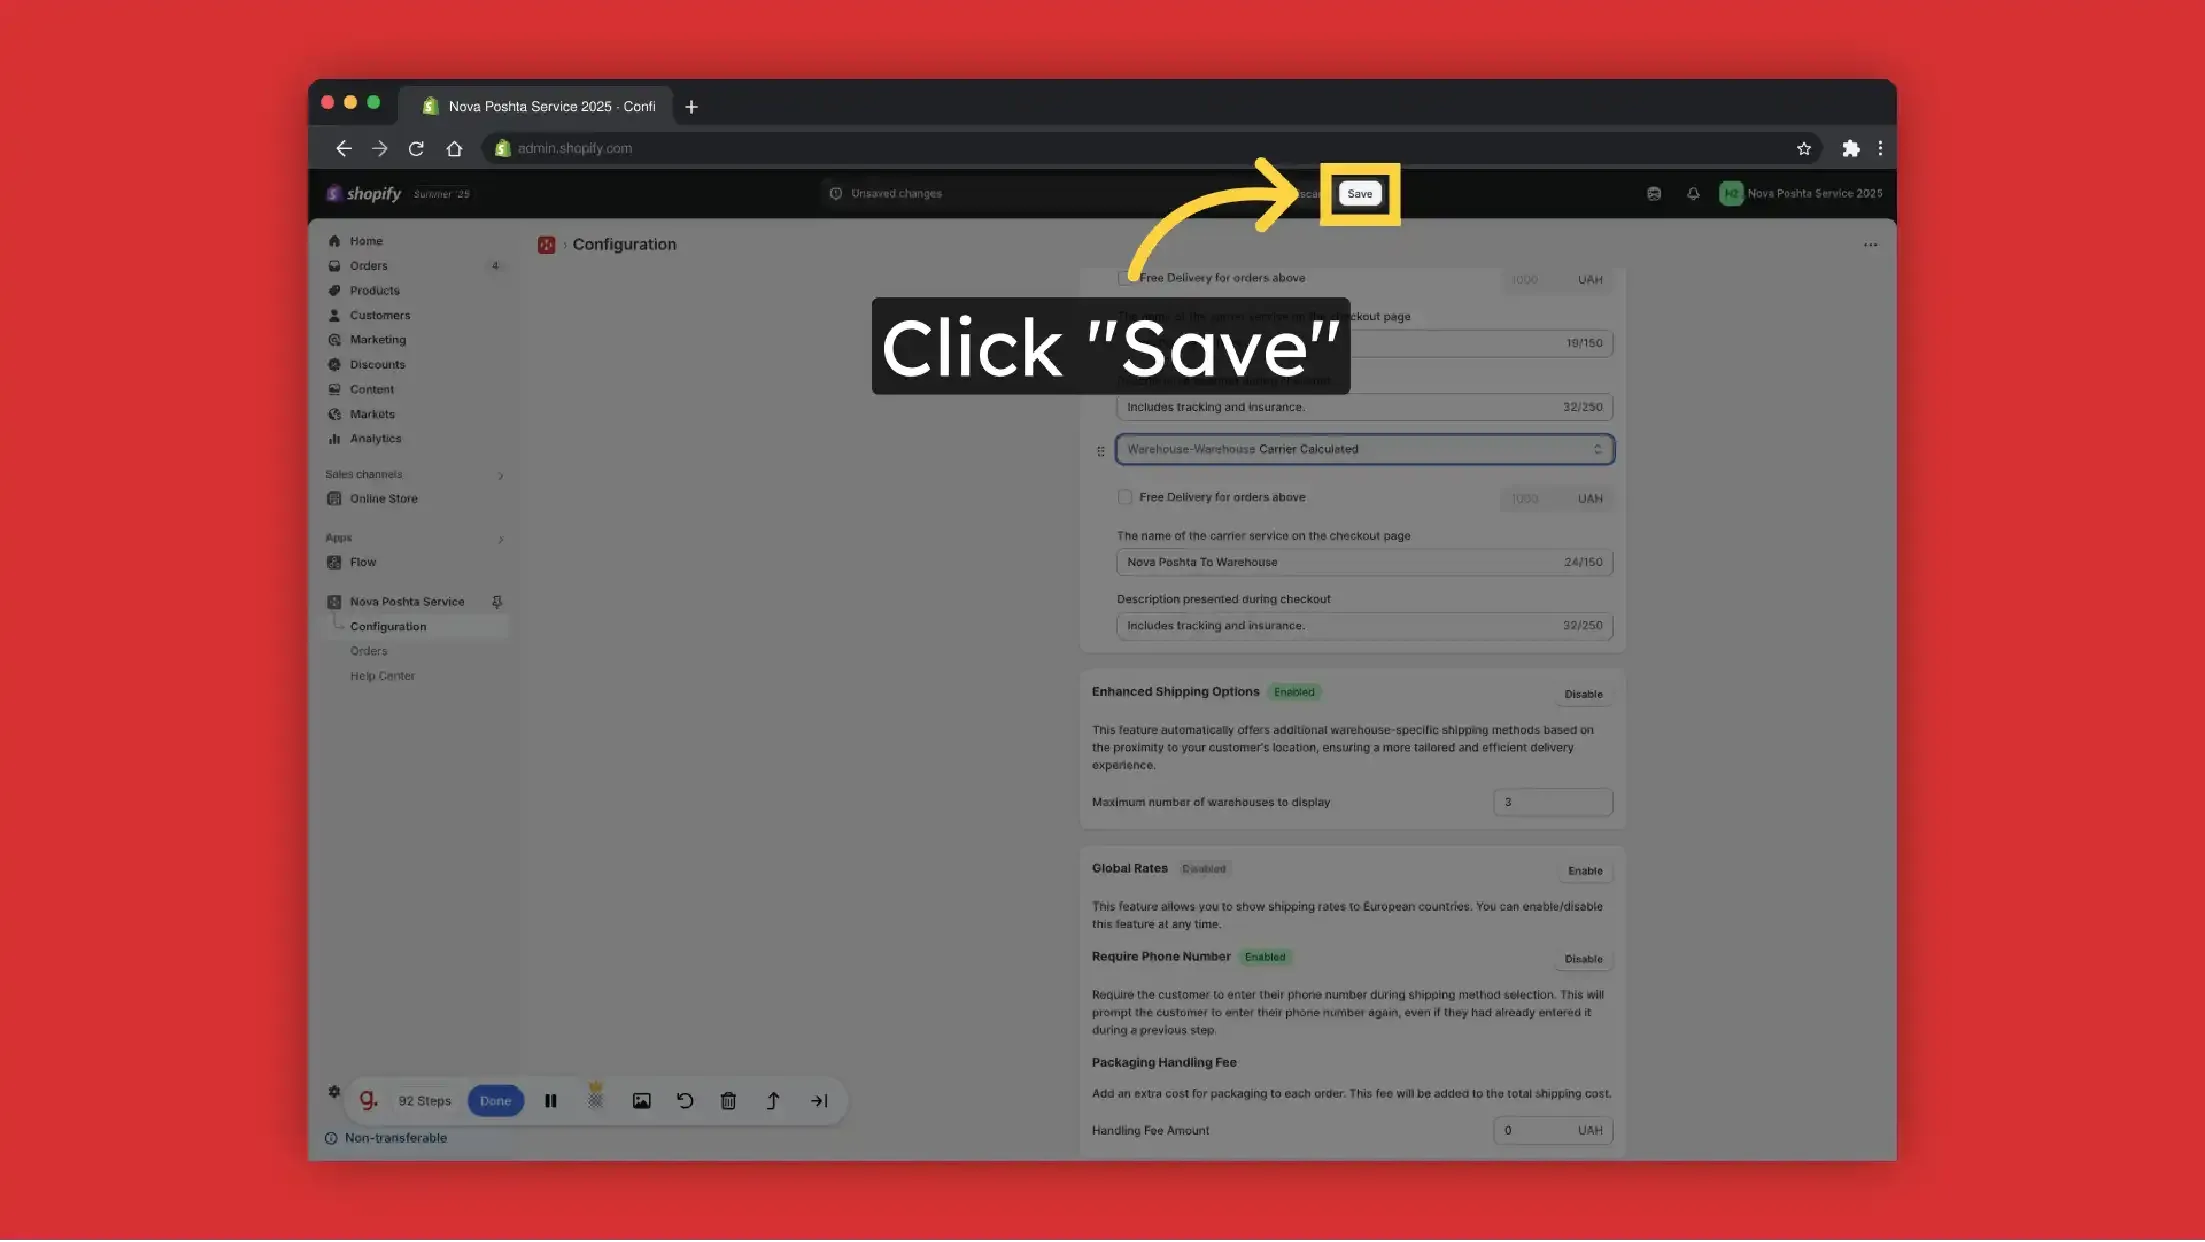
Select preferable Carrier Methods (Warehouse-Doors / Warehouse-Warehouse / both). You can also change the order of displaying shipping methods to customers. Just drag and drop the required method above.
-
Display delivery cost: Carrier Calculated or Flat Rate
-
Set Free delivery for orders above some price
-
Add Custom carrier service name and description
-
Decide what to display first (Address delivery or Delivery to Warehouse)
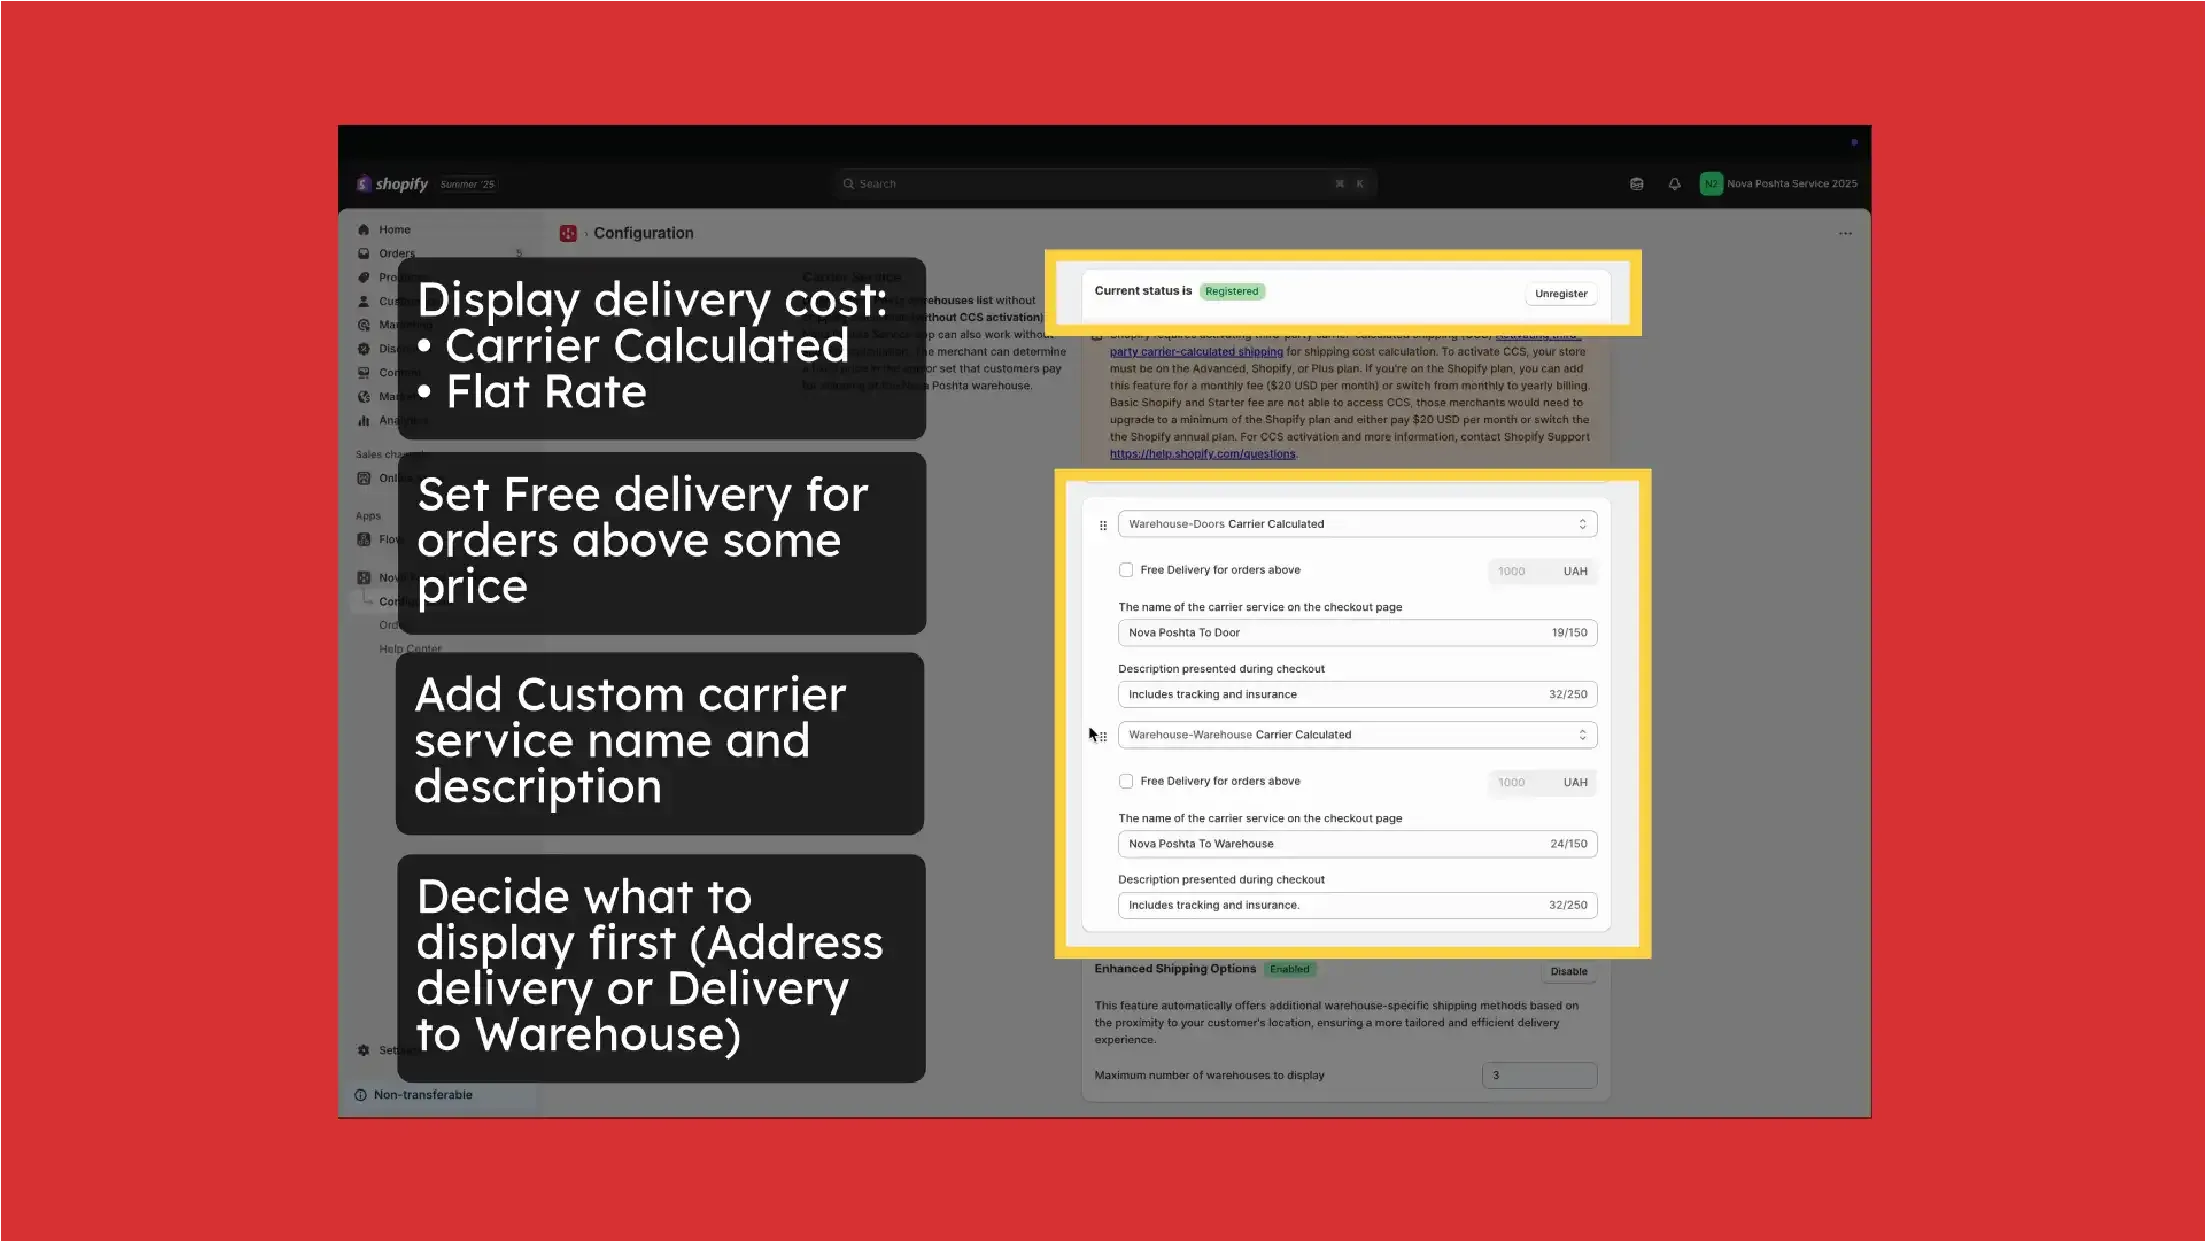
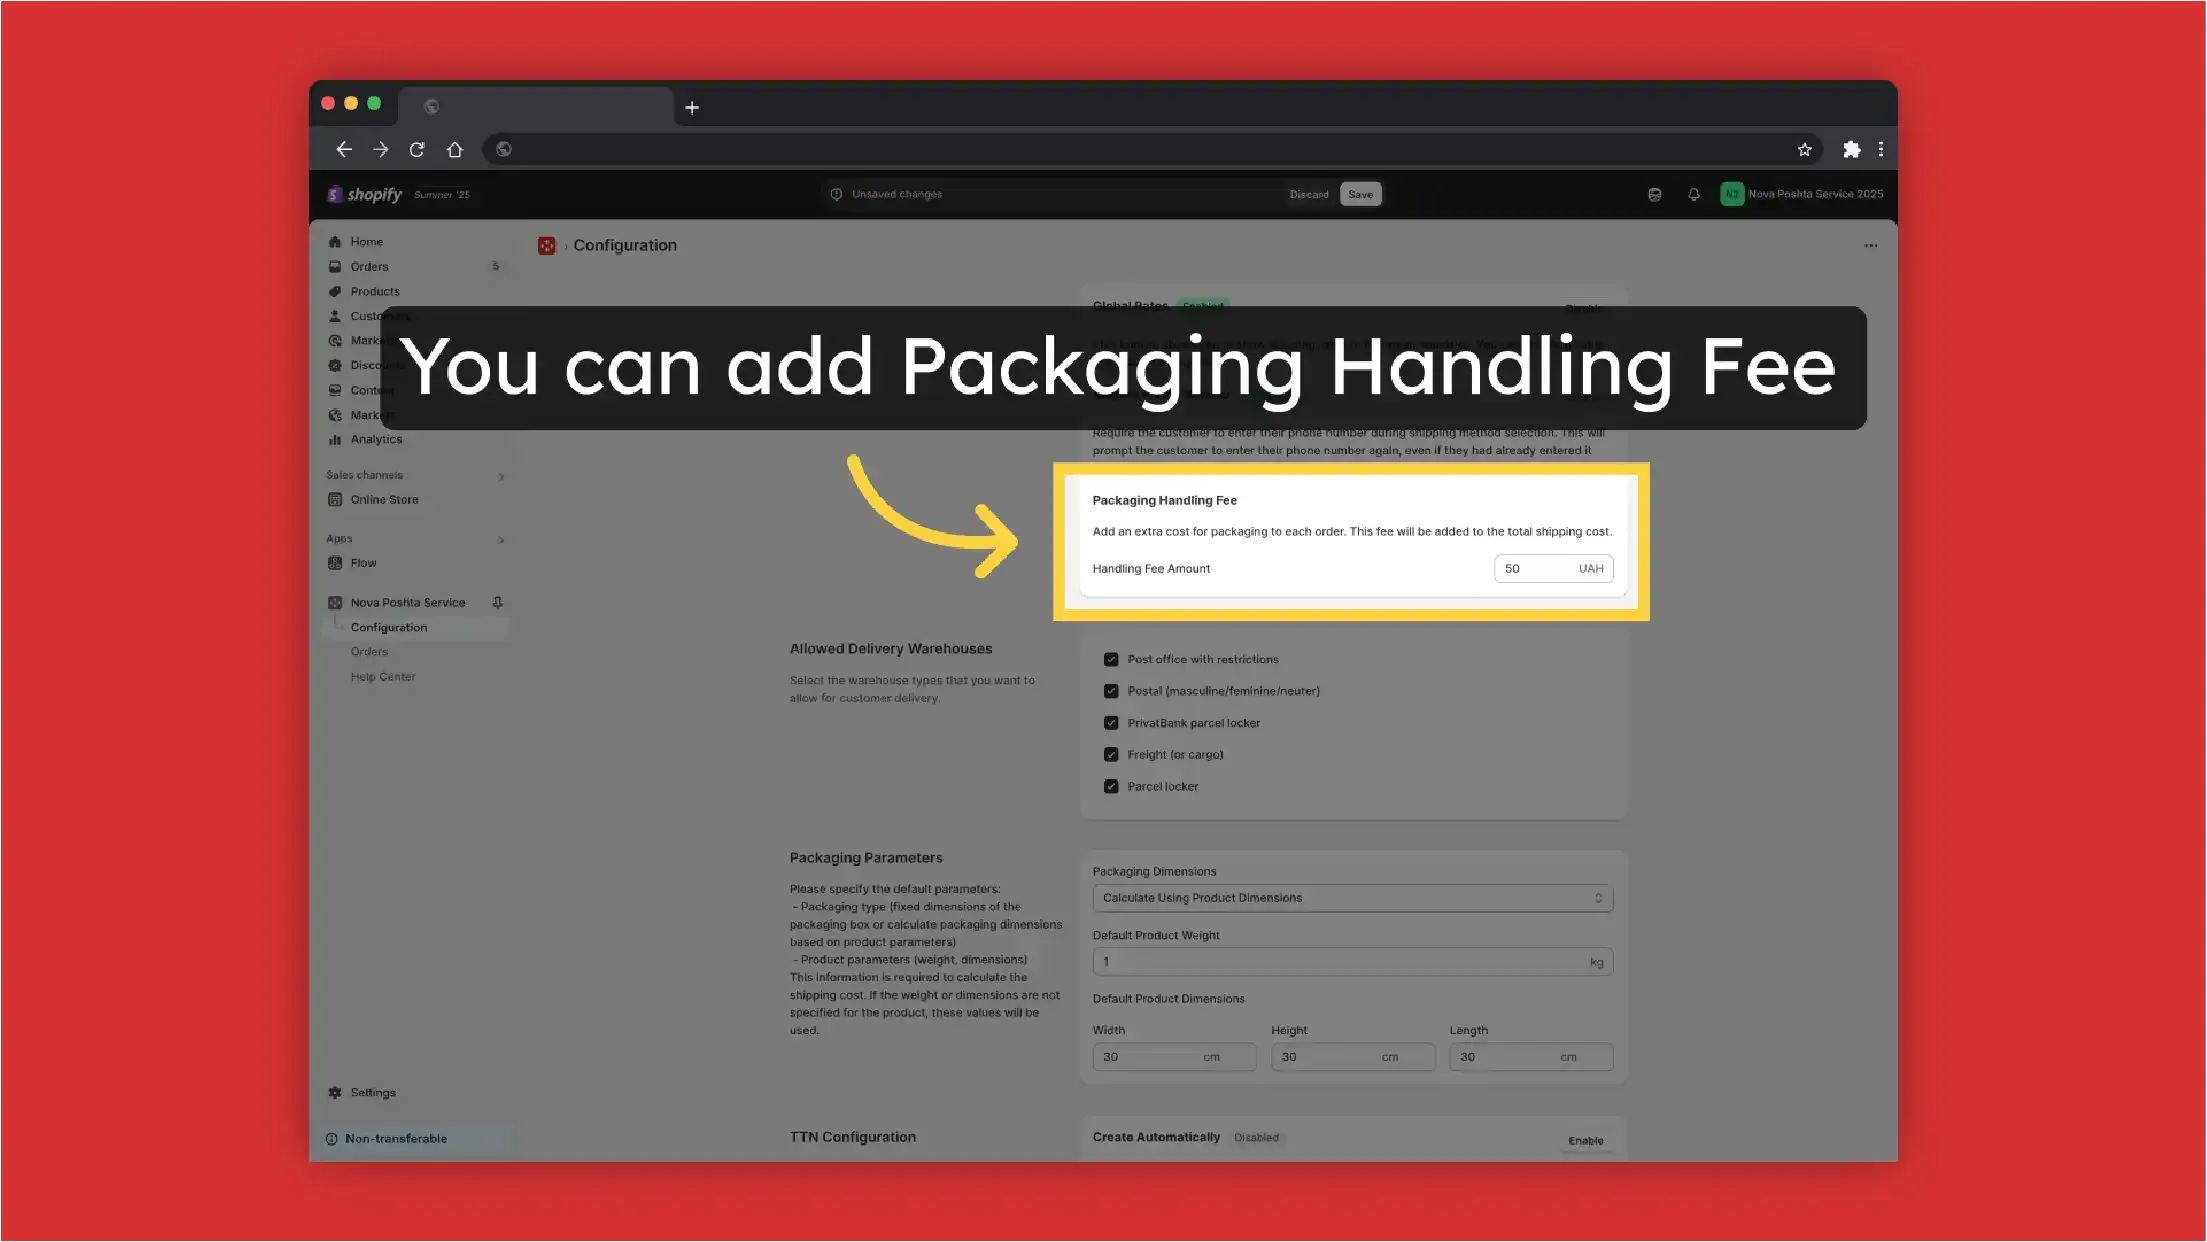
You can also add Packaging Handling Fee - an extra cost for packaging to each order. This fee will be added to the total shipping cost.
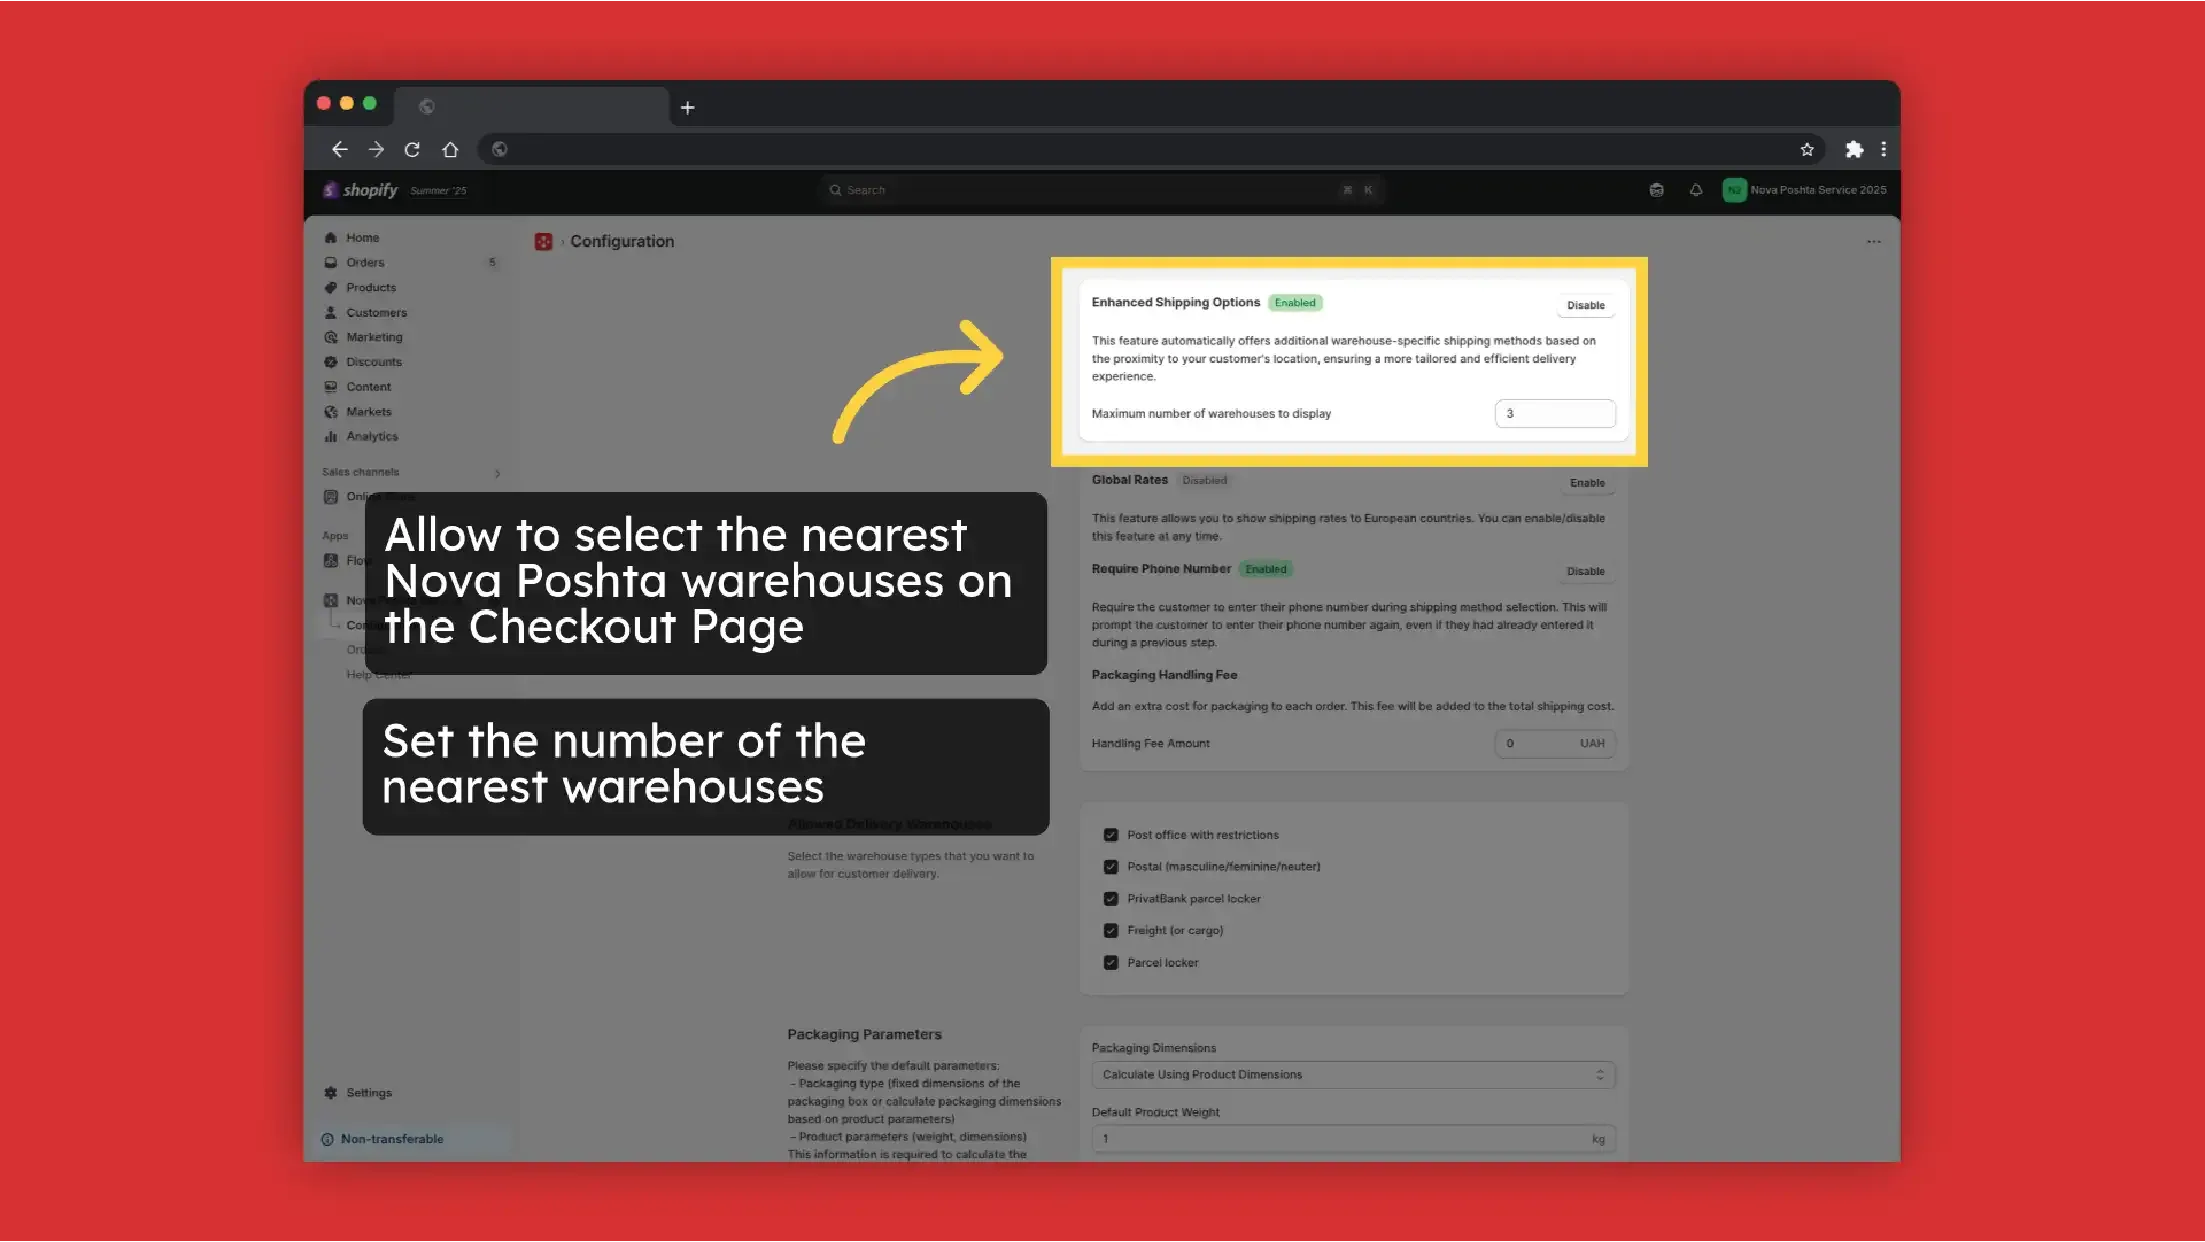
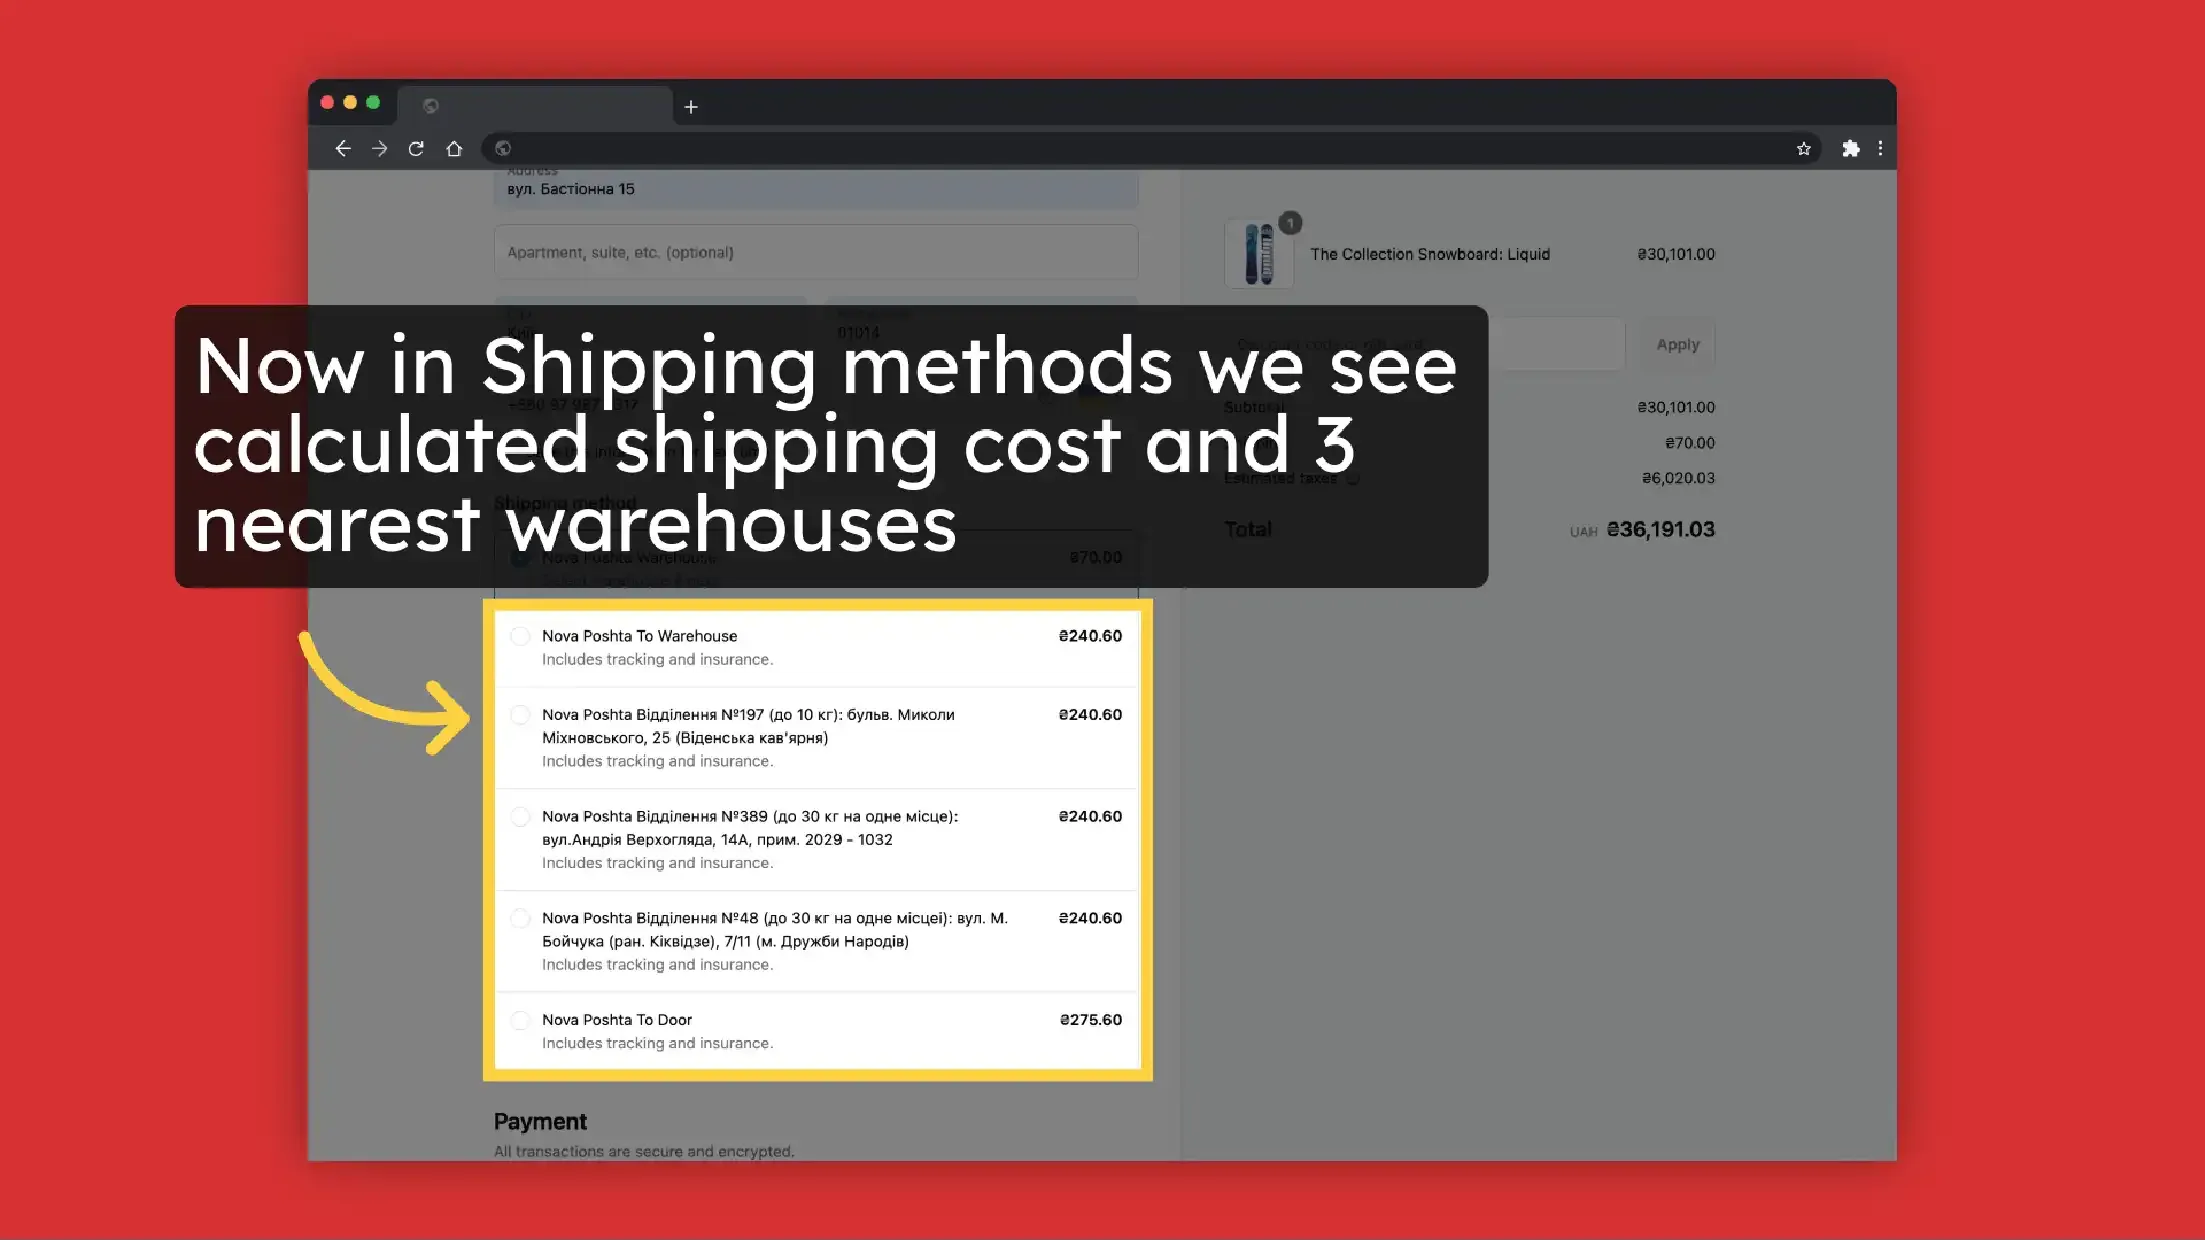
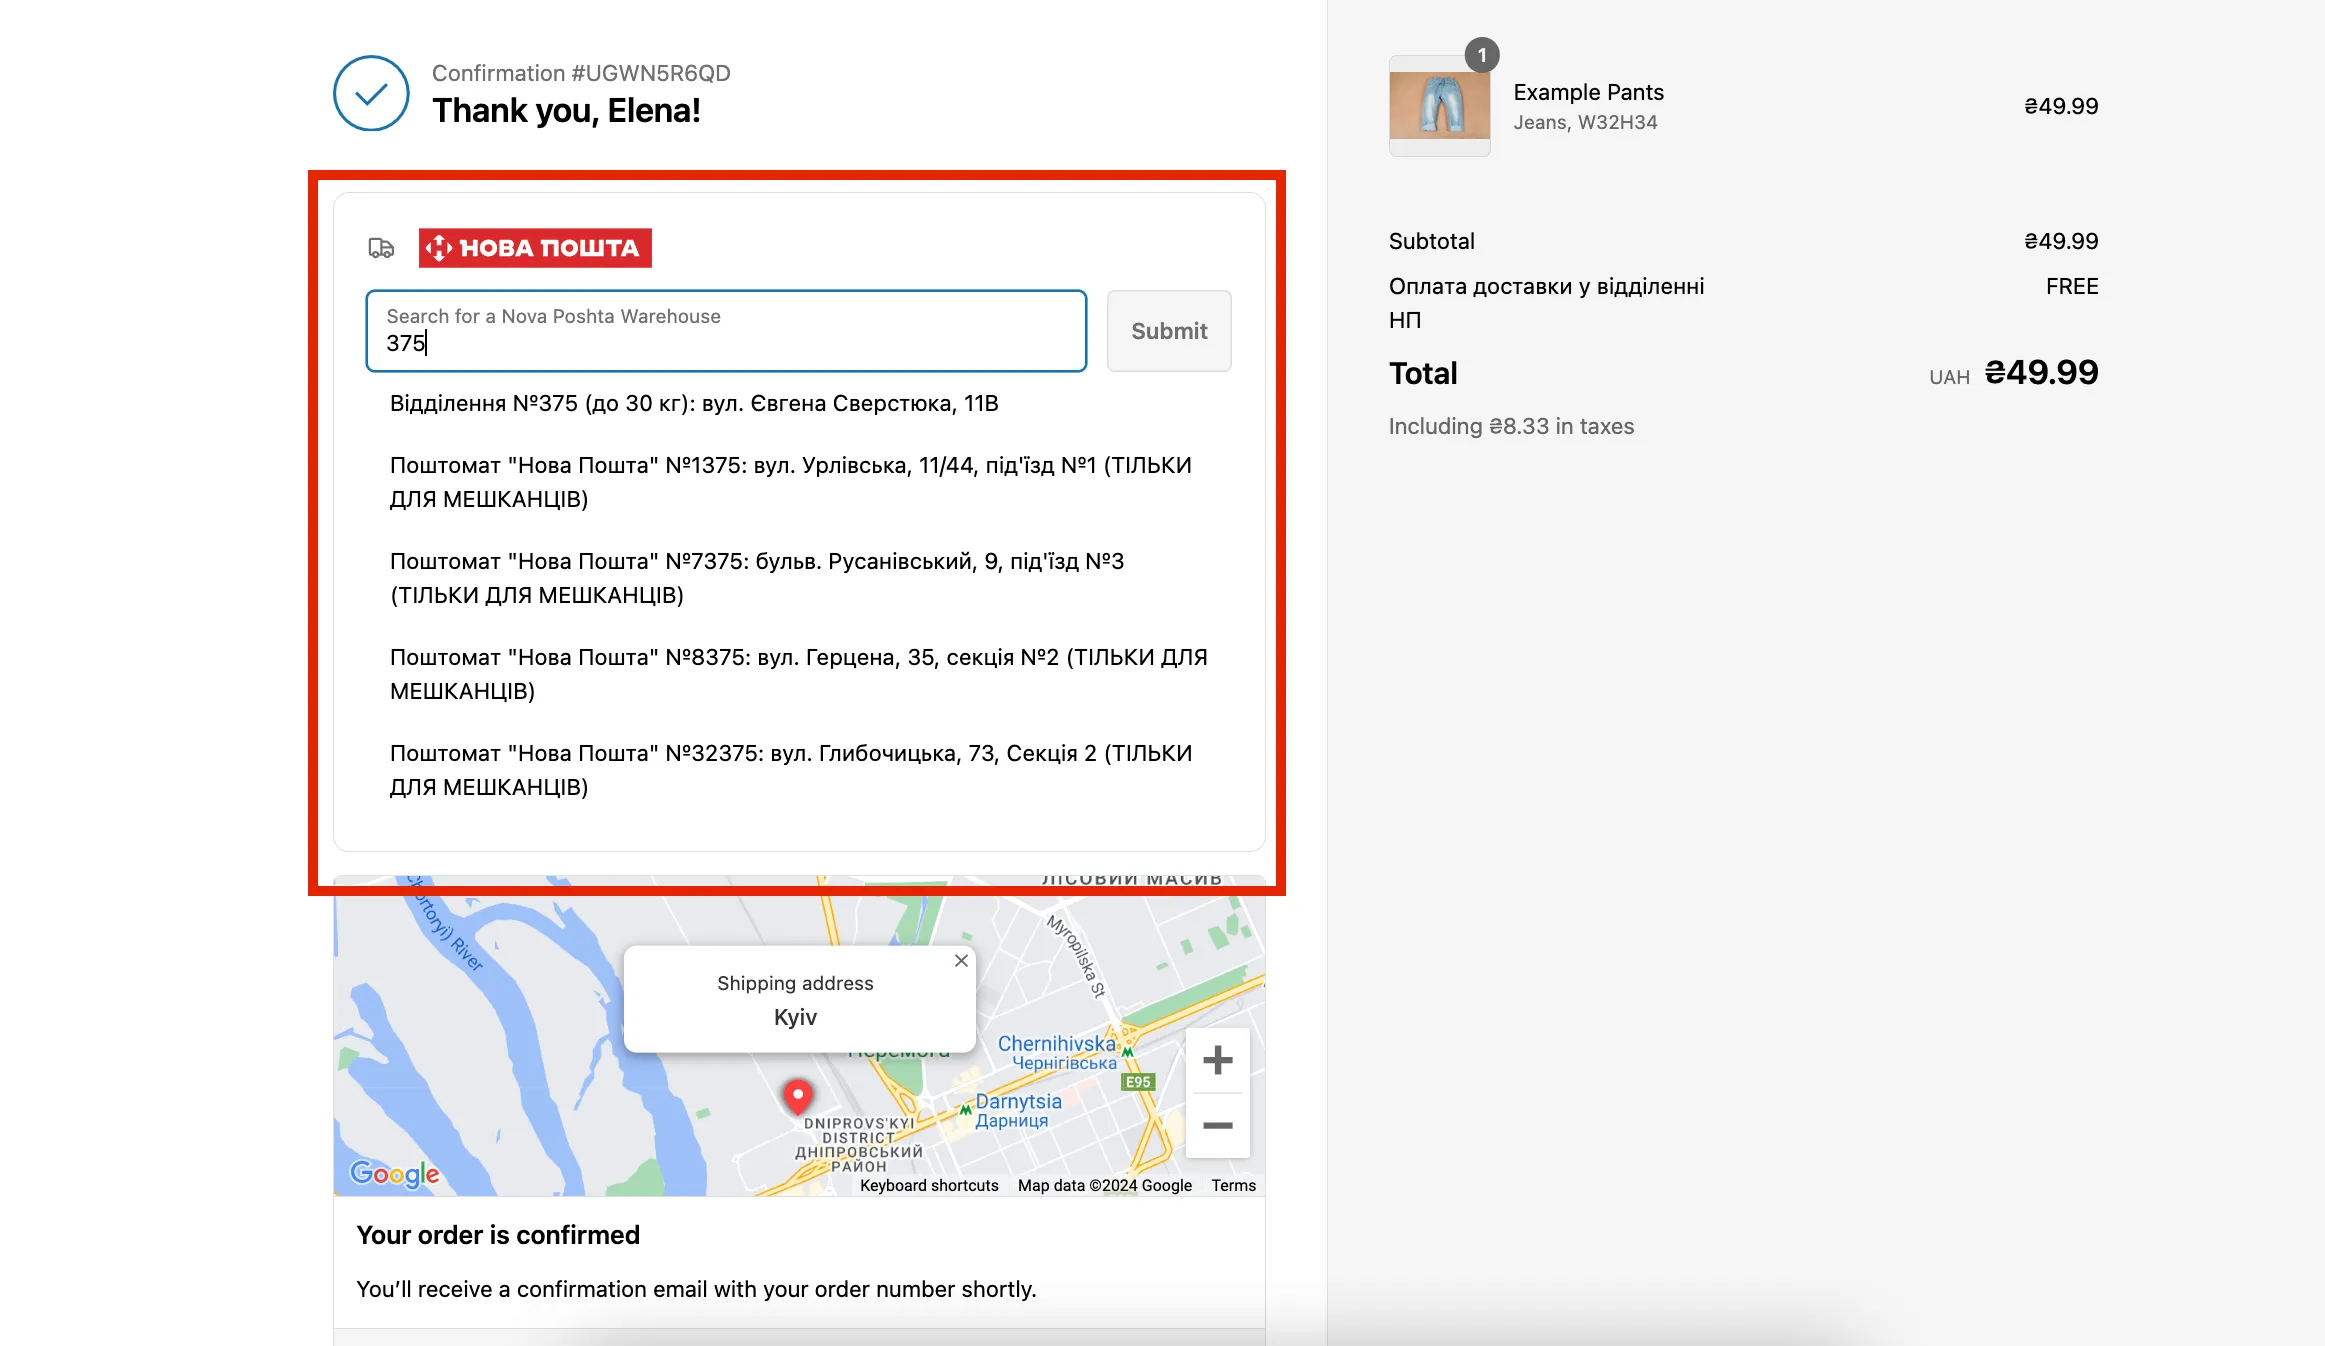
Display the nearest Nova Poshta warehouses on the Checkout Page (CCS activation required) + Result
The nearest Nova Poshta warehouses on the Checkout Page. Result
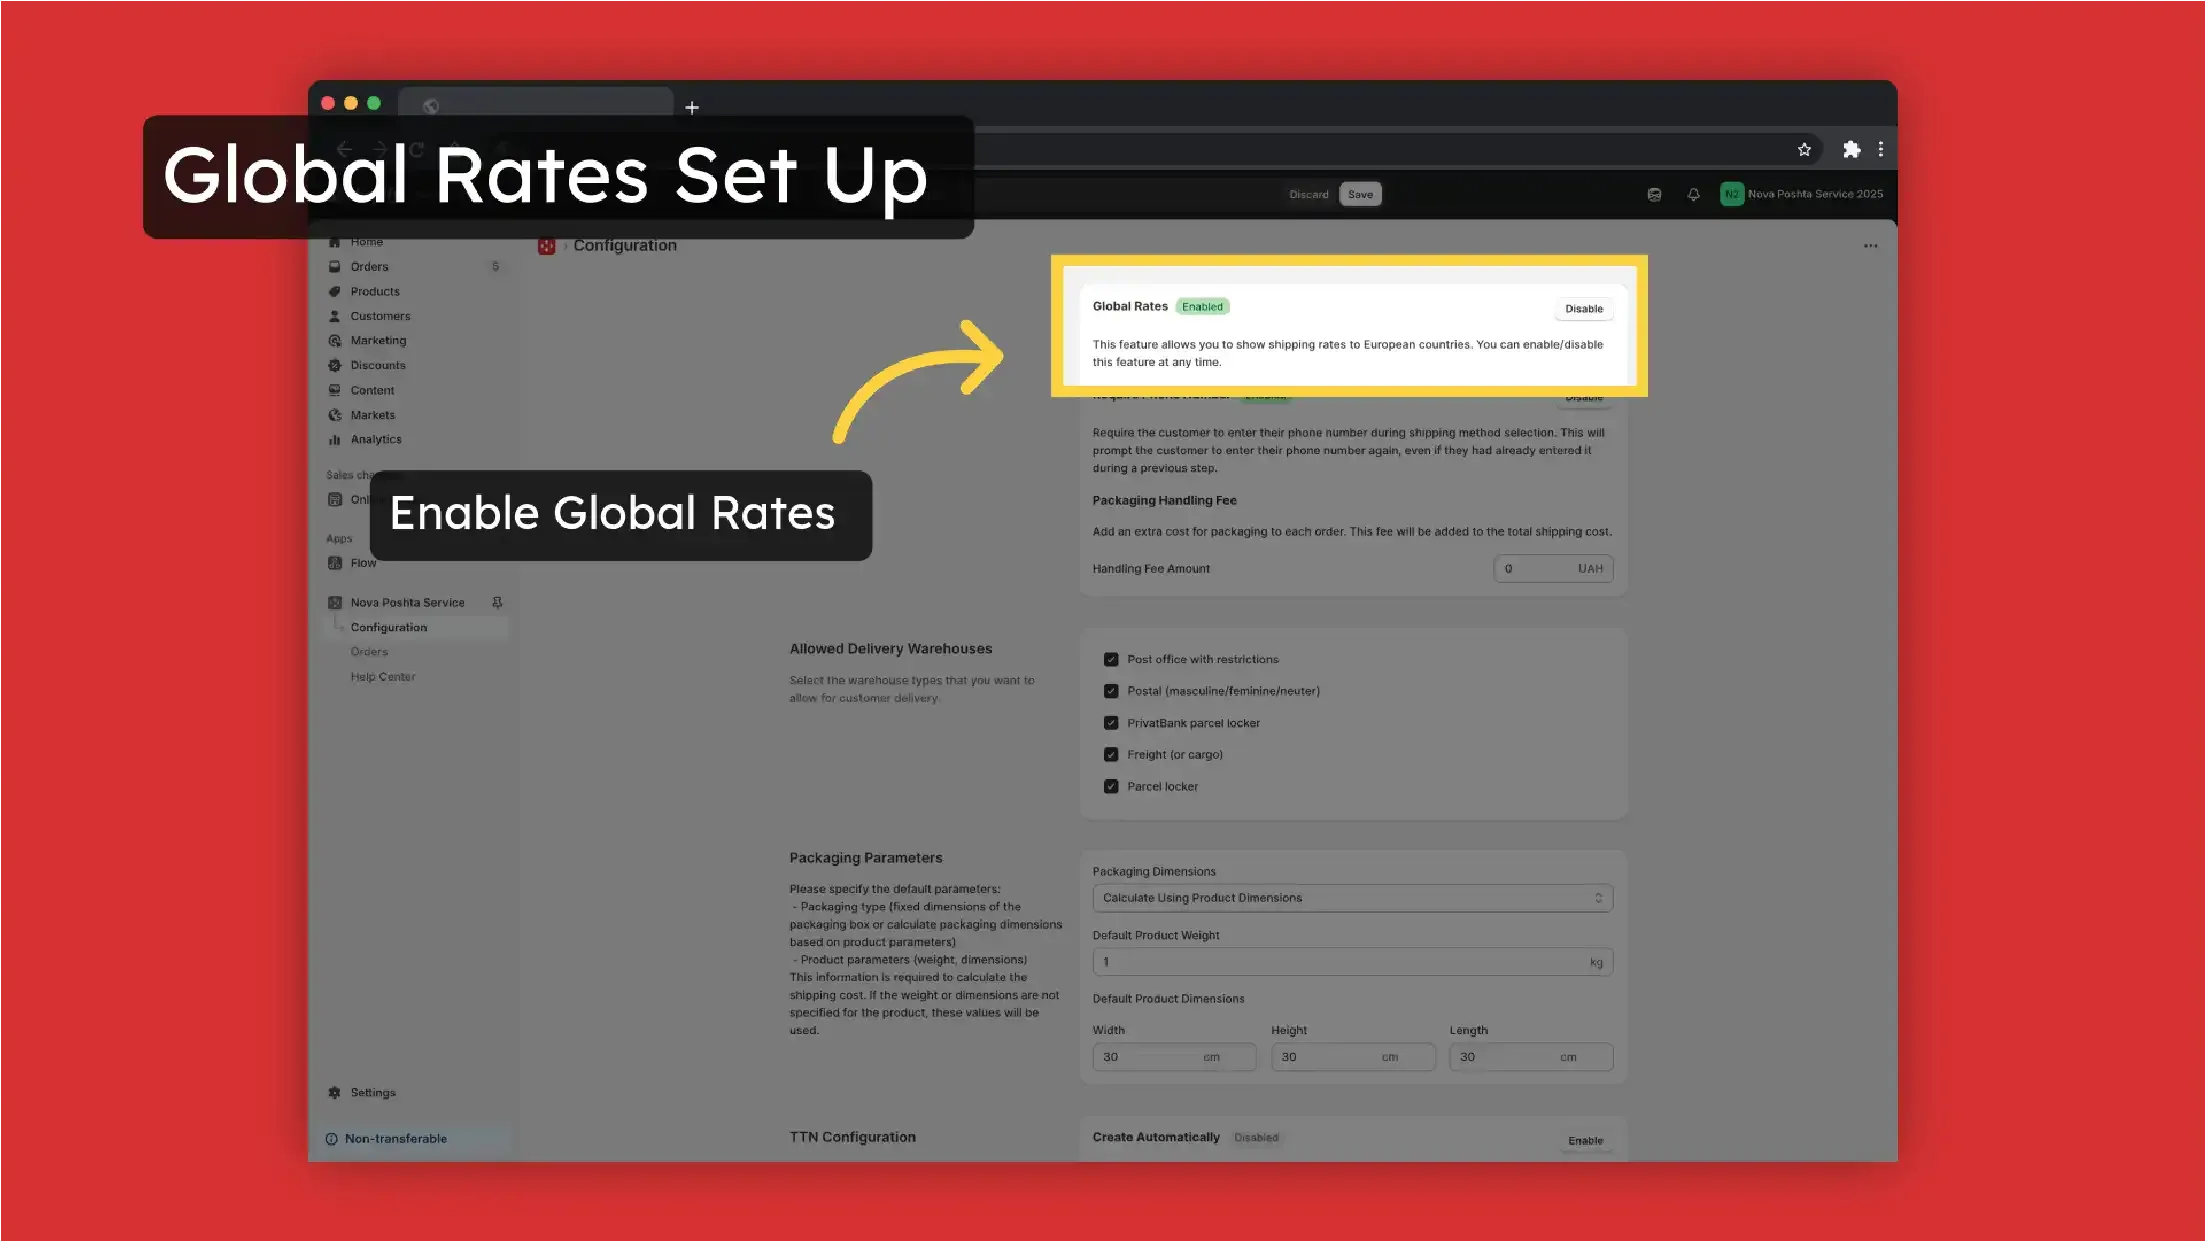
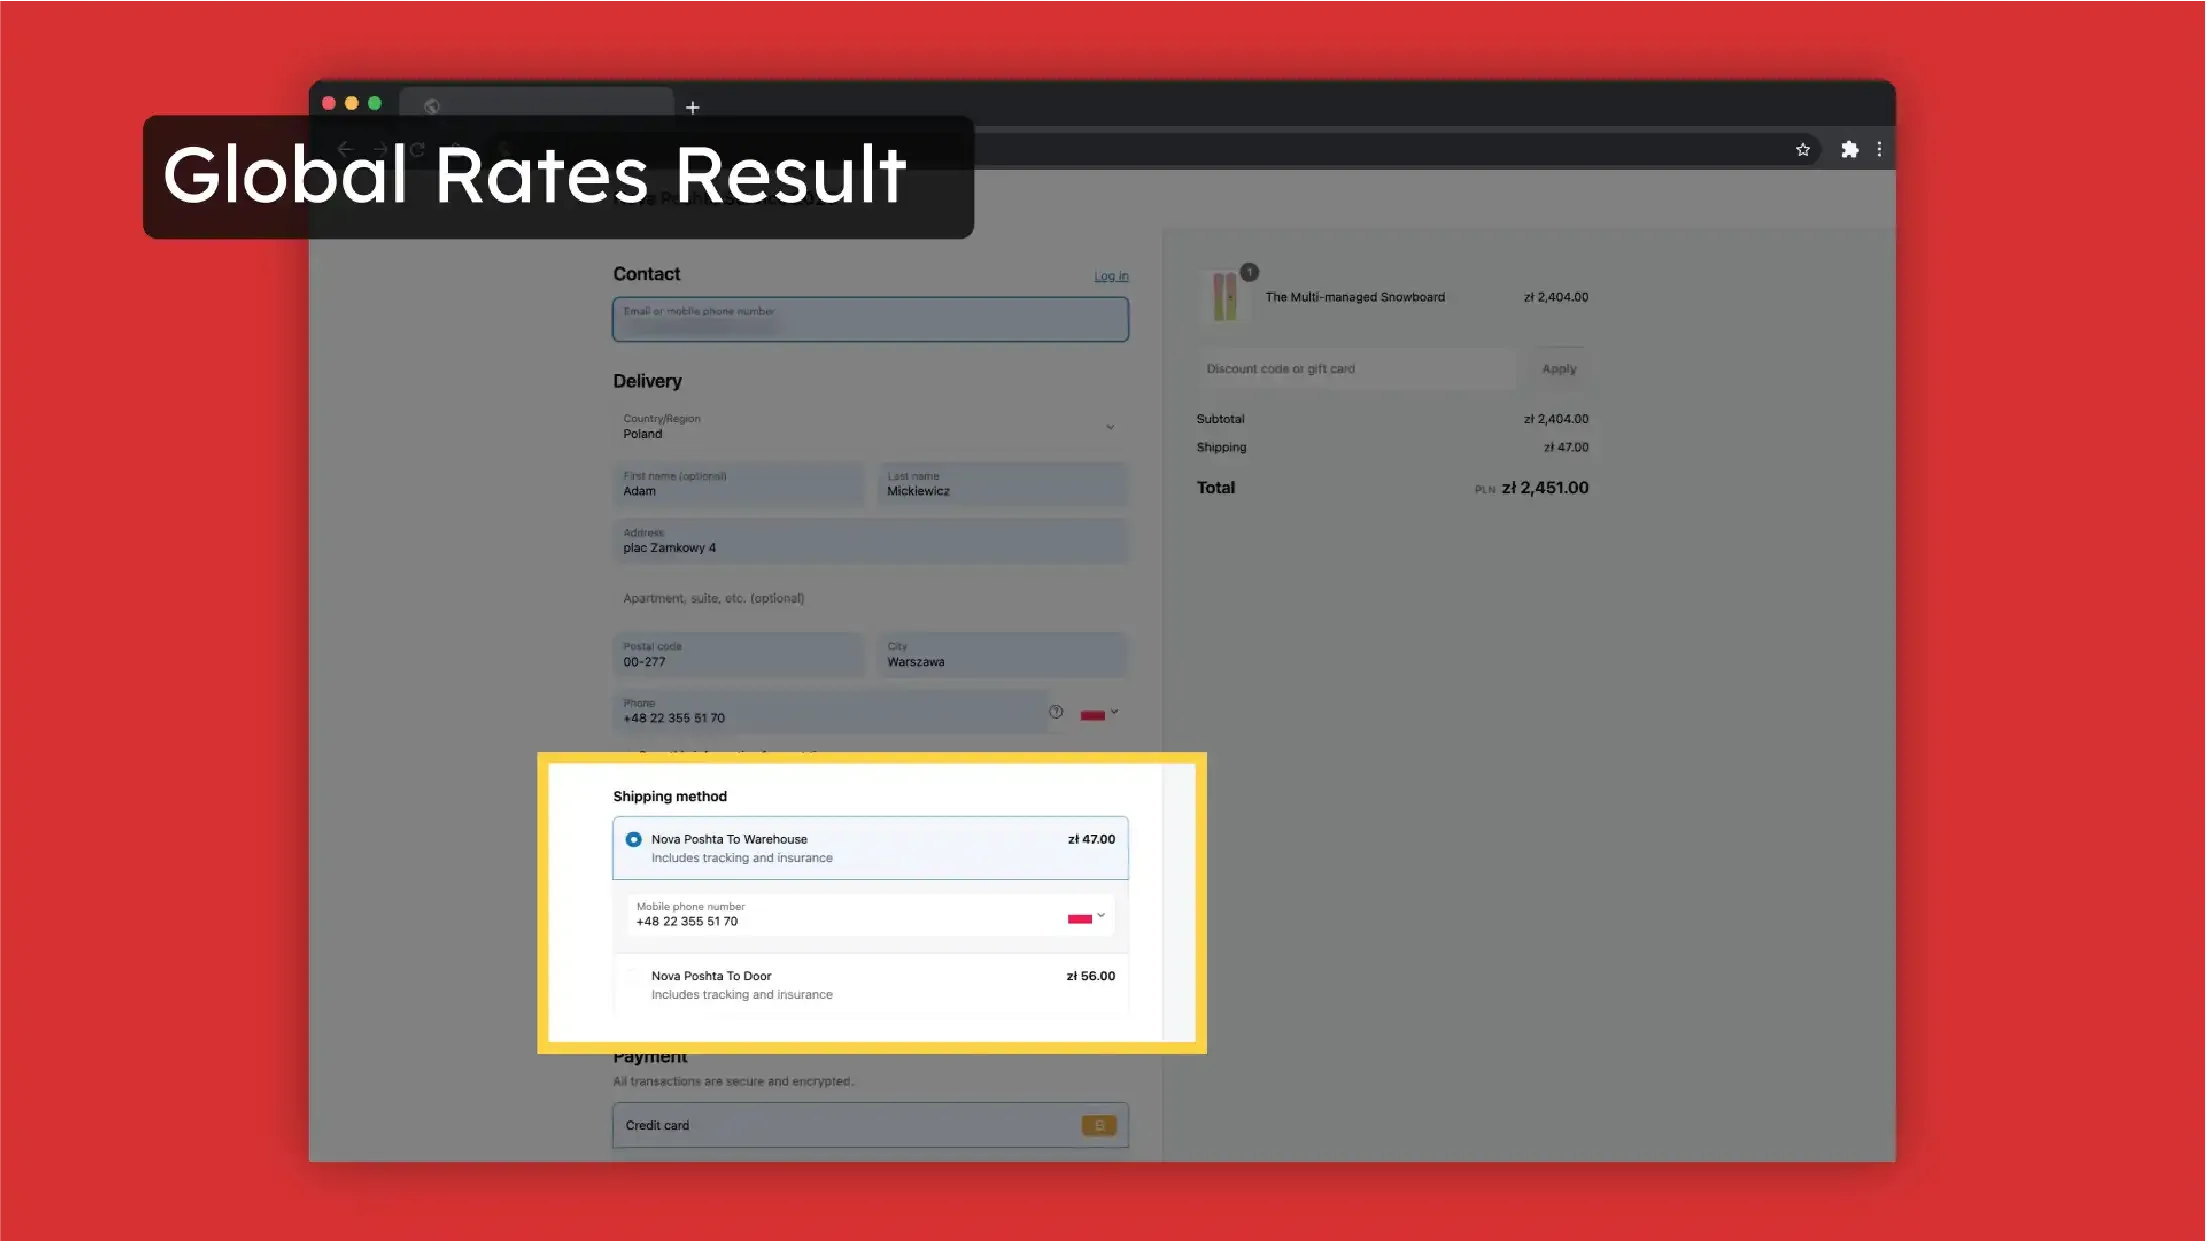
Nova Global: International delivery + Result
Nova Poshta Service Shopify App can also calculate and display rates for international delivery via Nova Global.
How to set up global rates?
The same as for domestic (Ukraine) delivery CCS activation is required for shipping cost calculation.
Let's try on example of international Nova Post delivery to Poland. Create a rate for Poland (you need to add it to your markets first)

Now customers can select Nova Post carrier to deliver to Poland. The app calculates shipping cost based on table rates from Nova Post
Payment for order on the website and for delivery at a Nova Poshta branch
This is one of the most requested feature, but Shopify doesn't allow splitting the payment. There is a way how to bypass this restriction. You can create a custom shipping method with the tariff set as Free. Then, in the theme's translation file, replace "Free" with your own text, for example, "According to Nova Poshta tariffs".
How to change text in the theme's translation file in Shopify:
- Log in to your Shopify admin panel.
- Go to Online Store >> Themes.
- Find the theme you are using and click on the Actions dropdown.
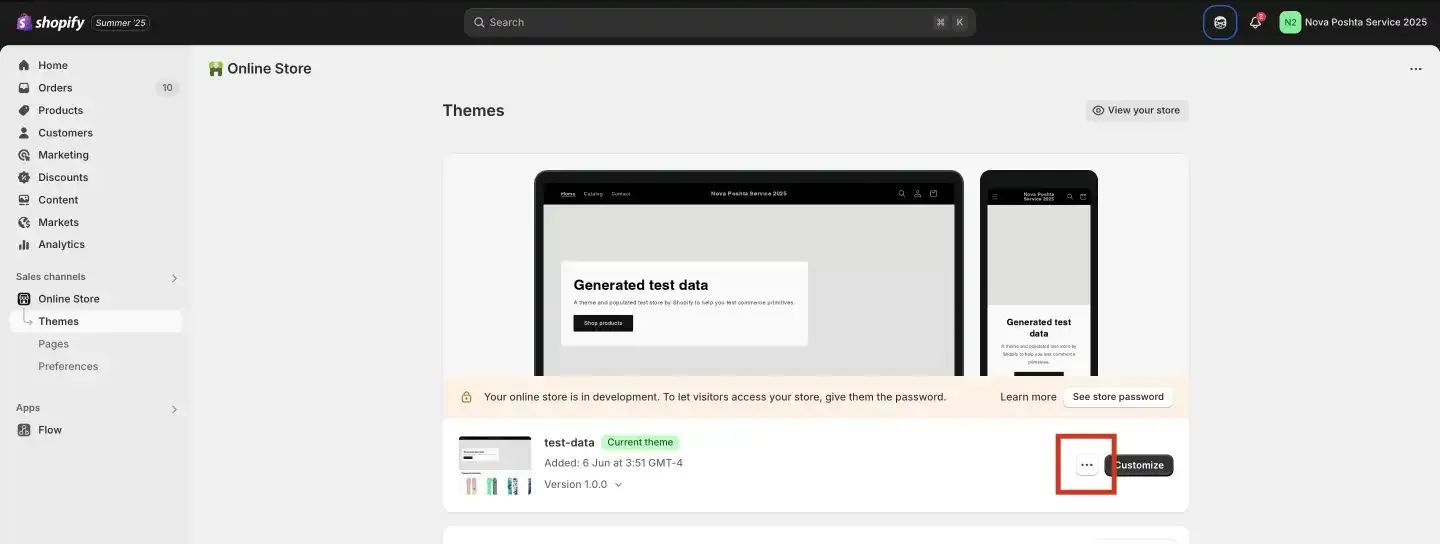
- Select Edit languages.
- In the search box on the language editor page, type "shipping" or another keyword that might bring up the text for the shipping method.
- Find the field that contains the shipping text you want to change. It might be in sections like Shipping methods, Checkout and system, or similar sections. If the "Free" text is associated with a specific shipping method, it should appear in the search results. Replace "Free" with the text you prefer.
- After editing the text, be sure to click the Save button at the top of the page to apply your changes.
Note: If your store is set up in multiple languages, you will need to change this text in each language file.
After this, at checkout, this shipping method will appear as:
After payment, the buyer will be able to select the required Nova Poshta branch from a dropdown menu.
 Note: In this configuration, you will need to manually change the payer in the consignment note, because by default, the payer is the sender.